Rack-mounting your script viewer system – Grass Valley SCRIPT Viewer News Rev.A User Manual
Page 9
TM
Page 7
© 1999 ParkerVision, Inc. • Meet Your SCRIPT Viewer™
Rack-Mounting Your SCRIPT Viewer System
The SCRIPT Viewer CPU contains the hardware and software for creating and editing SCRIPT Viewer files, as well as setting up and
controlling the data displayed on the remote SCRIPT Viewer flat-panel displays. The following pages explain how to mount,
connect, and install your SCRIPT Viewer system.
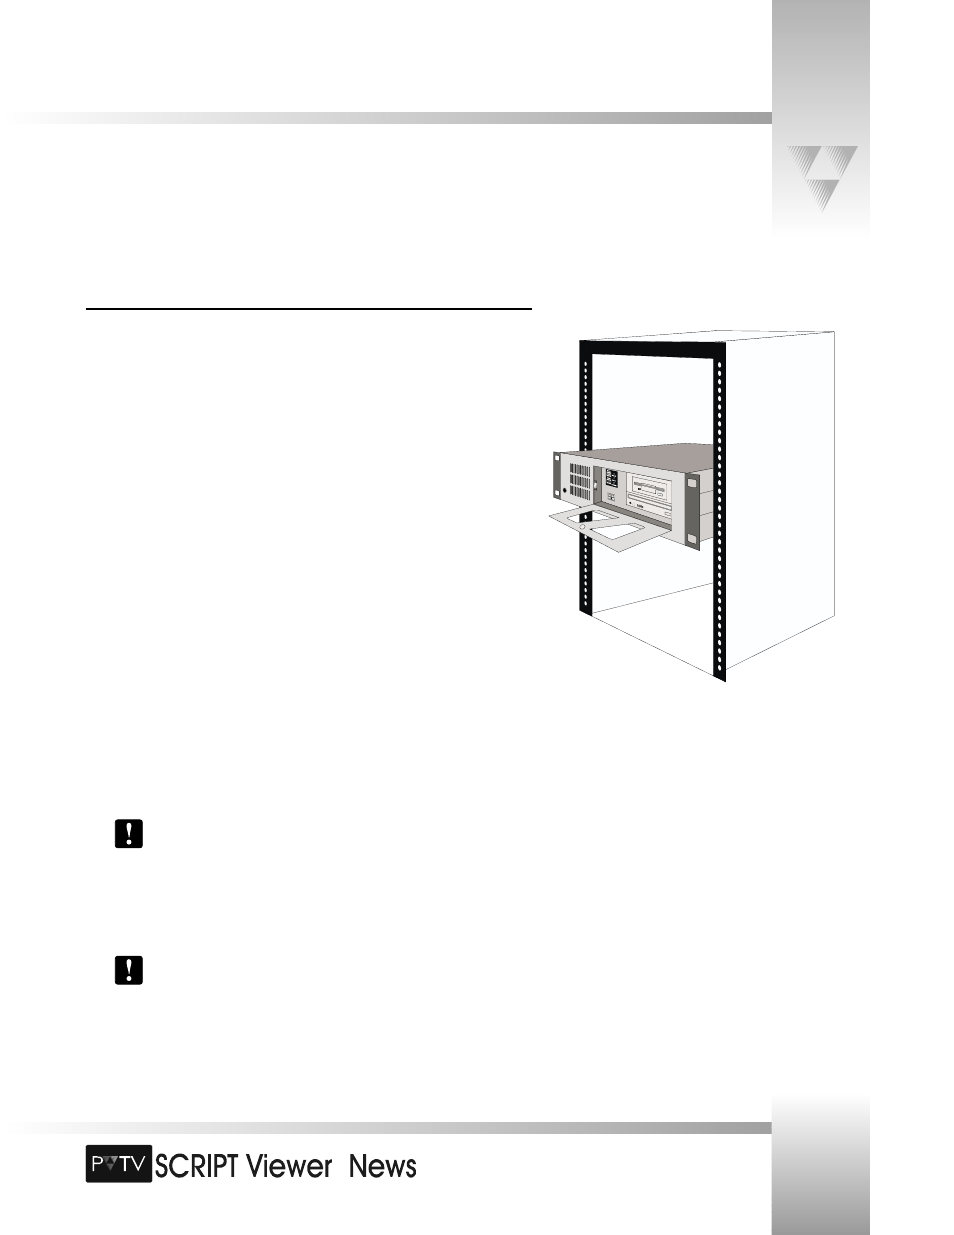
Rack-Mounting the CPU
The CPU is designed to fit into a standard 19” wide equipment rack and requires 7” of vertical
rack space. Check with the rack manufacturer for its exact measurements. The CPU should not
be mounted directly above or below other devices such as amplifiers or uninterruptible power
supplies (UPS) that generate high levels of ambient heat. The SCRIPT Viewer CPU should be
installed only in a location in which the ambient temperature is between 65°F and 75°F (18°C -
24°C).
To rack-mount the SCRIPT Viewer CPU into a standard 19” rack or console:
1. Remove all packing materials from the CPU and make note of the connections on the
rear of the box.
2. The SCRIPT Viewer system includes a 25-pin software key required for operating the
SCRIPTview software. This key can be installed prior to mounting the CPU into the
rack. The key should be connected to the mating 25-pin port on the rear of the CPU
and secured using a small flat-blade screwdriver.
3. Holding the CPU firmly by the sides, carefully slide the box into the rack from the
front. Position the box completely into the rack and make sure that the four holes on
each corner align with corresponding holes on the rack brackets. If these holes do
not align, you may have a problem with the rack and it may be necessary to
reposition other devices.
4. Use four standard rack-mount screws (not included) to secure the CPU to the rack.
You also may wish to use Teflon washers under the screw-heads to protect the
finish on the CPU box. Screws and washers of the proper size are typically
available from the rack manufacturer.
5. Loosely tighten one screw at a time, using slight pressure on the front-mounted
handles to lift or lower the box for exact alignment of the holes.
Forcing a screw to turn with the unsupported weight of the CPU box on its
threads can damage the screw and/or the threaded hole.
6. After all four screws have been installed, and the CPU is in place, go back and hand
tighten the screws firmly.