Setting paper size and type, Setting the paper size, Setting paper size and type -10 – Xerox Phaser 3330 User Manual
Page 48: Setting the paper size -10
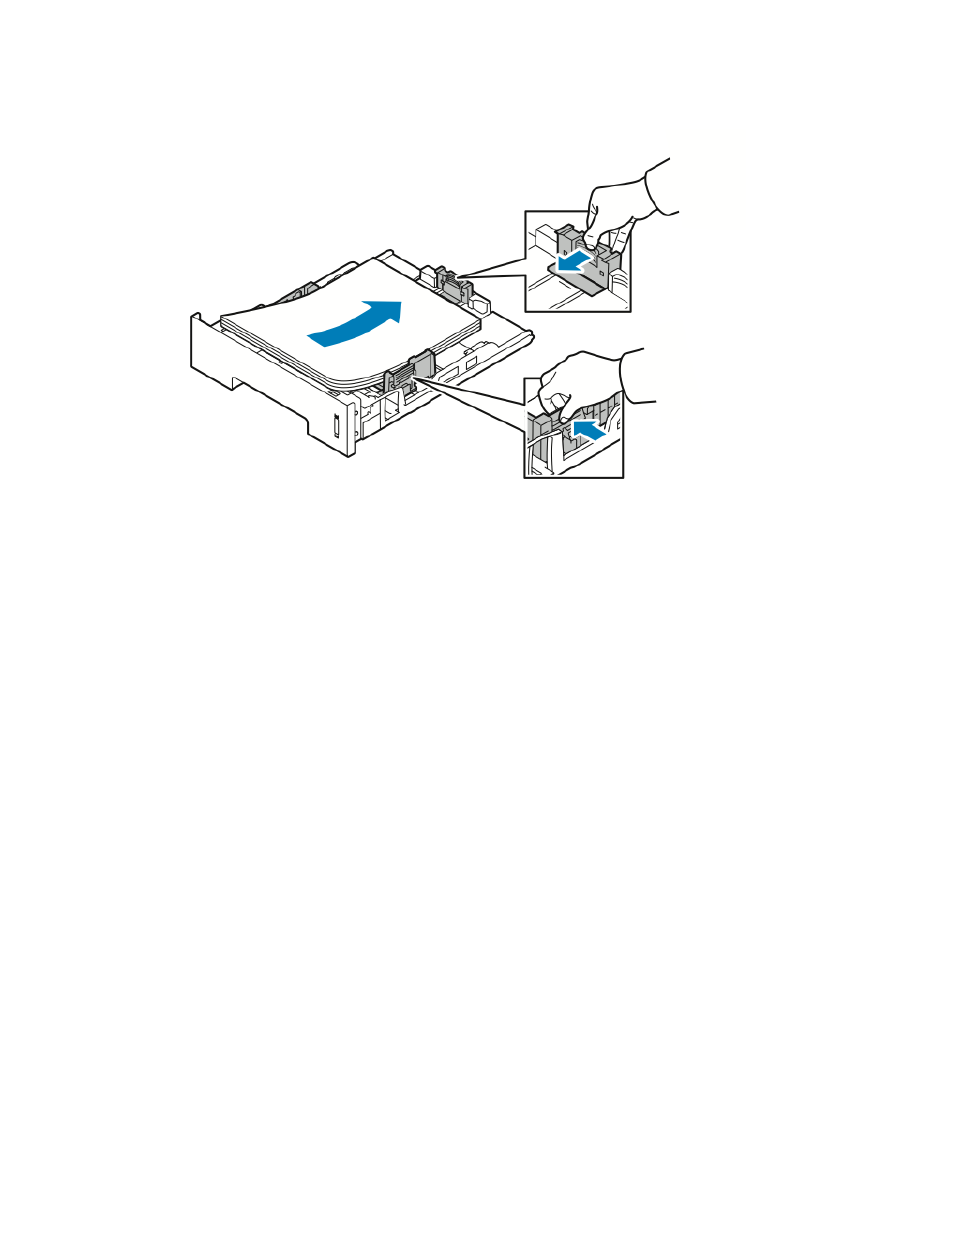
4. Load the paper into the tray, and adjust the paper guides in the tray to match the
size of the paper.
• Load paper into the tray with the print side face down.
• Load hole-punched paper with the holes toward the right of the printer.
• Do not load paper above the maximum fill line. Overfilling can cause paper jams.
5. Slide the tray into the printer and push it in all the way.
6. If the control panel Paper Settings screen prompts you, verify the paper size, type,
and color.
7. When finished, touch Confirm.
Setting Paper Size and Type
After loading paper in the paper tray, set the paper size and type using the control panel.
For computer printing, select the paper size and type in the application program you
use on your computer.
Note
The settings made from the printer driver on your computer override the settings on the
control panel.
After closing the paper tray, the Paper Size and Type settings are automatically displayed.
If correct, use the settings displayed or use the following procedures to change the
settings for the the size and type of paper loaded.
Setting the Paper Size
1. Press Menu on the control panel.
2. Press the Up/Down arrow buttons, and select Tray Paper Settings.
3. Press the Right arrow button.
4. Press the Up/Down arrow buttons, and select the required tray.
Xerox
®
Phaser
®
3330 Printer
4-10
User Guide
Paper and Media