Edl rod flipper plate instal, Edl actuator chamber install, External dock lock (edl) installation – SAF-HOLLAND XL-AR363-02 EDL/ARF Feature User Manual
Page 4: Edl rod flipper plate installation, Edl actuator chamber installation
XL-AR363-02 Rev. D
4
EXTERNAL DOCK LOCK (EDL) INSTALLATION
continued
EDL Rod Flipper Plate Installation
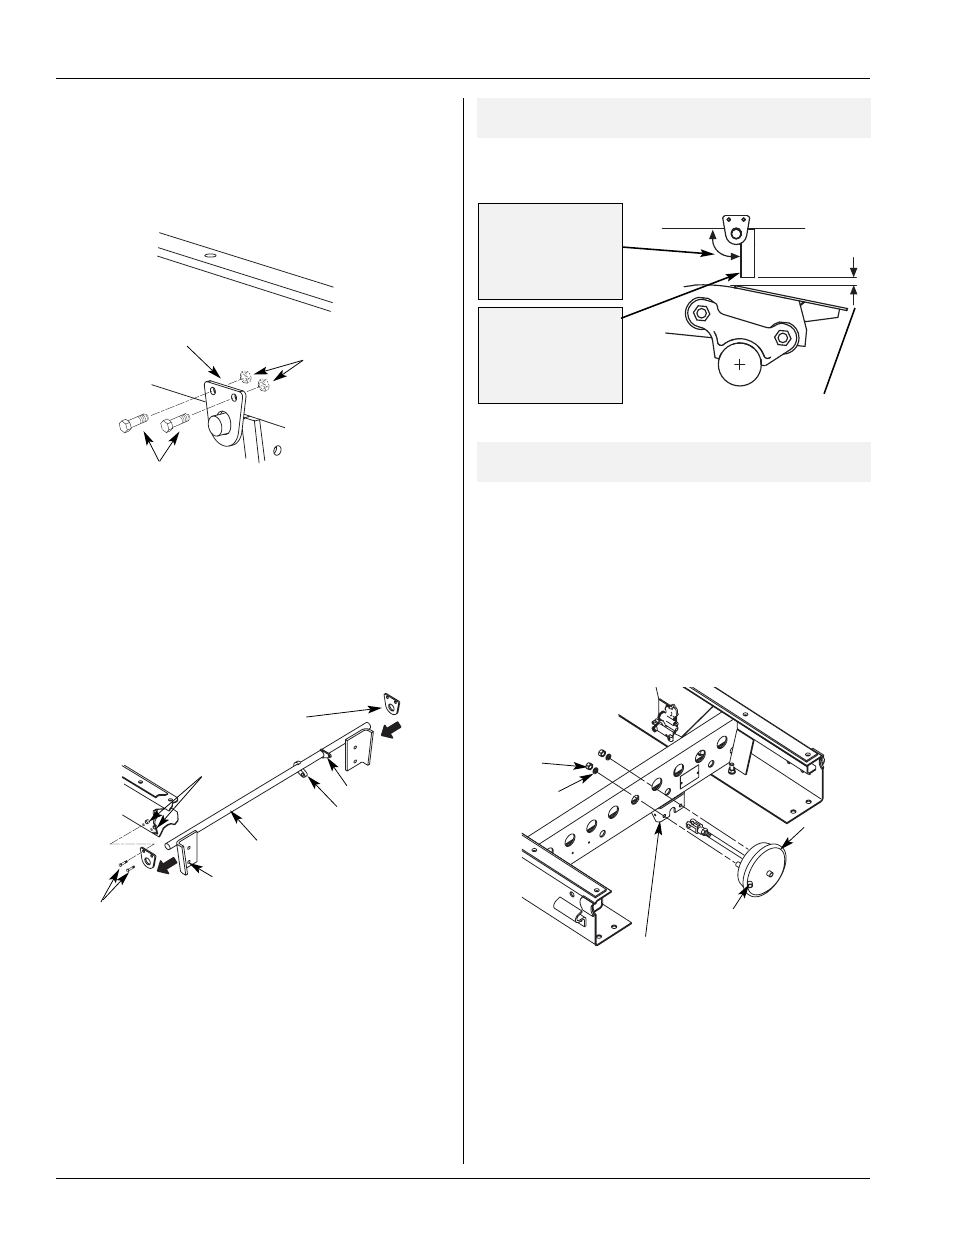
1. Attach one support plate to frame rail above rear axle, and secure
with two bolts and nuts. DO NOT tighten (FIGURE 4).
EDL Rod Support Plate
Support Plate
EDL Rod Assembly
Cam Bracket
FIGURE 4
EDL Rod Support Plate
FIGURE 5
EDL Installation
Nuts
Tab
Flipper Plate
Bolts
Nuts
Bolts
2. Slide one end of EDL Rod Assembly into the hole of the attached
support plate. Then slide the other support plate onto the opposite
end of EDL Rod Assembly and secure with two bolts and nuts.
Tighten and torque all four bolts and nuts to 25 ft. lbs. (34 Nm)
(FIGURE 5).
IMPORTANT:
Flipper Plate must
be completely down
when attaching
actuator push rod
To air supply line
Actuator
Chamber
Nut
IMPORTANT:
EDL Flipper Plate
Assembly should
rotate fully without
binding
5/8˝ Min. (16mm)
Clearance Gap Required
FIGURE 6
Flipper Plate Installation
FIGURE 7
Actuator Chamber Installation
Actuator Chamber
Mounting Bracket
Lockwasher
IMPORTANT:
EDL Rod/Flipper Plate Assembly should rotate
freely without binding (FIGURE 6).
IMPORTANT:
Both flipper plates must rest on equalizing beam
when trailer is loaded.
EDL Actuator Chamber Installation
1. Attach actuator chamber to mounting bracket on slider box
crossmember (FIGURE 7). Fasten with two lock washers and nuts.
Torque nuts to 50-60 ft. lbs. (68-81 Nm).
2. Install the adjusting nut and clevis to the actuator push rod and
thread adjusting nut and clevis down the push rod. Be sure to leave
clevis 1/2˝ (13mm) short of cam mounting hole (FIGURE 8).
continued