Using the microphone, Adjusting the input level, Using the vocoder – Roland JD-XA Analog/Digital Synthesizer User Manual
Page 10: Using a microphone to apply modulation, Outputting the mic’s vocal input, Controlling your performance, Using external pedals (hold/ctrl 1/ctrl 2), Changing the pitch/applying vibrato, Pitch bend/modulation lever)
10
Using the Microphone
* Acoustic feedback could be produced depending on the location of microphones relative to
speakers. This can be remedied by:
5
Changing the orientation of the microphone(s).
5
Relocating microphone(s) at a greater distance from speakers.
5
Lowering volume levels.
When using a microphone that uses phantom power
The JD-XA’s MIC INPUT jack can supply phantom power.
You must turn phantom power off unless you have connected a condenser
microphone that requires phantom power. Supplying phantom power to a dynamic
microphone or an audio playback device can cause malfunctions.
For details on the specifications of your microphone, refer to its owner’s manual.
(The JD-XA’s phantom power: DC 48 V, 10 mA max.)
1.
Press the [Menu] button.
2.
Use the Cursor [
K
] [
J
] buttons to select “MIC EDIT,” and then press the [Enter]
button.
The MIC screen appears.
3.
Use the cursor [
K
] [
J
] buttons to select “Phantom Sw,” and use the [-] [+]
buttons to select “ON.”
MEMO
The JD-XA does not remember the phantom power setting. The setting reverts to
“OFF” when you power-off the JD-XA.
Adjusting the Input Level
Here’s how to adjust the input level of a microphone that’s connected to the rear
panel MIC INPUT jack.
1.
Adjust the rear panel MIC INPUT [Level] knob.
If the signal level from the mic input is excessive, the top panel MIC [Level] knob
indicator blinks.
MEMO
Once you have adjusted the mic input level, you should generally leave it
unchanged. If you want to raise or lower the volume, adjust the top panel MIC
[Level] knob.
Using the Vocoder
A “vocoder” is an effect that is typically applied to a human voice.
By sending a human voice through a vocoder, you can give it an unexpressive robot-
like character.
The pitch is controlled by playing the keyboard.
1.
Press the [Vocoder] button.
2.
Edit the MIC VOCODER parameters.
&
For details on the parameters, refer to “Parameter Guide (English)” (PDF).
3.
While playing the keyboard, vocalize into the microphone.
Using a Microphone to Apply Modulation
Modulation is a function that lets you use your voice to modify the sound that
you’re playing.
Changes in the loudness of your voice can vary a synthesizer parameter of an analog
part. You can choose the parameter that apply modulation.
1.
Press the [Mod] button.
2.
Edit the MIC MOD parameters.
&
For details on the parameters, refer to “Parameter Guide (English)” (PDF).
3.
ANALOG PART Select [01]–[04] buttons to select the part that you want to
apply modulation.
4.
While playing the keyboard, vocalize into the microphone.
Outputting the Mic’s Vocal Input
You can output the vocal that is being input to the microphone.
1.
Press the [Bypass] button.
2.
Edit the MIC REVERB parameters.
&
For details on the parameters, refer to “MIC REVERB” (p. 14).
3.
Vocalize into the microphone.
MEMO
MIC REVERB is available only when the [Bypass] button is on.
Controlling Your Performance
Changing the Pitch/Applying Vibrato
(Pitch Bend/Modulation Lever)
Function
Explanation
Pitch bend
While playing the keyboard, move the lever to the left to lower the pitch, or
toward the right to raise the pitch.
Modulation
Move the lever away from yourself to apply vibrato.
Each tone has two LFOs: an LFO that is always applied to the tone, and
a MODULATION LFO that is applied when you move the pitch bend /
modulation lever away from yourself.
The state specified by the MODULATION LFO setting is applied when you
hold down the [Shift] button and move the pitch bend / modulation lever
away from yourself.
&
For details on the parameters, refer to “Parameter Guide (English)”
(PDF).
Using an Assigned Function to Modify the Sound (WHEEL 1/2)
Controller
Explanation
WHEEL 1
Controls the parameter assigned by the WHEEL 1/2 Assign setting.
If you hold down the [Shift] button and move the wheel, the WHEEL 1/2
setting screen appears.
&
For details on the parameters, refer to “Parameter Guide (English)”
(PDF).
WHEEL 2
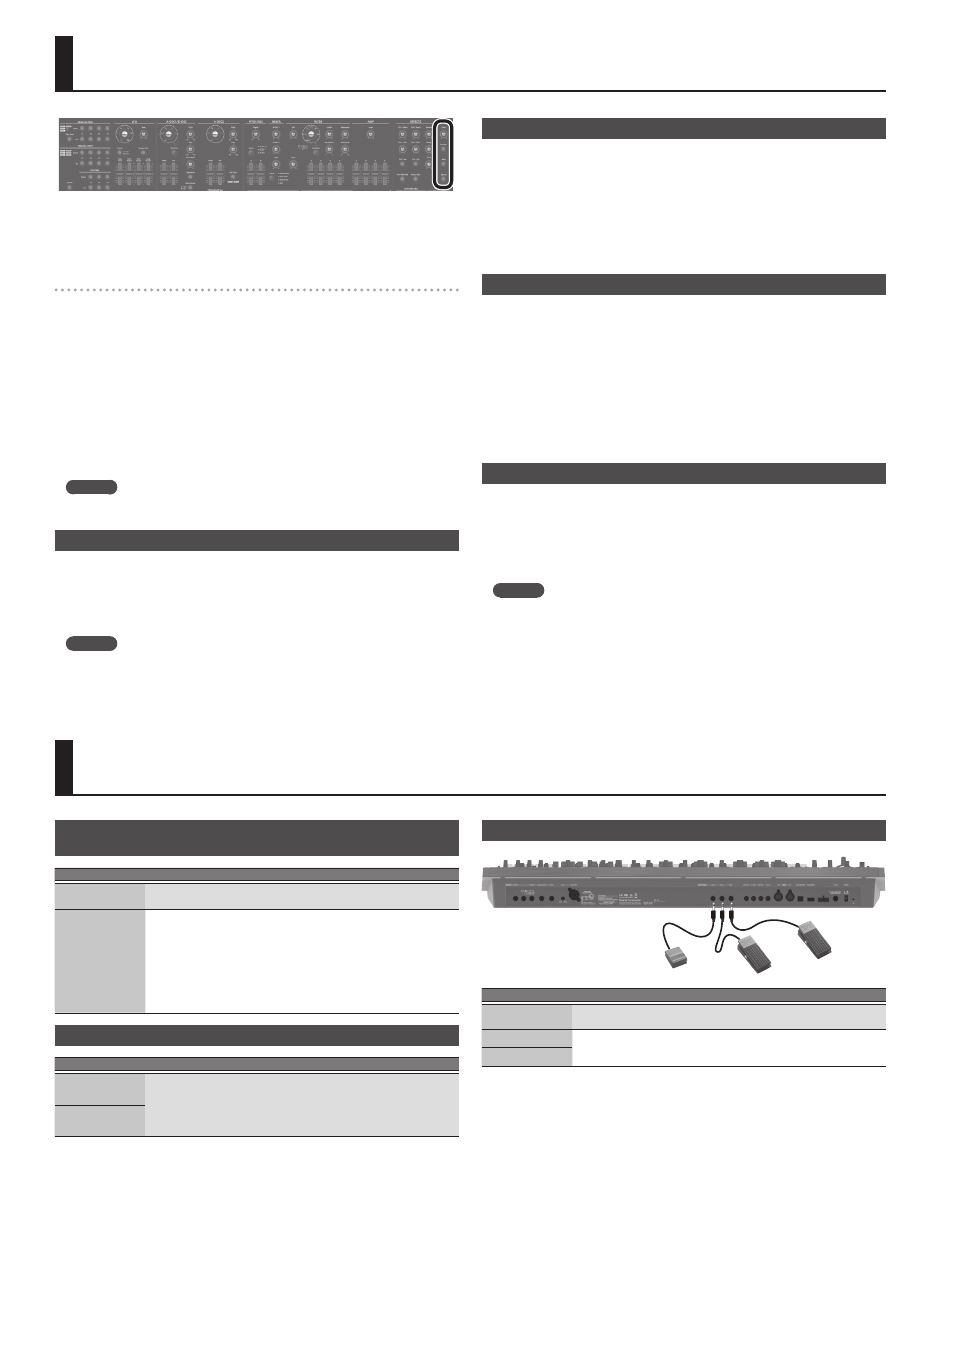
Using External Pedals (HOLD/CTRL 1/CTRL 2)
Pedal switch
(DP series; sold separately)
Expression pedal
(EV-5; sold separately)
Jack
Explanation
HOLD
You can connect a pedal switch (DP series; sold separately) and use it as a
hold pedal.
CTRL 1
You can connect an expression pedal (EV-5; sold separately) or pedal switch
(DP series; sold separately) here and use them to control various parameters
or functions.
CTRL 2