Recording (pattern sequencer), Realtime recording (real time rec), Step recording (step rec) – Roland JD-XA Analog/Digital Synthesizer User Manual
Page 8: Step recording 2 (step rec 2)
8
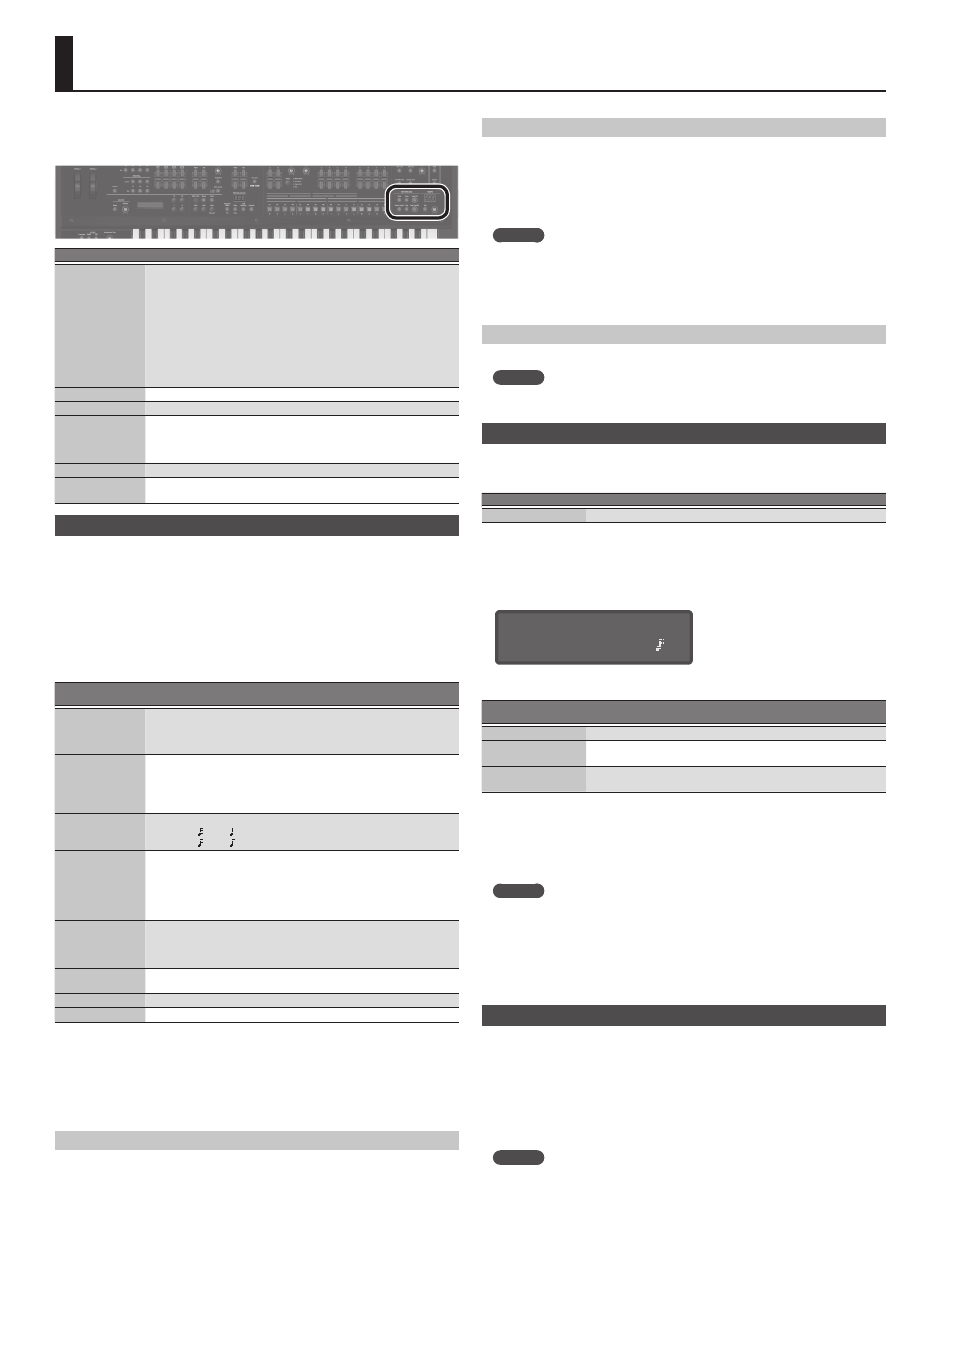
Recording (Pattern Sequencer)
The pattern sequencer lets you record keyboard performance and knob operations,
and play them back repeatedly.
When you record, the currently selected part is recorded.
Controller
Explanation
[Scale] button
Changes the length of one step. The indicators at the left of the button show
the setting.
5
The [01]–[12] buttons correspond to a recording input range of two beats,
allowing you to enter 16th note triplets.
5
The [01]–[12] buttons correspond to a recording input range of one
measure, allowing you to enter 8th note triplets.
5
The [01]–[16] buttons correspond to a recording input range of two beats,
allowing you to enter 32nd notes.
5
The [01]–[16] buttons correspond to a recording input range of one
measure, allowing you to enter 16th notes.
[Erase] button
Erase a recorded pattern or a portion of a pattern.
[Step REC] button
Lets you record your keyboard playing one step at a time.
[Pattern Length]
button
Changes the number of measures in the pattern. You can create a pattern up
to four measures long.
Use the [01]–[04] buttons to specify the length.
For some Scale settings, use the [01]–[08] buttons to specify the length.
[Play] button
Play or stop the pattern.
[Real Time REC]
button
Create a pattern by recording your performance of the keyboard and
controllers in real time.
Realtime Recording (Real Time REC)
Here’s how to create a pattern by recording your performance of the keyboard
and controllers in real time. Your performance is recorded by layering it onto the
selected pattern.
1.
Use the ANALOG PART or DIGITAL PART On [01]–[04] buttons to turn on the
part that you want to record.
2.
Press the [Real Time REC] button (REC STANDBY).
3.
Make settings for realtime recording.
Use the cursor [
K
] [
J
] buttons to select a parameter, and use the [-] [+] buttons to
edit the setting.
Parameter
Cursor [
K
] [
J
]
Explanation
Cnt In (Count In)
* This is shown
only during REC
STANDBY.
Selects the way in which recording is started.
OFF, 1 MEAS, 2 MEAS, WAIT NOTE
Input Qtz
(Input Quantize)
Quantize is a function that automatically corrects inaccuracies in the timing
at which you play the keyboard, tightening-up the rhythmic accuracy.
You can apply the quantize function during realtime recording. This setting
specifies whether quantize will be applied during recording.
OFF, GRID, SHFL (shuffle)
Reso (Resolution)
Specifies the note timing value at which quantization is applied.
GRID:
1/32 ( )–1/4 ( )
SHFL:
1/16 ( )–1/8 ( )
Strength
This setting is used with grid quantize. It specifies the degree to which your
notes are moved to precise intervals of the note values specified by the Reso
setting. If this is set to “100%,” the notes that you record are moved all the
way to exact intervals of the specified Reso. With lower percentages, less
correction is applied. If this is set to “0%,” the timing is not corrected at all.
0–100%
Rate
Use this setting when applying shuffle quantize.
With a setting of “50%” the notes are spaced at equal intervals. As you
increase this setting, you’ll get an increasingly “bouncy” feel as though the
notes were dotted.
Loop Rec
Specify whether Real Time REC turns off (OFF) or stays on (ON) when you
move to the next loop after recording your performance.
Tempo Rec
Specifies whether tempo changes are recorded (ON) or not recorded (OFF).
Click Switch
Turns the click sound on/off.
&
For details on the parameters, refer to “Parameter Guide (English)” (PDF).
4.
Press the [Play] button to start recording.
During playback, you can also press the [Real Time REC] button to start recording.
5.
Play the keyboard.
Movements of the knobs and wheels are also recorded.
6.
Press the [Real Time Rec] button to stop recording.
Click Settings
1.
Press the [Menu] button.
2.
Select “SYSTEM” and then press the [Enter] button.
3.
Choose the CLICK parameter (p. 13), and use the [-] [+] buttons to change
the value.
4.
Press the [Exit] button several times to return to the program select screen.
Save the system parameters if necessary.
&
“Saving the System Settings” (p. 14)
Erasing Only a Portion of a Phrase
1.
During playback or recording, press the [Erase] button (Erase Mode).
The button is lit, allowing you to erase notes. The Erase screen appears.
2.
Use the [-] [+] buttons to choose what you want to erase, and then press the
[Enter] button.
The chosen data is erased while you hold down the button.
MEMO
In erase mode, notes of the key you hold down are erased while you continue
holding down that key.
If you hold down two keys, all notes between those two keys are erased.
3.
Press the [Erase] button once again.
The button goes dark and the JD-XA returns to its previous state.
Changing the Tempo
&
MEMO
The tempo is saved for each individual program.
&
“Saving a Program (Write)” (p. 7)
Step Recording (Step REC)
Here’s how to create a pattern by recording your keyboard performance one step at
a time.
Your new recording replaces the pattern that’s selected.
Controller
Explanation
[01]–[16] buttons
The button of the part being recorded is blinking.
1.
Use the ANALOG PART or DIGITAL PART On [01]–[04] buttons to select the
part that you want to record.
2.
Press the [Step REC] button.
The [01] button blinks.
The following screen is shown until you stop recording.
STEP REC: 1 1:1
Type 1/16( )
You can use the Cursor [
K
] [
J
] buttons to select a parameter, and use the [-] [+]
buttons to edit the value of that parameter.
Parameter
Cursor [
K
] [
J
]
Value
[-] [+]
Type (Note Type)
Specifies the note value of the notes you’ll input.
Gate Time
(duration of the note)
Specifies the duration of the notes relative to the note type.
5–200%
Velocity
(keyboard dynamics)
Real (the actually-played dynamics),
1–127 (fixed dynamics)
3.
Play one note on the keyboard.
Your performance is recorded in step 1; you automatically advance to the next step
and the [02] button lights.
You can record a chord by selecting multiple notes.
4.
Repeat step 3 to record each step.
MEMO
5
To erase the data at a step (or to enter a rest), press the [Erase] button.
5
To enter a tie, press the [Enter] button.
5
To change the step that you’re recording, press one of the [01]–[16] buttons.
5
If you want to change the number of measures, press the [Pattern Length] button
and then use the [01]–[04] buttons to specify the length (for some scale settings, use
[01]–[08] to specify the length).
5.
Press the [Step Rec] button to stop recording.
Step Recording 2 (Step REC 2)
While playing or stopped, use the [01]–[16] buttons to record on the selected step
(step recording 2).
1.
Press the [Step REC] button twice to turn Step REC off.
2.
Use the ANALOG PART or DIGITAL PART On [01]–[04] buttons to select the
part that you want to record.
3.
On the keyboard, play the note that you want to record, and then use the
[01]–[16] buttons to turn the step on.
MEMO
5
You can also record on a specified step by holding down a note and pressing a [01]–
[16] button to specify the step.
5
By turning a knob while holding down one of the [01]–[16] buttons, you can record
the last state of that knob in the specified step.
5
Operation of the knob is recorded on the part selected in the PART Select.