Moza Slypod User Manual
Page 8
6
●
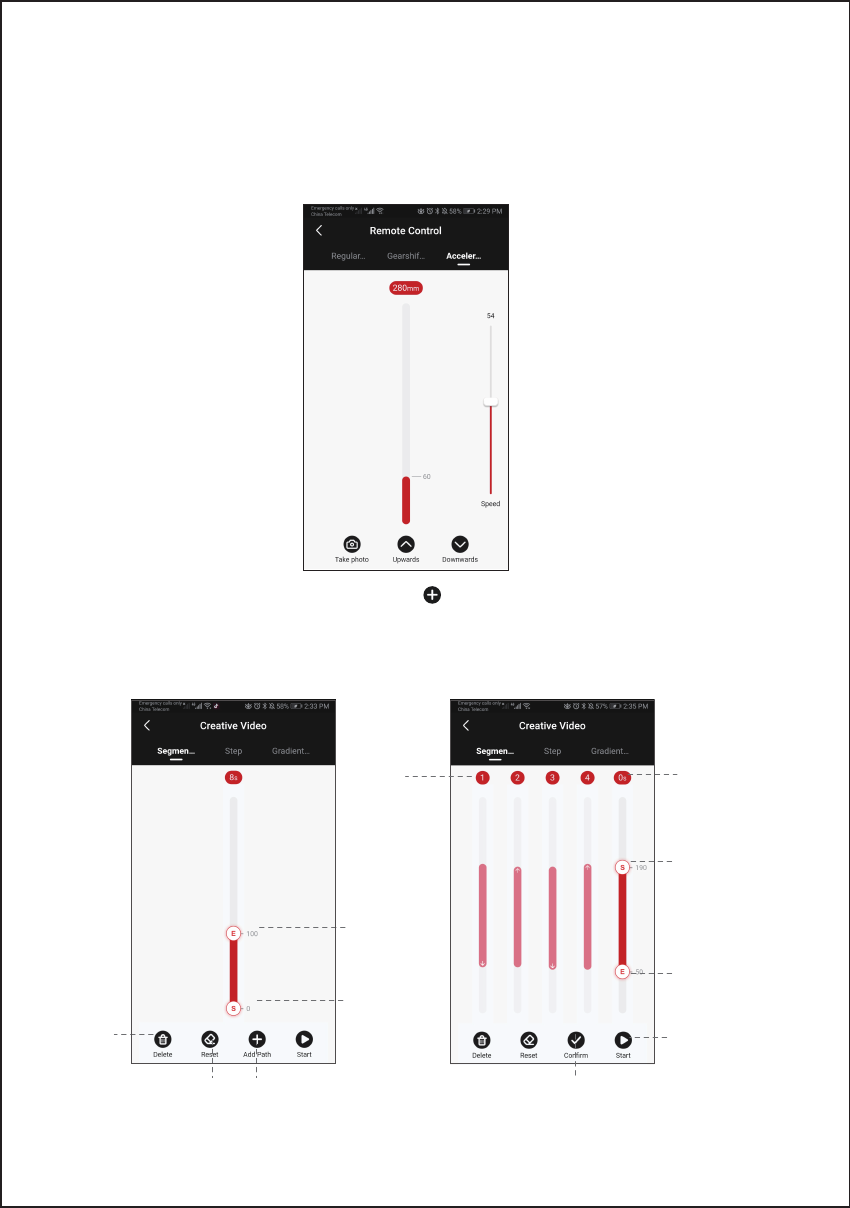
Segmentation Mode
Select the segmentation mode, add a path (Click to add the path. 5 paths is the most that can
be added, click confirm before adding the next path).Slide the S operating point and the E
operating point to any position to set the starting position and end position of the first path. Slide the E
operating point to set the end position of the second, third, fourth or fifth path. Then,the starting point
of the next path will be the end position of the previous one.
Click to start
Path
number
Click to confirm the
path before adding
the next path.
Beginning (number
shows the distance
from the origin)
Tap to the red
area to set the
running time
S operation
point
E operation
point
End (number
shows the
distance from
the origin)
Click to
delete
the path
Click to reset
the path
Click to add
the path
Click Upwards and the device will move up automatically; click again and the device stops
moving. Click Downwards and the device will move down automatically; click again and the
device stops moving. Click ‘Take photo’, the Slypod controls the camera to take a photo. (Slypod
needs to be connected to the camera with the camera control cable, the camera control cable
needs to be purchased separately) Speed setting: Drag the white mark to set the device
acceleration speed, and the device will continue to accelerate to the end position according to
the set speed (When the Slypod extends to 280mm or retracts to 0mm
it will reach the setting
speed)
●
Acceleration Mode