Step time-lapse – Moza Slypod User Manual
Page 9
7
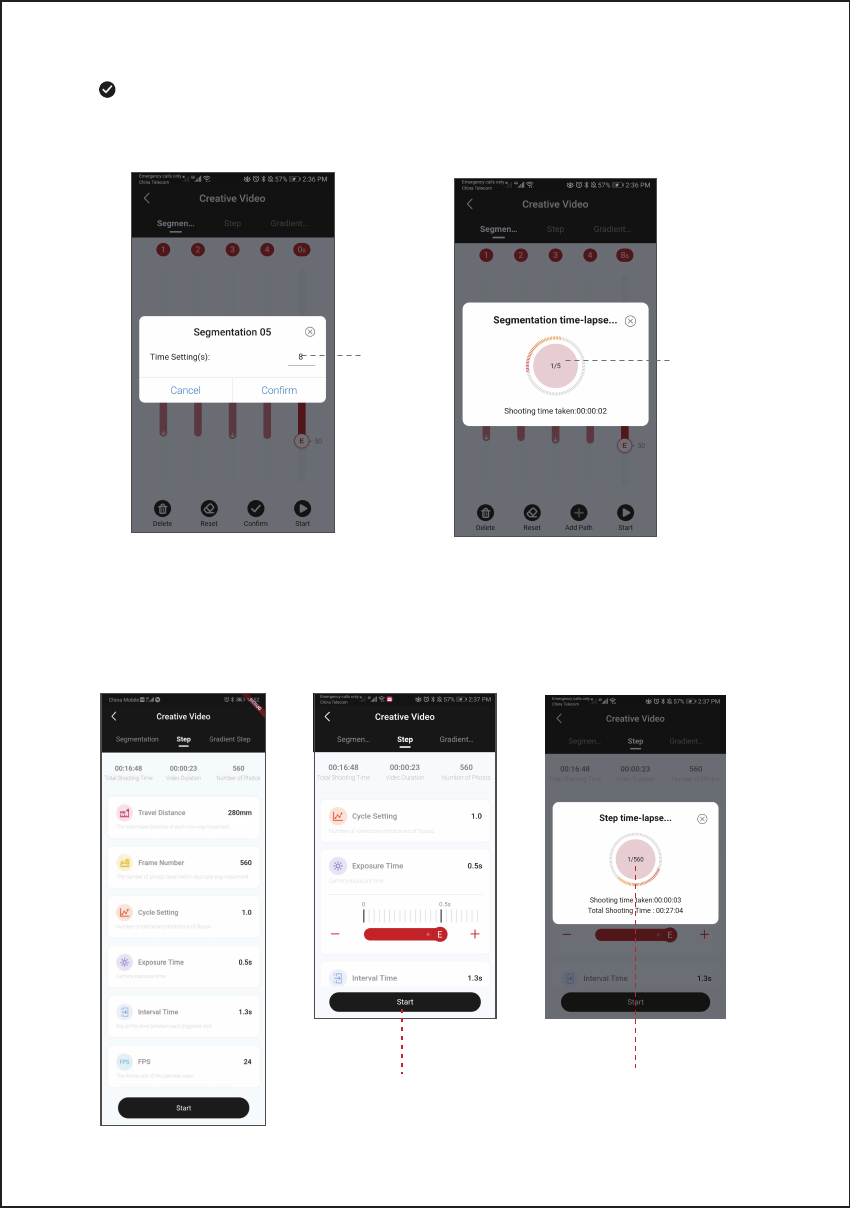
Set path
running time
Click to confirm the path and set the running time. The next path can be added after confirming
the path. Click Confirm and the Slypod will run according to the setting after the countdown is over.
At this point, enter the Segmentation time-lapse interface, click on the red circular area, the Slypod
can control the camera to take pictures. (Slypod needs to be connected to the camera with the
camera control cable)
Click on the red
circular area,
the Slypod can
control the
camera to
take pictures
● Step Time-Lapse
Select Step mode to set Travel Distance, Frame Number, Cycle Setting, Exposure Time, Interval
Time and FPS. Click “+”“-” to adjust the parameter, click to start, the Slypod will run according to
the set parameters, the interface will display Shooting Time Taken, Total Shooting Time, Total
number of photos. Enter the Step time-lapse interface, click on the red circular area, the Slypod
can control the camera to take pictures. (Slypod needs to be connected to the camera with the
camera control cable)
Click Start, the Slypod
will run according to
the setting
Click on the red circular area,
the Slypod can control the
camera to take pictures