CONTA-CLIP CONTA-Sign 4.3 User Manual
Page 7
In order to do so, please select > Edit and > Add Plate from the main menu or use the
right mouse button.
A new blank base plate comes up to be used with more
segments. Up to 16 base plates could be used in one
project (max. 10 projects in one file).
To move from one base plate to the other just click on
their names in the lower left corner. Base plates could
also be renamed just with a double
click, or moved in the position to each other with drag
and drop.
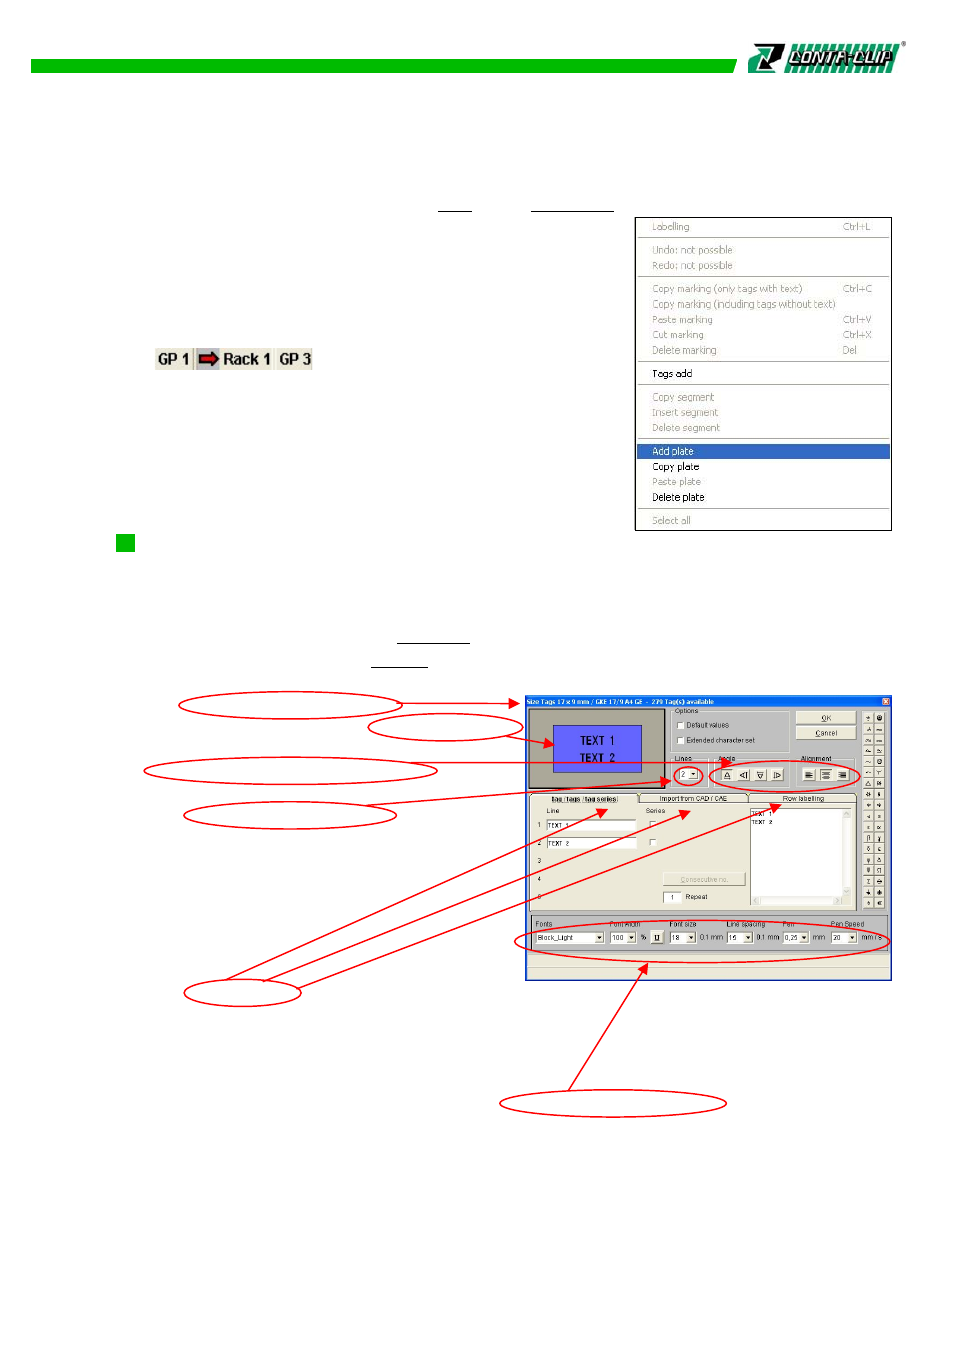
5.4 Marking the selected tags / marking elements
Double-click the tag or element where the labeling process is to begin.
This opens the labeling dialog box, which contains all the setting options. In order to
open the edit window, please click on the first tag to start with, use the right
mouse button and choose > Labeling from the menu or start typing a character on the
keyboard (check under > Option from the menu first). The exact description of the
selected tag and the number of tags available both appear in
the top line of the dialog box.
An outline of the selected marking element
is shown in the top third of the box.
Angle and text alignment options are found
next to this diagram.
The number of lines per tag can also be
specified here.
Note that the program will only allow
options that are appropriate for the
selected element.
The various tabs for different methods of data input and import appear in the middle of
the box. This is where you can enter all the data and text for one-time, multiple, and
serial marking, and files to be imported from different programs, as well as text for
custom labeling (for example, row labeling).
The font, font width, font size, underline, line spacing, tip width of the plotter pen, and
plotting speed settings can be adjusted in the lower part of the box.
6