Operation, Vertical alignment, Horizontal alignment – d&b Z5373 T Cluster bracket User Manual
Page 8
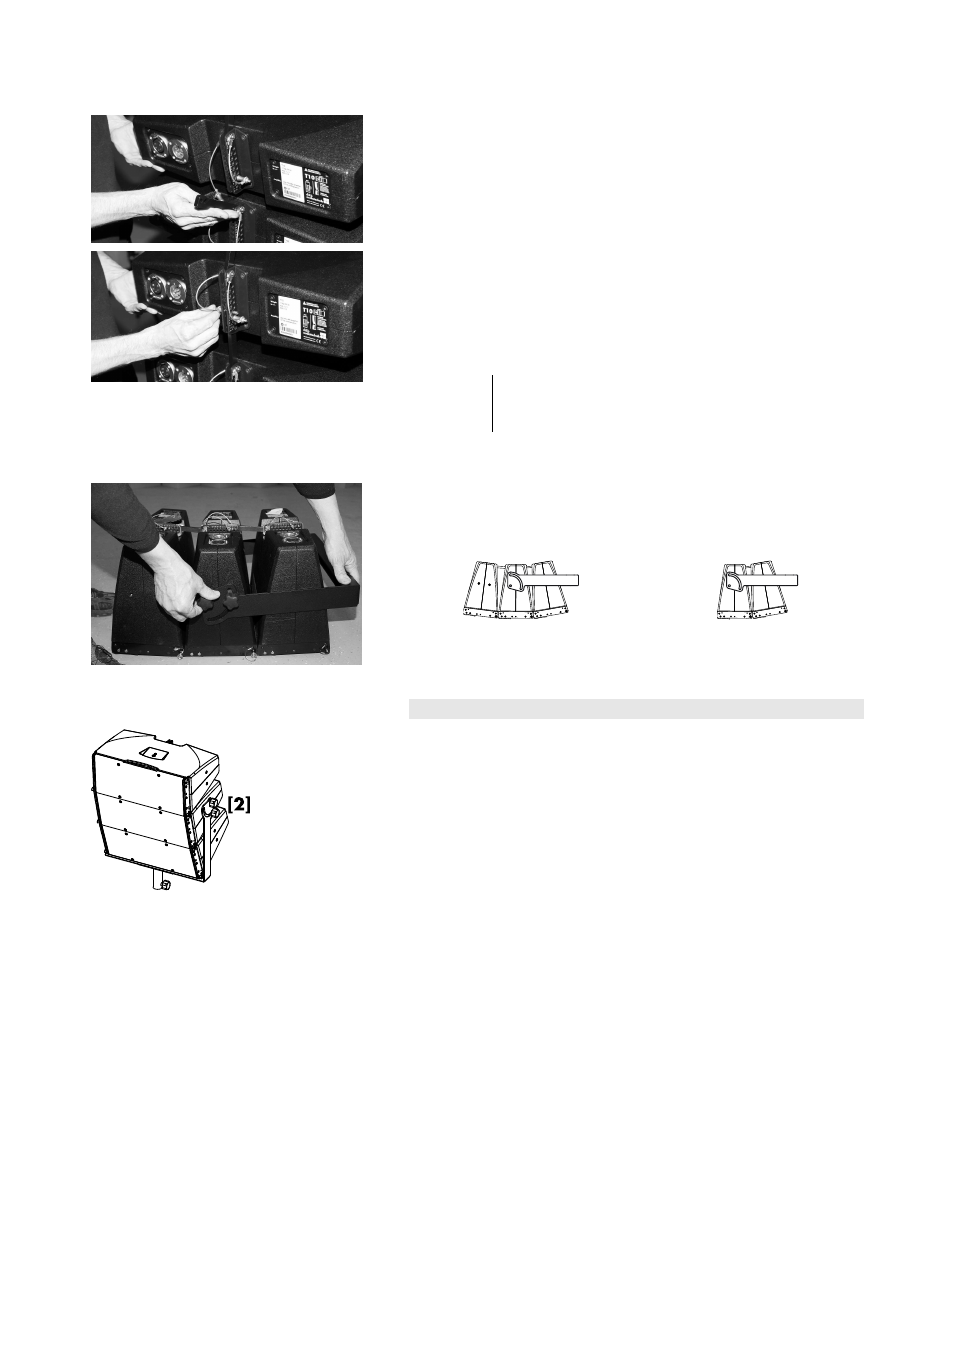
3. Set the desired splay angles
- On the rear, set the splay angles between the cabinets as follows:
- Starting with the top cabinet of the assembly first preset the
desired splay angle by inserting one Locking pin.
- Fold up the Splay link of the cabinet below into the rear
rigging strand of the upper cabinet.
- Lift the upper cabinet by hand until the hook of the Splay
link has hooked into the preset Locking pin.
- Insert the second Locking pin (safety pin) to secure the Splay
link.
- Proceed in the same manner until all splay angles of the cabinets are
set.
Note:
The two Locking pins at the bottom cabinet of the
assembly are not used. They should be stored in two of
the remaining holes on the rear rigging strand.
4. Attach the Cluster bracket to the assembly
- Turn over the assembly with the front grill facing the ground.
- Attach the Cluster bracket with the desired direction as follows:
3-deep
2-deep
- Fix the bracket to the M10 threaded inserts on both sides of the
cabinet using the four supplied hand bolts.
7.
Operation
Once the assembly is completed and attached to its operating position,
the total vertical and horizontal aiming can be adjusted.
Vertical alignment
- Slightly slacken the four hand bolts [2] until the assembly is just about
free to be moved.
- Set the desired vertical aiming of the assembly.
- Retighten all four hand bolts to fix the total vertical angle.
Horizontal alignment
The loudspeaker is aligned horizontally via the Loudspeaker stand
adapter or the TV spigot mounting.
Z5373 Mounting instructions
(1.0 EN)
Page 8 of 10