Add further ti10l cabinets – d&b Z5374 Ti Flyingadapter User Manual
Page 7
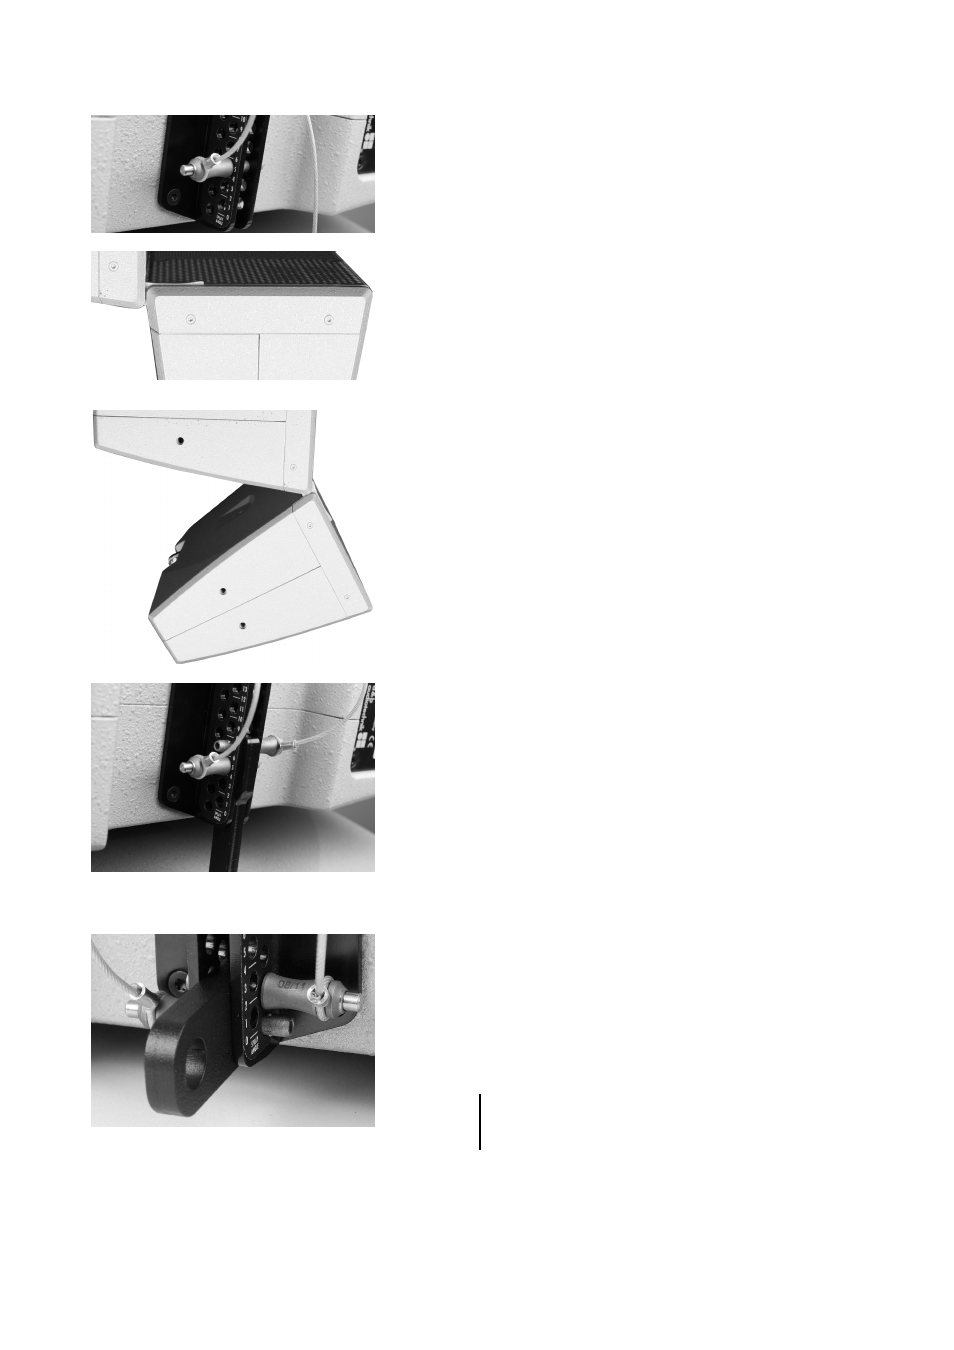
4. Add further Ti10L cabinets
- Lift the Flying bar to a suitable working height to add the next
cabinet.
- Preselect the desired splay angle on the upper cabinet.
- Slide out the Front links (hooks) and fold out the Splay link.
- Release the two Locking pins at the rear rigging strand and fold out
the Splay link.
- Keep the cabinet at an angle of 90° to the upper cabinet.
- Insert the Front hooks into the front rigging of the upper cabinet until
the hooks are completely inserted.
- Slowly lower the cabinet and make sure the hooks rest in the bolts of
the upper cabinet.
- Lift the back of the cabinet.
- Hook the Splay link over the preset Locking pin of the upper cabinet.
- Insert the second Locking pin (safety pin) to secure the Splay link of
the cabinet.
To add further cabinets proceed in the same manner until the assembly
is completed.
5. Attach the Pullback anchor device to the bottom
cabinet
Depending on the type of suspension and aiming of the array, the
additional Pullback device must be attached to the rear rigging strand
of the lowest cabinet.
- Insert the Pullback anchor device into the track of the rear rigging
strand.
- Insert the two remaining Locking pins into the rear hole grid of the
rigging strand using the 0° and 2° holes.
Note: If you do not use the Pullback anchor device, the two
Locking pins should be stored in two of the remaining holes
on the rear rigging strand.
Z5374 Rigging manual
(1.0 EN)
Page 7 of 10