Installation & setup, Paging protocol, Scope – WaveWare comPPage DVIF-10 User Manual
Page 4
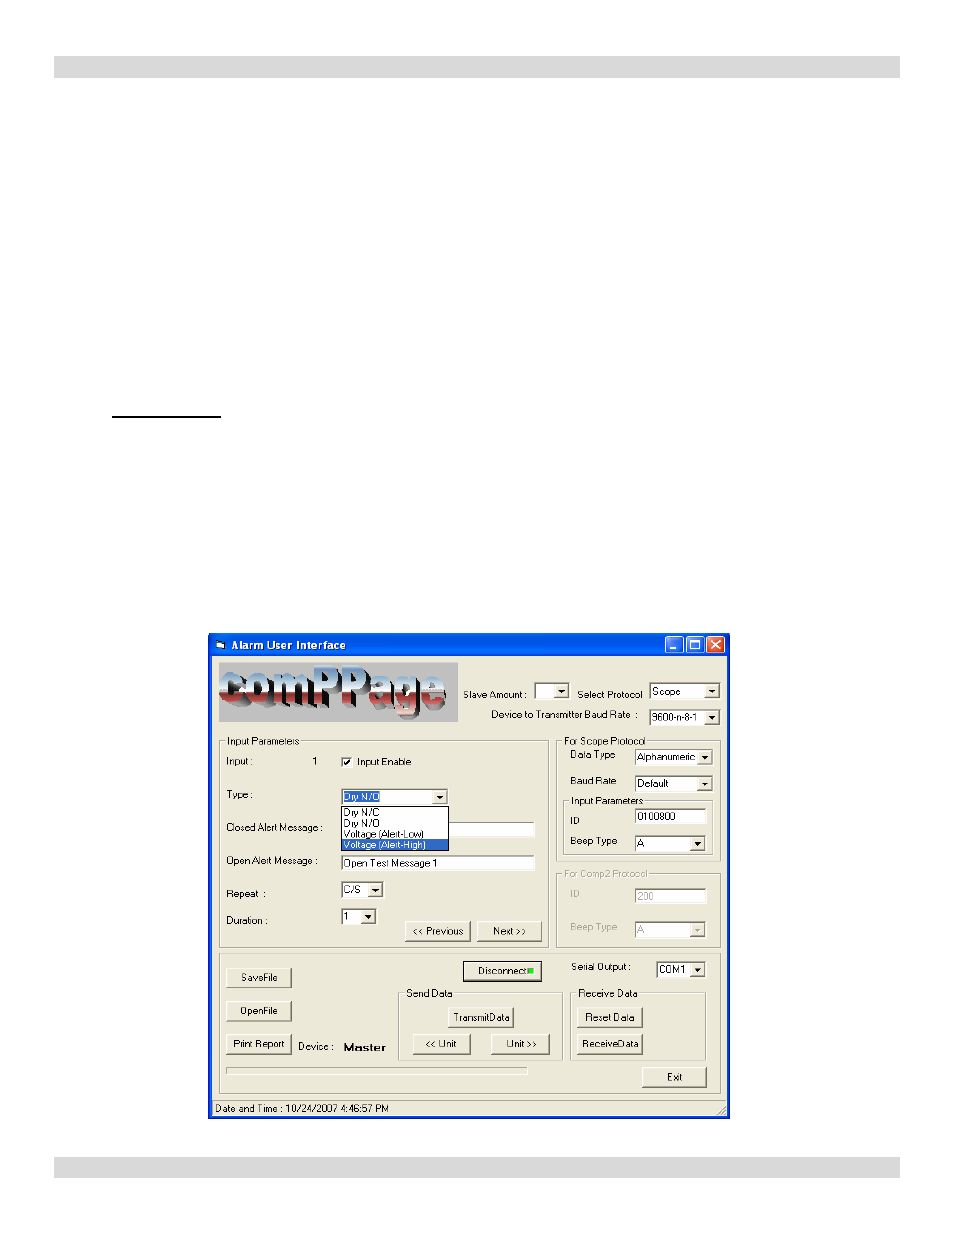
Alarm Interface Utility Software V3.1.3
INSTALLATION
1. Insert CD into the CD-R or CD-RW drive, the CD will auto start.
2. If auto start does not function, Select [START], [RUN] type in {cd-rom drive letter and enter SETUP.EXE.
3. Press OK.
.
SETUP
1. Connect the DVIF10 to a computer using the supplied Null-modem cable.
2. Open the Alarm User Interface program
3. Turn on the DVIF10 unit.
4. Select the communication port the DVIF10 will be connected to. [Serial Output].
5. Select the baud rate of the port using the drop down menu [Devise to transmitter baud rate].
6. Select [Connect] the
Red
will turn
Green
when connected and the label will turn to [Disconnect].
If you have made a mistake and selected the wrong communication port, simply click on the word
Disconnect and reselect the communication port. The program LED on unit will light.
Scope Protocol
1.
Select
Slave Amount 0=None or 1,2,3.
2.
Select
Scope paging protocol and serial port baud rate and parity.(Device to Transmitter Baud rate)
3. Select Data Type and Baud Rate (pager – 512, 1200. Default = 1200)
4.
Select
[Input Enable] for input 1. You must do this for each input 1-10.
5. Select the type of input. Each input can be different. See [Type:].
6. Enter Closed message and pager ID, beep type for each input.
7. Enter Open message. The Pager ID, beep type will be the same for Open and Closed State.
8. Select the number of repeats and duration between each repeat or C/S (Change of State)
9.
Select
[Next].
10. Complete 2-6 for each contact input.
4