Camera raw dialog box overview – Adobe After Effects CS3 User Manual
Page 95
AFTER EFFECTS CS3
User Guide
90
After Effects applies the settings for the first camera raw image in the sequence to all of the images in the sequence
that do not have their own XMP sidecar files. After Effects does not check the Camera Raw database for image
settings.
Note: Camera raw files are uncompressed. Their large size may increase rendering time.
1
Choose File > Import > File.
2
Select the camera raw file, and click Open.
3
Make any necessary adjustments in the Camera Raw dialog box, and click OK.
You can adjust a camera raw image after importing it. To open the image in the Camera Raw dialog box, select the
footage item in the Project panel, choose File > Interpret Footage > Main, and click More Options.
Note: You can’t assign an input color profile to a camera raw image for use in a color-managed project. For information
on how colors are automatically interpreted, see “Interpret a footage item by assigning an input color profile” on
page 245.
See also
“Import a single still image or a still-image sequence” on page 81
“Color management” on page 241
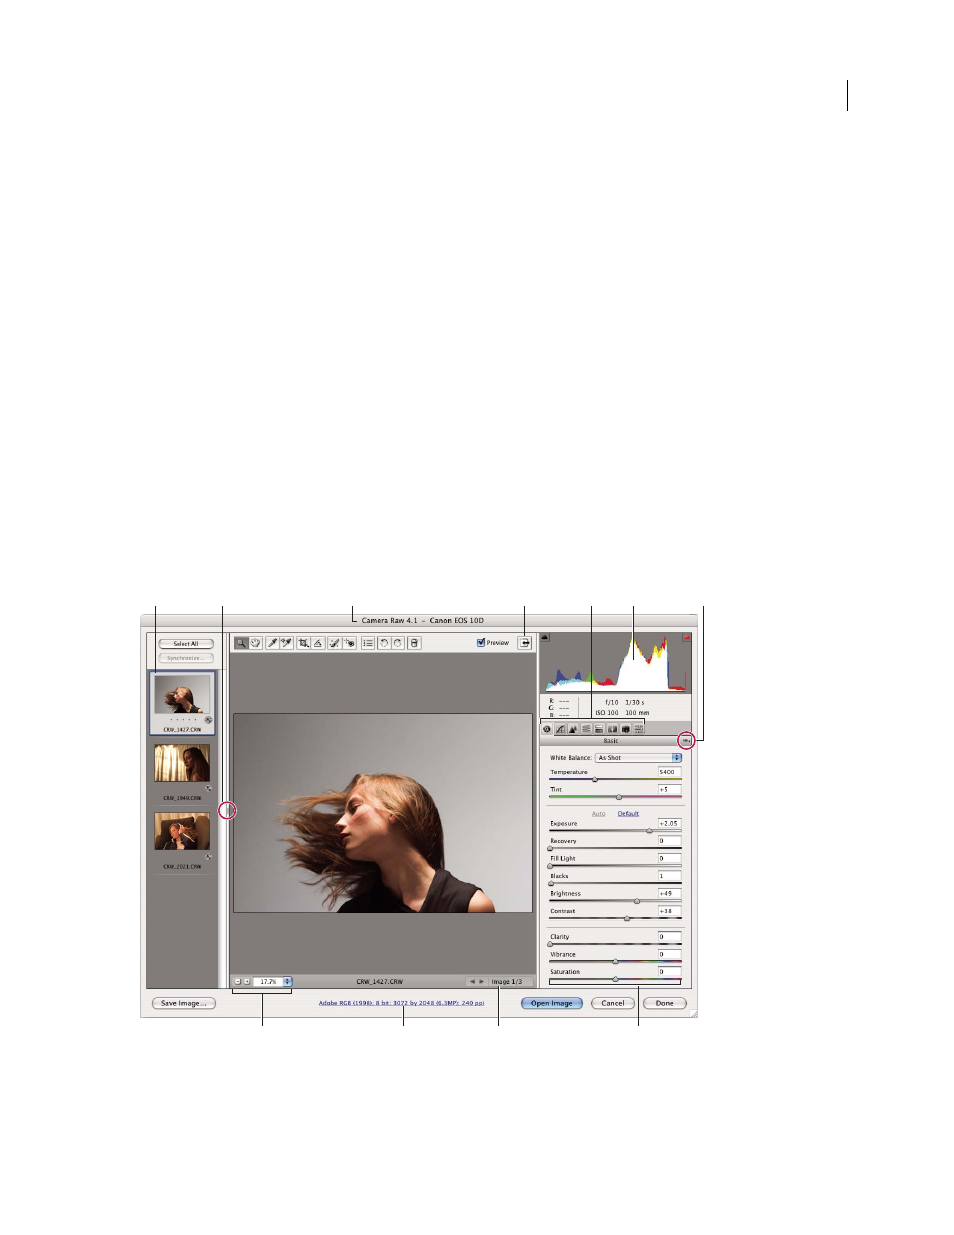
Camera Raw dialog box overview
Camera Raw dialog box
A. Filmstrip B. Toggle Filmstrip C. Camera, file name, and Exif information D. Toggle full screen mode E. Image adjustment tabs
F. Histogram G. Camera Raw Settings menu H. Zoom levels I. Click to display workflow options J. Navigation arrows K. Adjustment sliders
A
F
G
D
C
B
E
H
J
I
K