Setting up your baby lock, Accessory adapter – Baby Lock Cover Stitch (BLCS-2) Instruction and Reference Guide User Manual
Page 10
O
V
E
R
V
I
E
W
8
1. Remove machine from box
After removing the packing materials from the
box, gently lift your Baby Lock by grasping the
handle provided on the top of the machine.
Place the machine on a sewing table or any
level surface that provides ample work area to
the left. Place the foot controller in a pedal stay,
if desired, and place it under the sewing table.
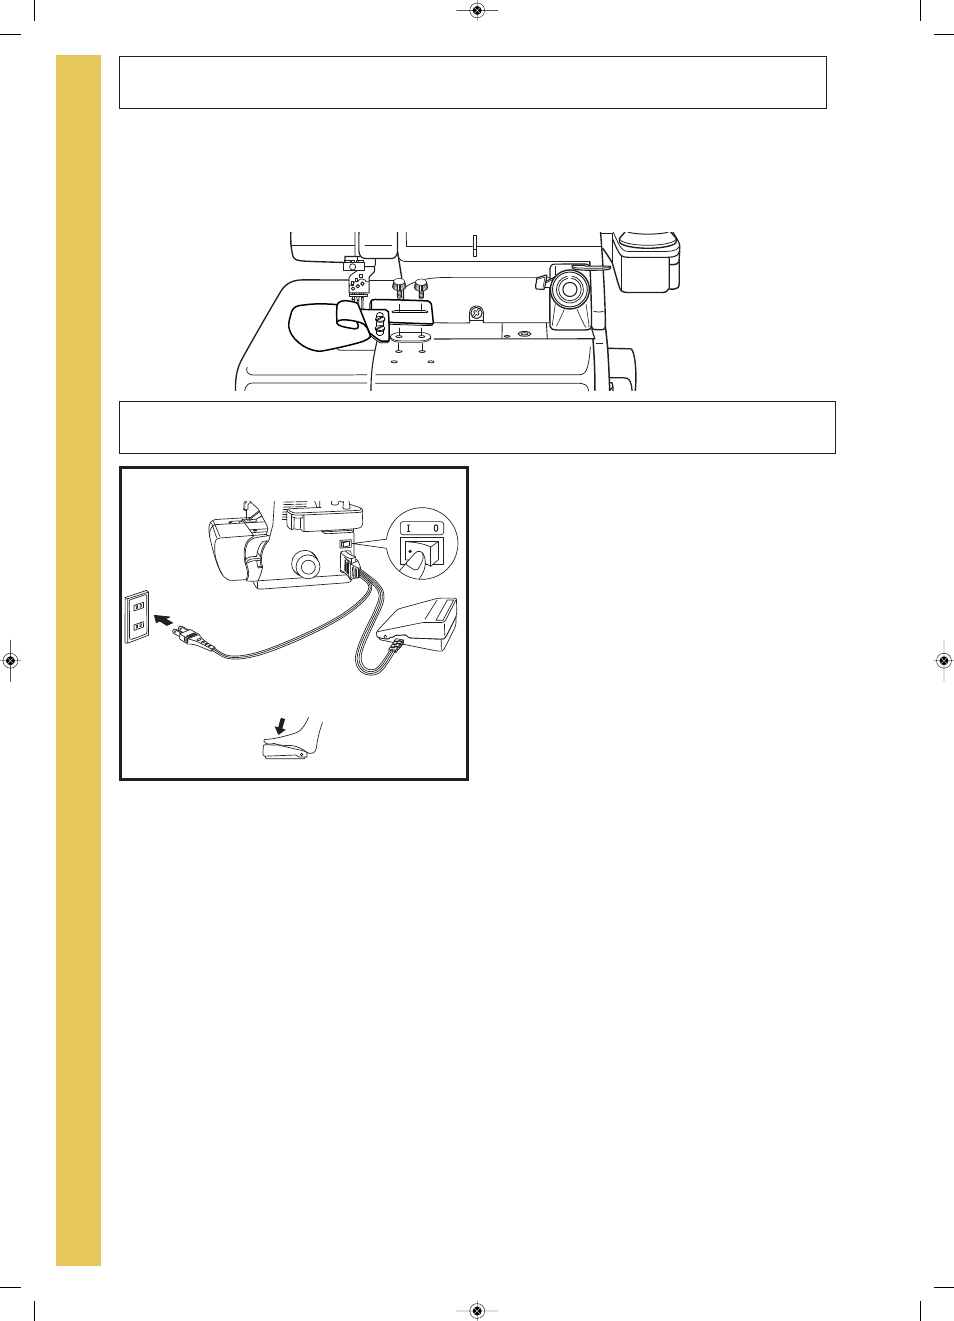
2. Plug in the machine
Plug the power cord into the machine first, then
into a wall outlet. The power switch is located
toward the back on the right side of the
machine. Always make sure the power is off
when the machine is not in use (fig. A).
Available foot controller for U.S.A.: Model YC
482 or YC420W.
3. Polarized plug
This appliance has a polarized plug (one blade
wider than the other). To reduce the risk of
electric shock, this plug is intended to fit in a
polarized outlet only one way. If the plug does
not fit fully in the outlet, reverse the plug. If it
still does not fit, contact a qualified electrician
to install the proper outlet. Do not modify the
plug in any way.
4. Foot controller
The sewing speed of the machine is deter
mined by the amount of pressure applied to the
foot controller. When not in use, do not place
anything on the foot controller, or the machine
could start inadvertently and the controller or
motor could burn out.
Setting Up Your Baby Lock
A
・
Place Accessory Adapter over the back two holes of the front cover table.
・
Place the accessory bracket on top of the Accessory Adapter.
・
Insert the Guide Fixing Screws to hold the Accessory Adapter and Accessory in
place.
Accessory Adapter
★New_BLCS-2 Ta:BLCS-2 En.qxd 2009/05/25 16:58 ページ 8