Threading preparation, Threading your baby lock, Locked position for threading – Baby Lock Cover Stitch (BLCS-2) Instruction and Reference Guide User Manual
Page 15
T
H
R
E
A
D
I
N
G
13
Threading Preparation
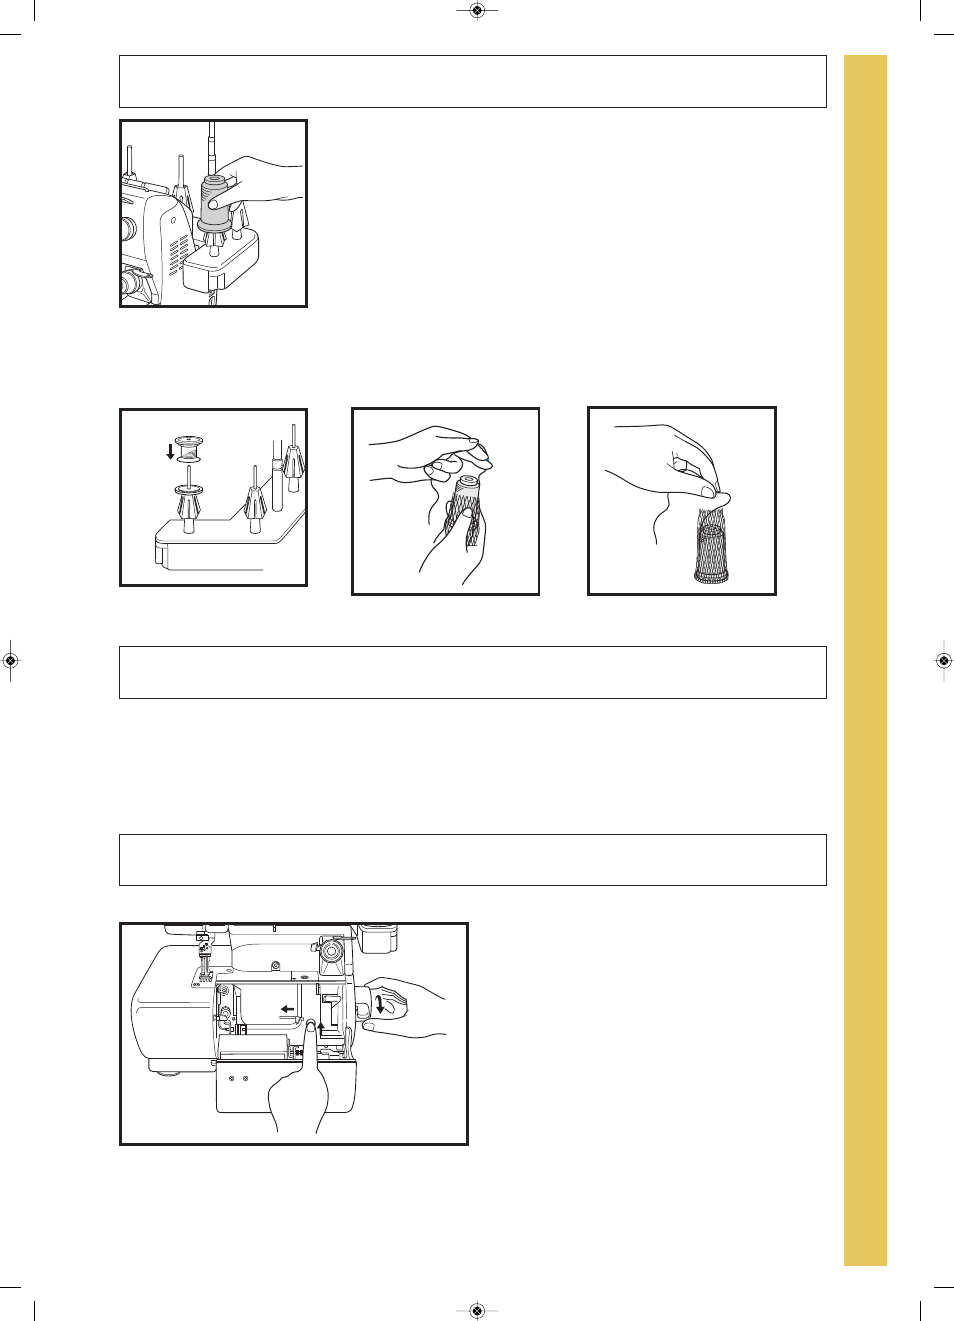
When using overlock threads (cones) place the cone securely over
the spool holder on your machine. The spool holders prevent the
cone from spinning, enabling the thread to feed evenly. (fig. A)
When using standard sewing thread spools, use the sponge disks
(sponge side up) and spool caps (on top of spool) to prevent the
thread from tangling. (fig. B)
Thread nets can be placed over threads that tend to slip off the
spool during sewing. For example: rayon, silk, nylon, invisible, and
decorative threads. Place the thread net over the spool of thread
and fold net back, (fig. C) Pull thread from the top of spool to enable
the thread to feed evenly. (fig. D)
D
A
B
Standard sewing thread with
sponge disks and spool cap.
C
Thread net on thread
Pulling thread through net
Threading Your Baby Lock
Your Baby Lock is equipped with an exclusive "Instant JetAir Threading System" for fast, easy
threading of the chain looper.
One push of the "JetAir" threading lever will automatically thread the chain looper. It is no longer nec
essary to use tweezers for threading the thread guides. If a looper thread breaks or runs out, just
rethread it. There is no need to follow threading sequence.
Locked Position for Threading
A
1. Open the front cover.
2. Raise the presser foot to release all threads.
3. Depress the machine lock button firmly. Rotate
the machine handwheel slowly toward you until
the button "snaps" into the locked position and
the lock button release lever moves to the far
left (fig.A).
Note: The Baby Lock must be in the locked posi
tion when threading the looper unless otherwise
indicated.
Cones with Spool Holder
★New_BLCS-2 Ta:BLCS-2 En.qxd 2009/05/25 16:58 ページ 13