Unit description, Initial use, Operation – Beurer TL 40 User Manual
Page 10
10
Repairs
Important
• Please do not attempt to repair the unit yourself. This could result in serious injuries. Failure to observe
this regulation shall void the warranty.
• If you need to have the unit repaired, contact customer service or an authorised dealer.
4. Unit description
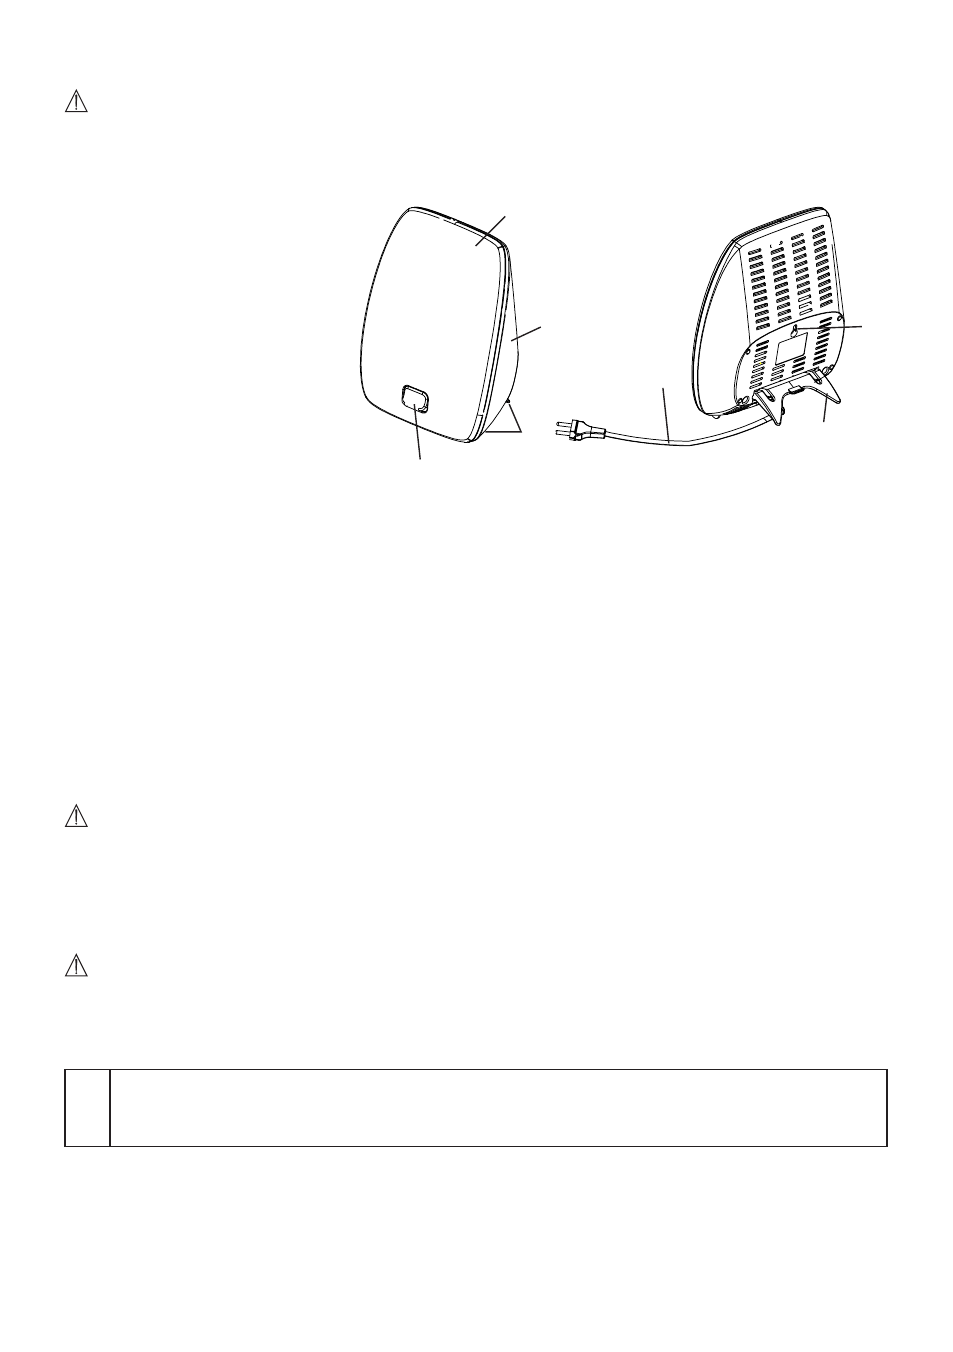
Overview
1. Fluorescent screen
2. Rear of the device housing
3. Support feet
4. On/off button
5. Mains cable with plug
6. Stand
7. Hole for wall-mounting fixture
5. Initial use
After opening the packaging check to ensure it contains all the parts to be included in delivery.
Take the device out of the plastic wrapping. Check the device for damage or faults. If you notice any damage or
faults on the device, do not use it and contact customer services or your supplier.
Positioning the device
Place the device on an even surface. The position should be chosen to ensure a distance of between 20 cm and
40 cm between the user and the device. The lamp is most effective at this distance.
Mounting the device on the wall
Alternatively, you can also mount the device on the wall. This requires a solid wall with a stable suspension de-
vice (for concrete walls e.g. a 25 mm long M4 stainless steel self-tapping screw and wall plug). Only mount the
device on the suspension device at the hole (located centrally on the rear of the device). Self-tapping screw and
wall plug are not included in delivery.
Important
:
If the area around the hole in the rear of the device is cracked or damaged, do not mount the device on the
wall! For help, please contact customer services or your retailer.
Mains connection
Connect the unit only to the mains voltage listed on the type plate. Push the plug completely into the mains
socket.
Note:
• Ensure that there is a socket near the place where the lamp will stand.
• Lay the mains cable in such a way that no one can trip over it.
6. Operation
1
switching on the lamp
Press the On/Off button. The tubes turn on.
The tubes develop their full luminosity after a couple of minutes.
1
2
3
4
7
6
5