Daktronics DF-1050/1051/1052/1053 User Manual
Page 28
3-10 Electrical
Installation
Figure 16
for an illustration of the host/client display connection.
Select the host driver by inserting the Protocol 4 plug into the 5-pin protocol jack
(J20.) For protocol jack location, refer to Drawings A-166216.
All other drivers in the display system are client drivers. These drivers receive signal
from the host driver on the Signal IN terminals and can re-drive this signal to other
“client drivers” on the Signal OUT terminals.
The address is an identification number assigned to each sign or display in a
network. Drawing A-227502 shows how to set the address on the drivers used in the
DataMaster and DataTime products. The control software uses the address to locate
and communicate with each sign. Because of the variety of installations using
DataMaster displays, addressing for each unit will be determined at point of sale or
installation. In general, a typical Level 1 parking
display would have an address of 1, a Level 2
would have an address of 2, and so on.
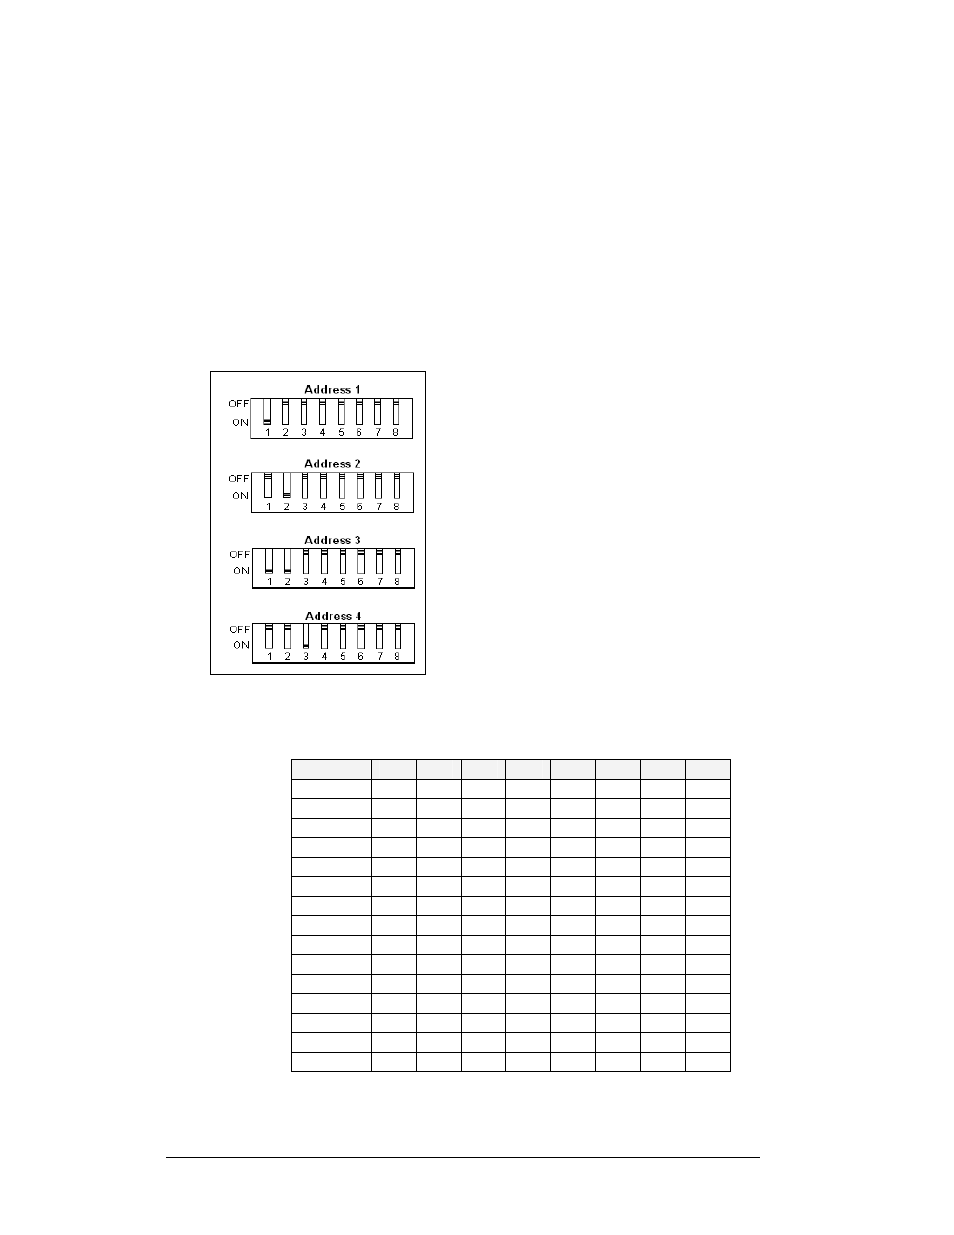
The address of each driver is set using an 8-
position DIP-switch (S1), and the address is
based on that driver’s position in the sign or
display system. If a single-line sign is used, the
address will typically be Address “01.” This
means that switch 1 is turned “ON” and the
remaining 7 switches are in the “OFF” position.
This is the default address, set when each display
is shipped. In multiple-product displays, the
address determines which line of information is
shown on the driver’s digits. The switch is set
using a binary address. Use the table and the
examples for setting the address.
Binary Address Settings
Note: Some older drivers set the address of each driver using an address plug
(Daktronics part # 0A-1279-0122) in J19. The address, either using a switch or a
plug, needs to be set for each driver.
Figure 17: Common Address
Settings
Address
1
2
3
4
5
6
7
8
1
ON OFF OFF OFF OFF OFF OFF OFF
2
OFF ON OFF OFF OFF OFF OFF OFF
3
ON ON OFF OFF OFF OFF OFF OFF
4
OFF OFF ON OFF OFF OFF OFF OFF
5
ON OFF ON OFF OFF OFF OFF OFF
6
OFF ON ON OFF OFF OFF OFF OFF
7
ON ON ON OFF OFF OFF OFF OFF
8
OFF OFF OFF ON OFF OFF OFF OFF
9
ON OFF OFF ON OFF OFF OFF OFF
10
OFF ON OFF ON OFF OFF OFF OFF
11
ON ON OFF ON OFF OFF OFF OFF
12
OFF OFF ON ON OFF OFF OFF OFF
13
ON OFF ON ON OFF OFF OFF OFF
14
OFF ON ON ON OFF OFF OFF OFF
15
ON ON ON ON OFF
OFF
OFF
OFF