Page 27 – Dexaplan DV 622 User Manual
Page 25
Page 27
GB / IE - 27
!
!
!
!
!
!
!
!
If you would like to pause an image or video sequence, press one of
the buttons
[4] or
[2] again. Press this button again in order
to continue the slide show (the paused video sequence will not be
resumed, instead the next image or next video sequence will be
displayed).
The images will be displayed with an information window (see Figure
H). In order to hide this window, press the button
[3]. Press this
button again in order to display the window again.
The last six stored images (or the respective first frames of the video
sequences) in the daily directory are displayed by pressing the “Play”
button [10] again.
The pages can be scrolled through by pressing the buttons
[3] and
[12].
If you would like to view an image or a video sequence in full screen
mode, move the white frame onto the desired image by pressing the
buttons
[4] and
[2]. Now press the “OK” button [13] in order
to go into full screen mode (see previous chapter “1. Full screen”).
The directories of the stored images are displayed by pressing the “Play”
button [10] again. A new directory is created automatically every day
(from 00:00) in order to make searching easier. One directory contains a
maximum of 1024 stored images and/or video sequences. A new directory
will be created (see Fig. K) if this number is exceeded within one day: 07-
01-12 00 and 07-01-12 01).
Move the arrow onto the desired daily directory by pressing the
buttons
[3] and
[12].
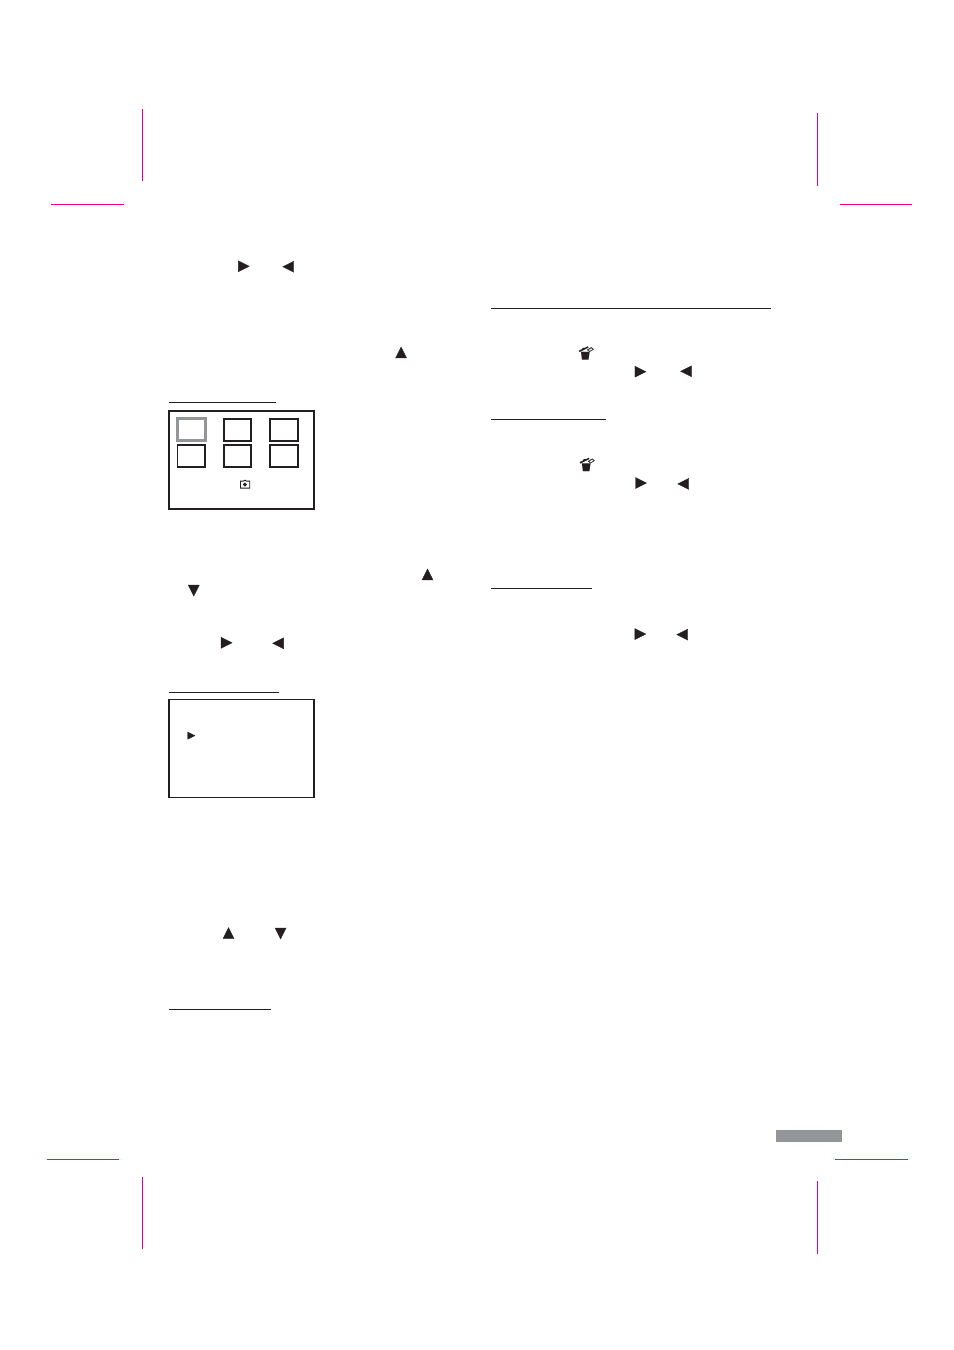
Select the daily directory by pressing the “OK” button [13]. You are
now in the 6-image overview (see previous chapter “2. 6-image
overview”).
Return to the live image mode by pressing the “Play” button [10]
again.
Note:
If there is no stored data available, “NO FILE” will be displayed on the
screen for a short time.
2. 6-image overview
3. Directory overview
4. Live image mode
Deleting of stored still images / video
sequences
Manual recording (Quick Shot)
Optional accessories
Maintenance + cleaning
1. Deleting of individual still images / video sequences
2. Deleting a directory
3. Deleting all data
!
!
!
!
!
!
!
!
!
!
!
!
!
!
#
#
!
!
Select the still image / video sequence in full screen mode (see section
“Playback mode”).
Press the button
[11].
Select “YES” with the buttons
[4] or
[2].
Press the “OK” button [13] to delete the image.
Select the directory overview (see section “Playback mode”).
Select the directory that you wish to delete.
Press the button
[11].
Select “YES” with the buttons
[4] or
[2].
Press the “OK” button [13] to delete the directory.
Note:
If there is a lot of data stored in the directory, deleting can take a
correspondingly long time.
Select the directory overview (see section “Playback mode”).
Press the “Menu” button [5].
Select “YES” with the buttons
[4] or
[2].
Press the “OK” button [13] to delete all data.
On a PC, you can delete individual image / video sequence data, individual
directories or all data at the same time. Deleting data on a PC is quicker
and more flexible than on the event recorder.
This function enables the manual recording of a still image or a video
sequence.
Press the “Quick Shot” button [11] (the LED [9] flashes for a short
time).
This function cannot be selected in playback mode.
Additional camera with 1 m and 14 m connection cables
Extension cable 10 m; the connection cable between the camera and
video recorded can be extended up to a maximum 35 m overall
length.
You can find information about ordering accessories at www.dexaplan.com
Check the plug connections regularly.
Use a slightly moist cloth, using a little detergent if necessary, for
cleaning the surfaces. Do not use any chemicals.
2007/01/09
009
22:45:44
/026
Fig. I
SHOT: del DIR
Choose Folder
07-01-09 00
07-01-09 01
07-01-10 00
Fig. K