Installing and removing the edger – DR Power Power Take-Off (PTO) System User Manual
Page 13
Installing and Removing the Edger
BEFORE PERFORMING ANY MAINTENANCE PROCEDURE, STOP THE ENGINE AND DISCONNECT
THE SPARK PLUG WIRE.
CALL TOLL FREE 1-800-DR-OWNER
9
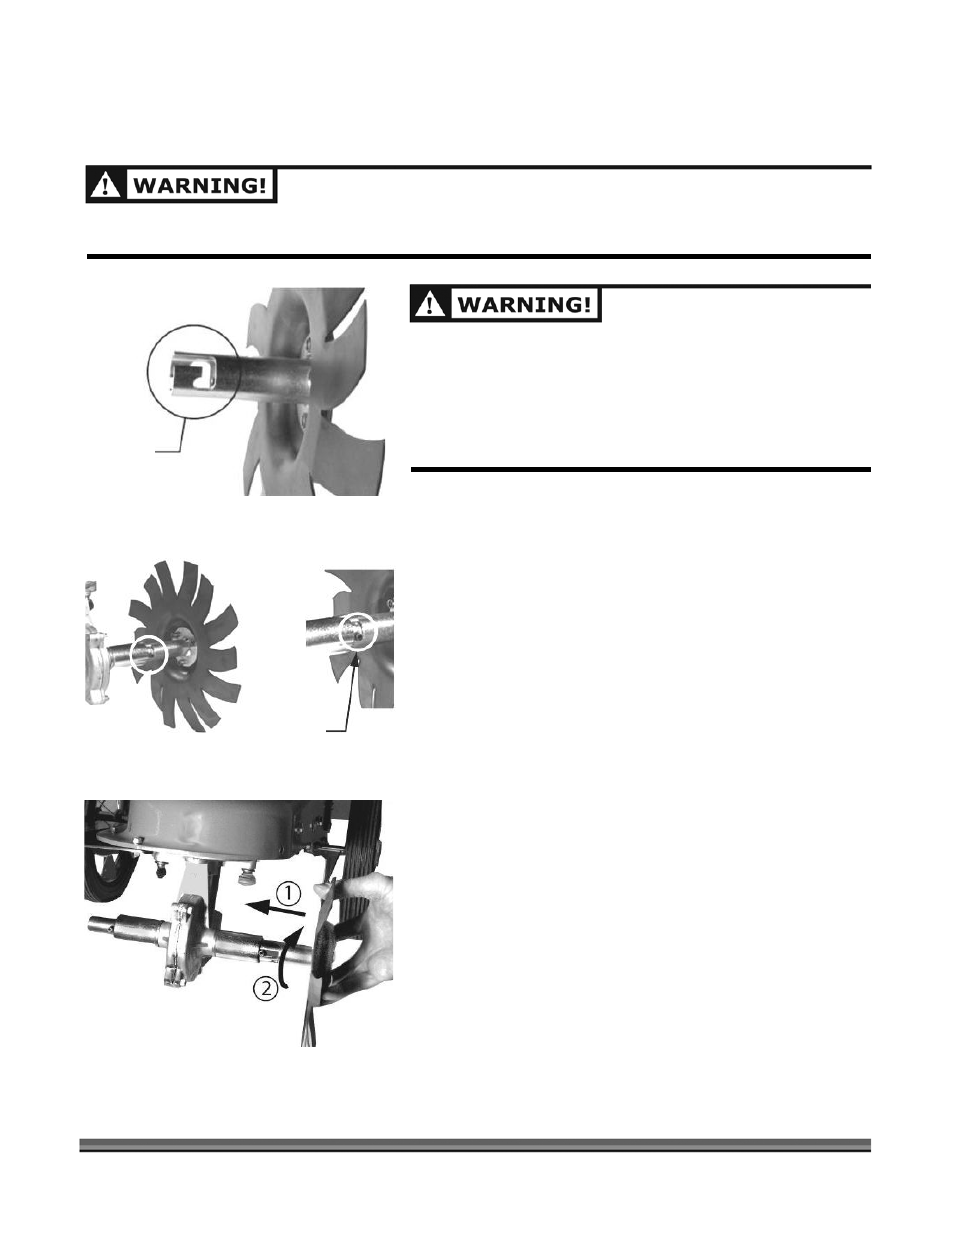
Figure 7
J Slot
THE TRANSMISSION IS HOT DURING AND AFTER USE.
TYPICAL SURFACE TEMPERATURES RANGE BETWEEN 110
AND 180° FAHRENHEIT. DO NOT TOUCH THE
TRANSMISSION UNTIL A COOL DOWN PERIOD OF 15-30
MINUTES HAS PASSED. COOL DOWN TIME CAN VARY
DEPENDING ON THE OUTDOOR TEMPERATURE AND
OPERATING CONDITIONS.
Using the edger accessory on your DR
®
TRIMMER/MOWER™, you can cut clean borders around
trees, flowerbeds, walkways, shrubs, and gardens.
Note:
The following steps are based on the Trimmer’s left
and right as if you were standing at an operating position
behind the Trimmer’s handles.
1. Install the Edger on the Trimmer’s left by sliding the
Edger’s axle over the shaft of the transmission,
rotating the Edger to align the J-slot in the axle (Figure
7) with the drive pin (Figure 8) and pushing the Edger
axle toward the transmission (Figure 9).
Drive Pin
Figure 8
Note:
There is a spring that you will compress as you push
the Edger onto the shaft until the drive pins bottom on the
slot in the Edger axle. This will require a fair amount of force
to overcome the spring tension.
Figure 9
2.
W
hen the Edger axle is inserted completely, rotate the
Edger clockwise until it reaches the end of the J-slot
(
Figure 9
).
Note:
When the Edger is released, it should lock into the end
of the J-slot and should not turn in either direction. Check to
see that the Edger is locked into place by trying to turn it both
clockwise and counterclockwise.
3. To remove the Edger, simply reverse the procedure by
pushing the Edger in, twist counterclockwise and
release.