Adjusting the steel bushing over center – DR Power RapidFire 3.0 HP DR (June 2014 - Present) Operating Manual User Manual
Page 20
20
DR
®
PREMIER RAPIDFIRE™ LOG SPLITTER
Adjusting the Steel Bushing Over Center
Tools needed:
Two 9/16" Wrenches
9/16" Socket and Ratchet
1. Remove the long Flange Bolt and Locknut that secures the lower portion of
the Guards to the Frame using two 9/16" Wrenches (Figure 38).
2. Remove the five short Flange Bolts and Locknuts that secure the Guard
Flanges together using two 9/16" Wrenches and remove the left side Guard
from the Splitter.
3. Remove the four short Flange Bolts and Locknuts that secure the right side
Guard to the Frame using a 9/16" Socket and Ratchet to remove the right
side Guard from the Splitter (Figure 39).
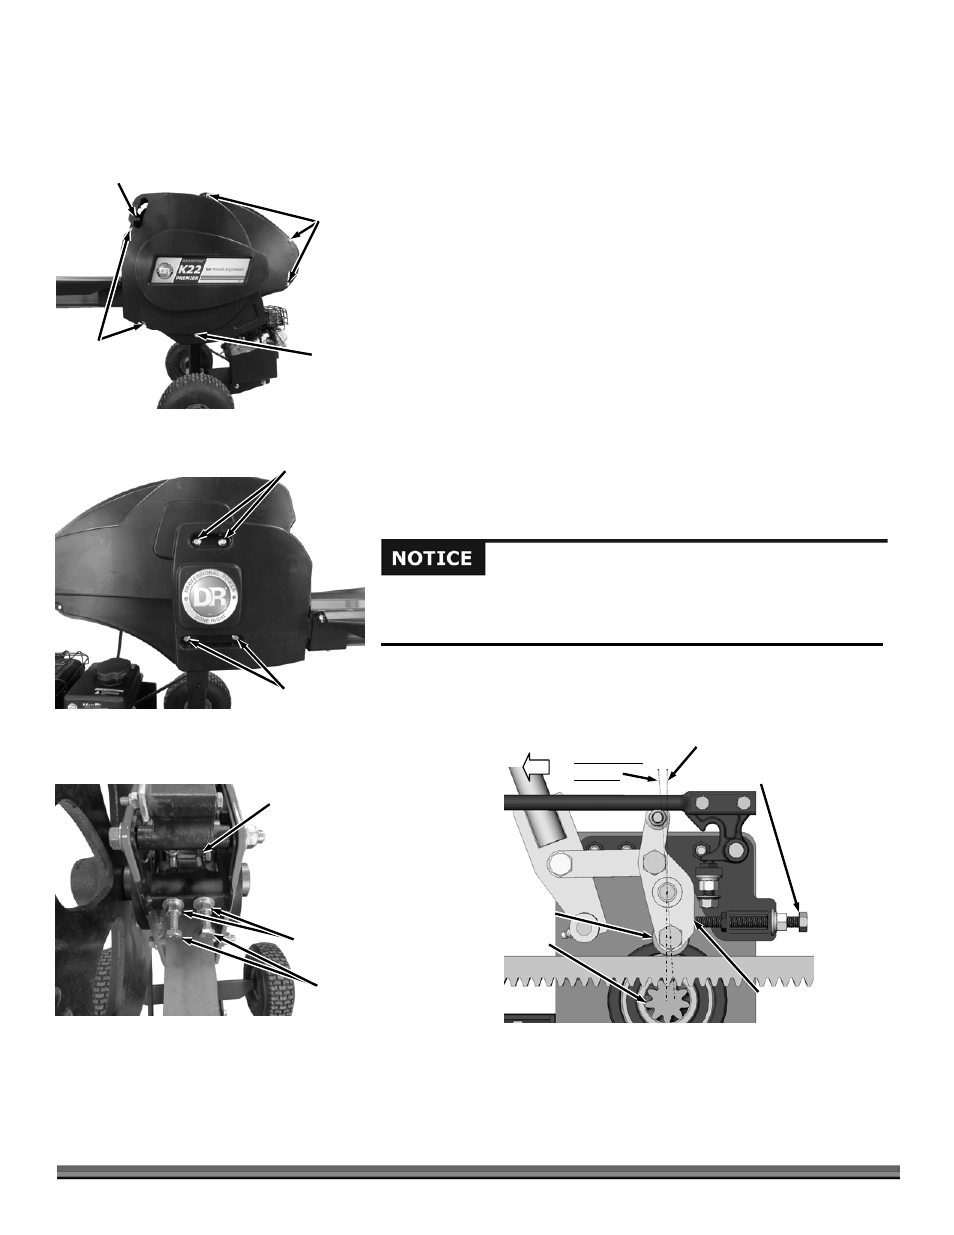
4. Loosen the Stop Bolt Jam Nuts (Figure 40).
5. Lift the Safety Interlock Lever and push the Engagement Handle forward to
position the Steel Bushing Yoke as close to vertical as you can and hold it
there (Figure 41).
6. Rotate the Stop Bolts until they touch the Steel Bushing Yoke. Turn the Bolt
back out of the Frame counterclockwise 1-1/4 revolutions. Tighten the Jam
Nuts with a 9/16" Wrench to lock the Stop Bolts at this position.
Left Side Guard
Short
Flange
Bolts
Figure 38
Safety Interlock Lever
Short
Flange
Bolts
Long
Flange
Bolt
Right Side Guard
Short Flange Bolts
Figure 39
Short Flange Bolts
Stop
Bolts
Figure 40
Jam Nuts
Handle Yoke
Do not adjust more than 1-1/4 revolutions when adjusting off center.
Adjustment too far off center will not allow the Rack Teeth to engage fully and
will cause damage to the Splitter.
Vertical Position
Figure 41
Over Center
Position
Rack
Pinion
Steel
Bushing
Forward Stop
Adjustment
Back of
Yoke