Installing the cradle kit – DR Power RapidFire 3.0 HP DR (June 2014 - Present) Operating Manual User Manual
Page 9
CONTACT US AT www.DRpower.com 9
1. Support the Beam with a Jack Stand or equivalent so the front of the Beam is
high enough to install the Frame Stand (Figure 3).
2. Secure the Support Leg to the Beam with four Carriage Bolts and Locknuts
using a 9/16" Wrench. Bolt head on stand side.
3. Remove the Jack Stand.
Installing the Cradle Kit
Parts Supplied (
Figure 2):
Item # Part
# Description
Qty
1 ............. 34496 .............. Cradle ..................................................... 2
2 ............. 33350 .............. Bolt, Hex, Flange, 3/8-16 X 2" ............... 4
3 ............. 28551 .............. Washer, Saddle, 3/8 X 1" ...................... 4
4 ............. 33333 .............. Nut, Nylon Lock, Flanged, 3/8-16 ......... 4
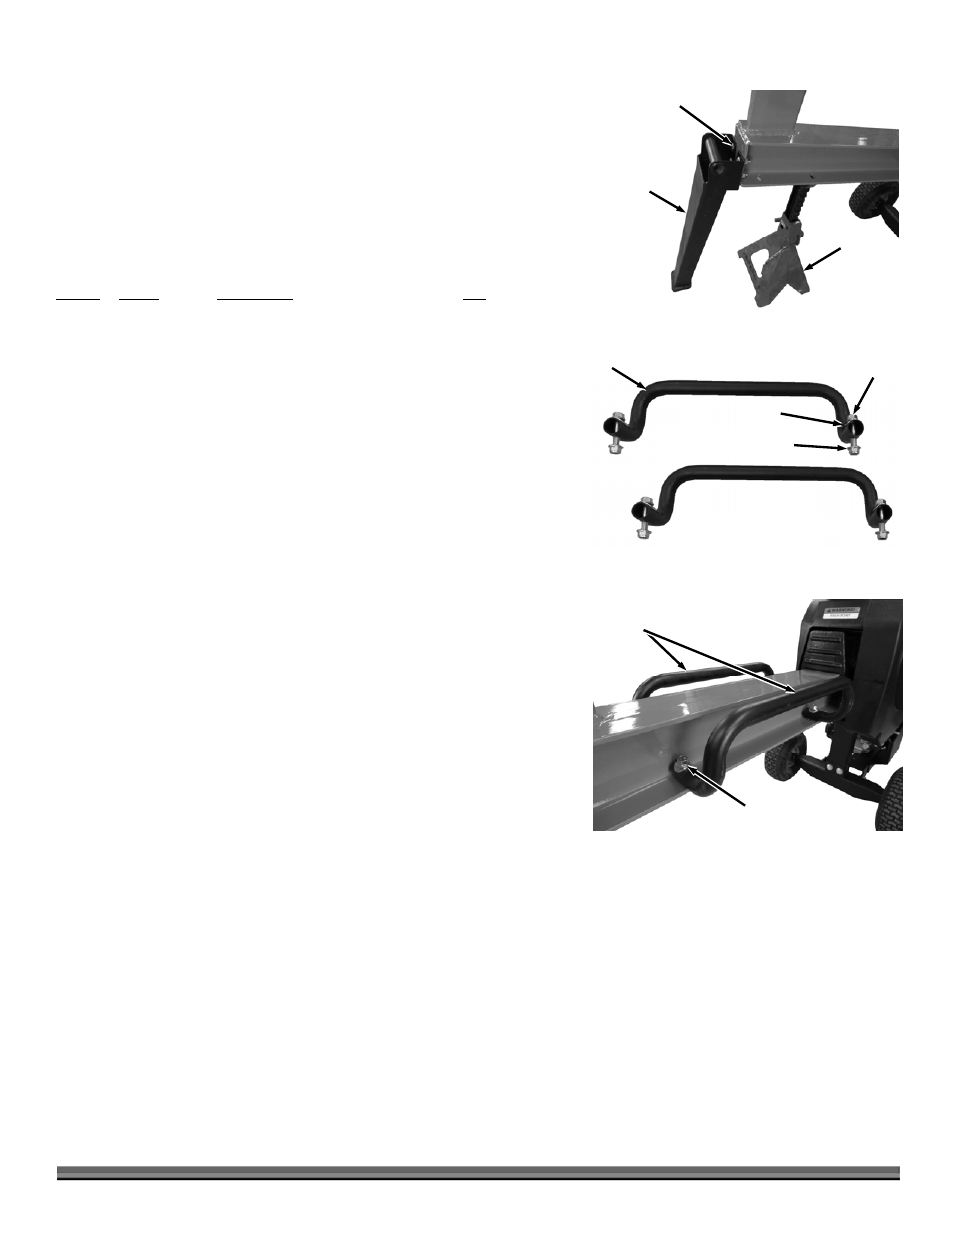
1. Remove the Hardware from the Cradles (Figure 4).
2. Secure the Cradles to the Beam with the Bolts, Saddle Washers and Locknuts
using two 9/16" Wrenches (Figure 5).
Support
Leg
Figure 3
Carriage Bolt
and Locknut
Jack Stand
Beam
1
Figure 4
2
3
4
Cradles
Figure 5
Bolt, Saddle Washer
and Locknut