DR Power 5.00 HP Power Wagon User Manual
Page 28
25
DR POWERWAGON 5.0 Safety & Operating Instructions
Figure 24
Figure 25
Note:
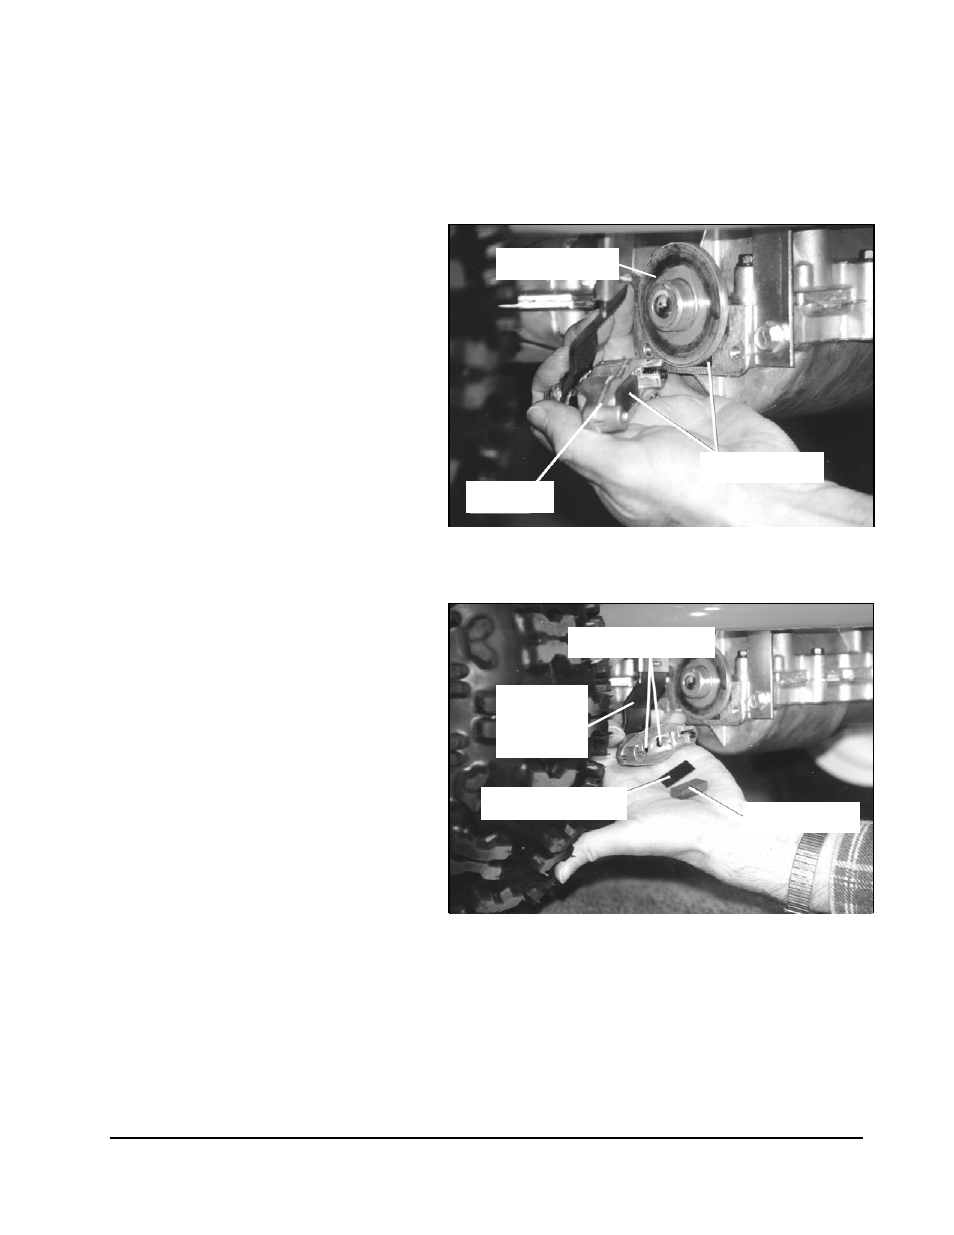
The caliper contains four small parts: the brake pad, the backing plate, and two
small actuator pins (Figures 24 & 25). As you let the caliper hang from its attaching
hardware, keep track of these parts as they could fall out. Clean away any debris from
these parts and the inside of the caliper.
3. Pull the brake disc off
the keyed shaft (Figure
24) being careful not to
lose the shaft key.
4. Remove the old brake
pad from behind the
disc and replace it with
a new brake pad, then
reinstall the brake disc.
5. Replace the caliper
housing and its parts:
two actuator pins, the
backing plate, and the
second brake pad.
(Figure 25). Make sure
the brake arm assembly
is in the upright
position. Be sure that
the parking brake lever
is pointing up. (Figure
23) Reinstall the two
caliper bolts and be
careful not to over
tighten them.
6. Test the parking brake:
With the machine on a
level surface, set the
parking brake and put
the machine in "N"
(Neutral). If the parking
brake does not engage
or hold, tighten the
parking brake
adjustment nut 1/4
turn with a 1/2"
wrench. See “Adjusting
the Parking Brake” on
page 23.
Note:
Check the parking brake periodically and adjust accordingly.
Brake Pads
Caliper
Actuator Pins
Backing Plate
Brake Pad
Brake Disc
Parking
Brake
Lever