Aerating your lawn – DR Power Lawn Aerator User Manual
Page 11
CONTACT US AT www.DRpower.com 11
able to drive the tool in the ground 2 to 3 inches with little effort. If you are
unable to do so, then watering the lawn a day before aerating is necessary.
Inspect the lawn to be aerated and remove rocks, wire, string and other
objects that might present a hazard before starting.
Identify and mark all ground objects to be avoided, such as sprinkler heads,
stakes, water valves, clothes line anchors, etc.
If operating in cold weather, first engage the Tines in the “raised” position
for at least two minutes prior to actual aeration. This is to warm the grease
in the Tine Crank Bearings.
Aerating your Lawn
Practice aerating in an open area prior to aerating in tight areas.
1.
Start the Engine as described in the “Starting the Engine” section on the
previous page.
2.
Allow the engine to warm up at idle for a few minutes and then adjust the
Throttle to the rabbit (fast) position.
3.
Make sure the Tine Position Lever is in the “Raised” position (Figure 10).
Note: Always aerate with the Throttle Lever at the rabbit (fast) position.
4.
Hold the Tine Engagement Bail Bar to the Handlebar.
5.
Slowly push the Tine Position Lever forward and keep pace with the
machine as the Tines engagement with the ground causes the self propel
action.
Note: Do not push the machine while operating. The holes will be deeper if you
allow the Aerator to pull itself forward as the tines penetrate the soil.
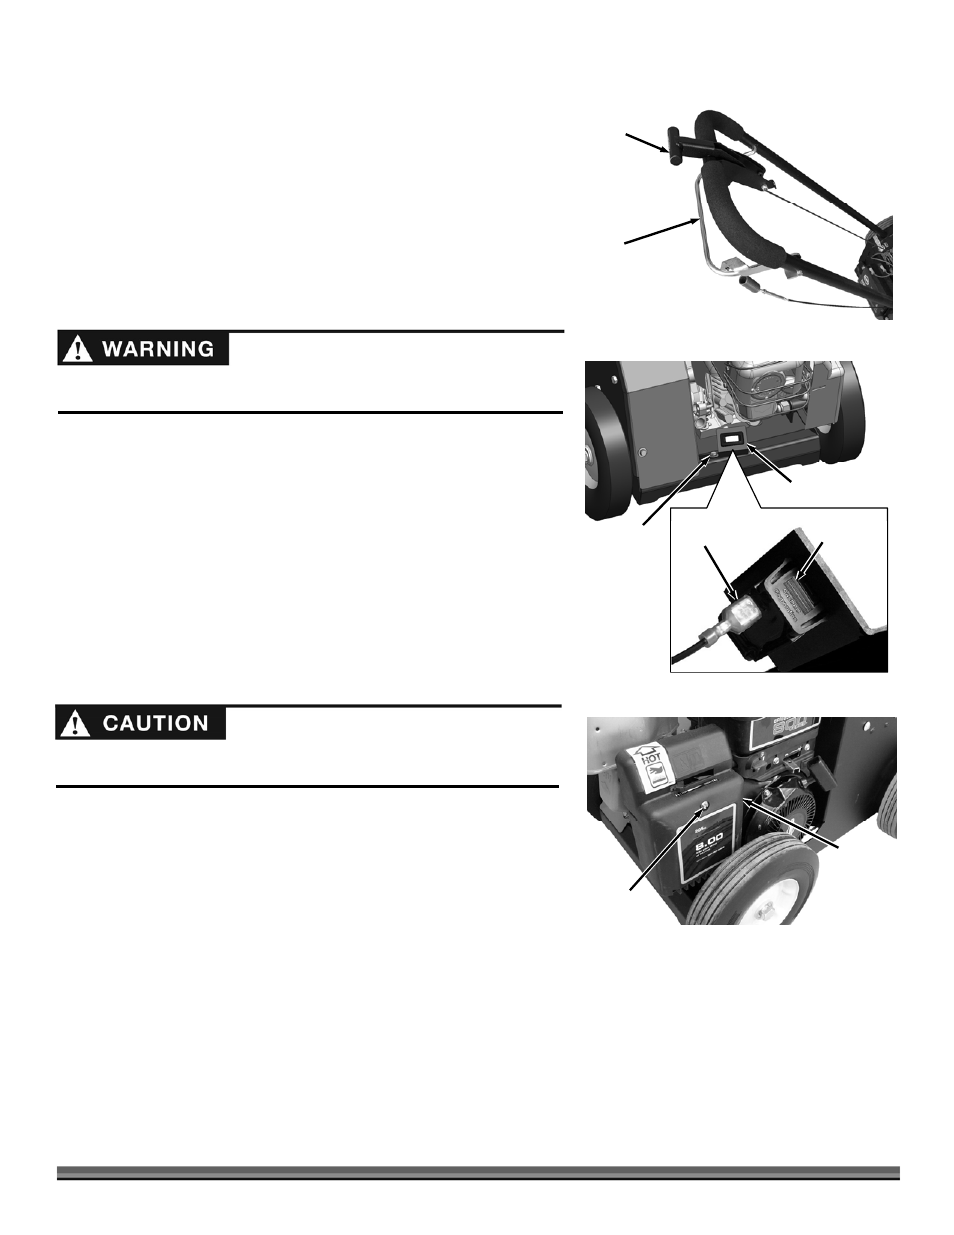
Installing the Maintenance Meter Accessory (Kit #19945)
Tools and Supplies needed:
1/2" Wrench
1.
Insert the Meter into the Bracket opening as shown in Figure 11. Press it
firmly to ensure the retaining clips on the top and bottom of the meter have
snapped into place.
2.
Slide the Meter Wire Connector firmly onto the Meter Wire Terminal on the
back of the meter.
3.
Remove the Bolt, Lock Washer and Flat Washer from the Frame using a 1/2" Wrench (Figure 11).
4.
Position the Maintenance Meter Bracket and secure with the Bolt, Lock Washer and Flat Washer using a 1/2" Wrench.
5.
Remove the Engine Air Filter Cover and Filters to gain easy access to the Spark Plug (Figure 12).
Figure 11
Bolt, Lock
Washer and
Flat Washer
Meter Bracket
Maintenance
Meter
Meter Wire
Connector
Read and understand the warnings listed in “Chapter 2 General Safety Rules”
before operating this LAWN AERATOR.
Never cross hard objects or surfaces (sidewalks, driveways, stepping stones,
etc.) with the tines down.
Tine
Position
Lever
Figure 10
Tine
Engagement
Bail Bar
Air Filter
Cover
Figure 12
Screw