DR Power Lawn Aerator User Manual
Page 17
CONTACT US AT www.DRpower.com 17
2.
Place Wheel Chocks in front of the front Wheels.
3.
Lift the rear of the DR LAWN AERATOR off the ground with Jack Stands.
4.
Lower the Tines with the Tine Position Lever.
5.
Hold the Tine Hex in place with a 7/8" Wrench as you turn the Jam Nut
away from the Tine Shaft with a 15/16" Wrench (Figure 27).
6.
Having the Jam Nut loose will now allow you to unscrew the Tine by the Tine
Hex to remove the Tine from the Tine Shaft.
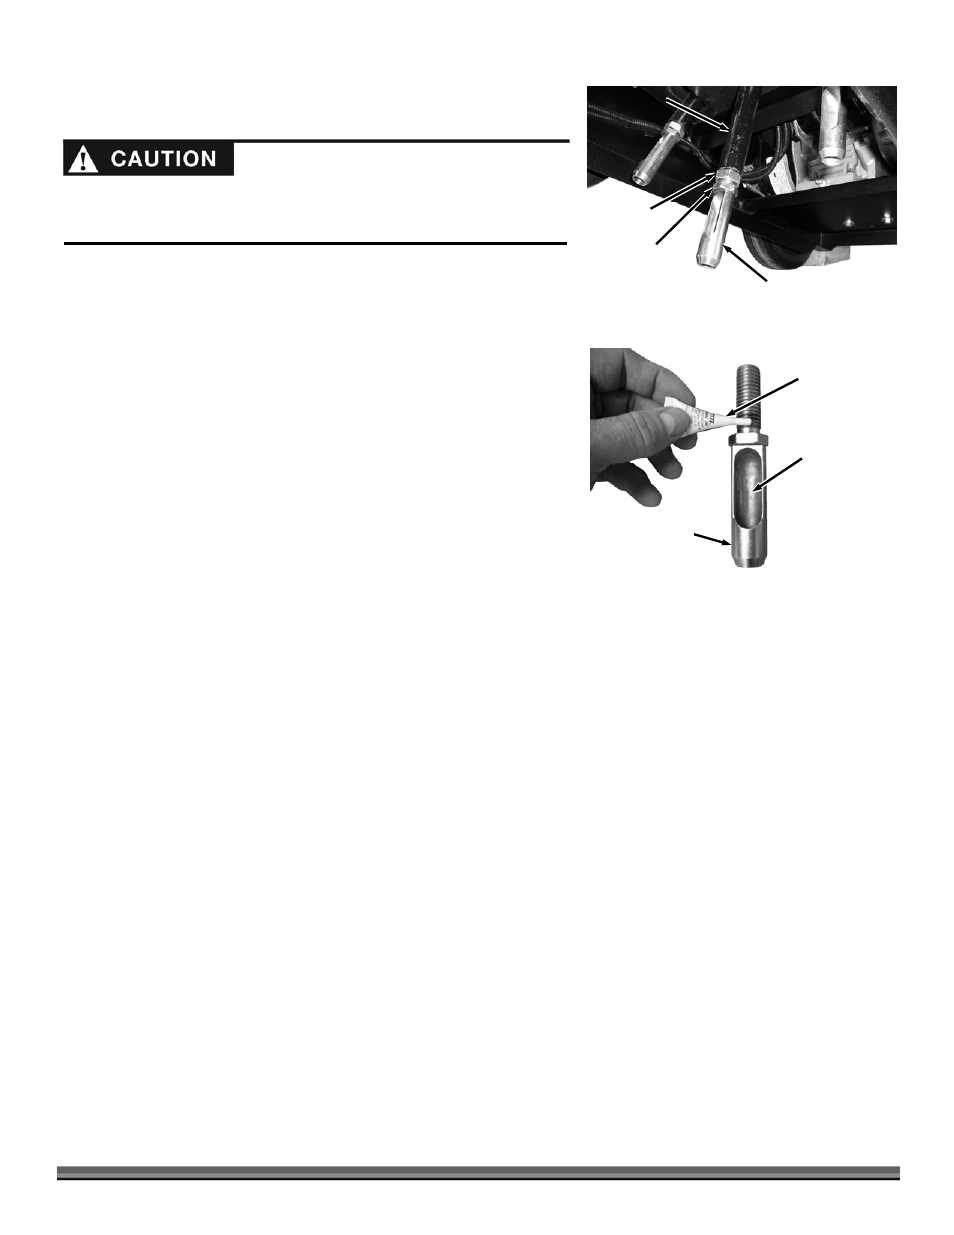
7.
Add some Thread Locking Compound to the first few lower threads of the
Tine as shown and screw the Jam Nut all the way onto the threads as close
to the Tine Hex as possible by hand (Figure 28).
8.
Screw the New Tine into the Tine Rod all the way until it stops. If the Tine
core opening is not facing towards the rear of the machine turn it back until
the opening is facing the rear.
9.
Hold the Tine Hex with the 7/8" Wrench and tighten the Jam Nut very tight
against the Tine Shaft with a 15/16" Wrench.
10.
Repeat with other Tines as needed.
11.
Raise the Tines with the Tine Position Lever and lower the machine to the
ground.
12.
Reinstall the Cover.
NOTE: Allow the Thread Locking Compound to cure overnight before using the Aerator.
Thread Locking
Compound
Figure 28
Tine
Tine Core Opening
The aerator must be very stable when changing the tines. If you do not
position the jack stands and chocks securely the machine may fall and injure
you.
Tine Hex
Figure 27
Tine
Jam Nut
Tine Rod