0 analyzer initial start-up, 1 sample and drain tubing connections – Electro-Chemical Devices (ECD) CA6 Hardness Analyzer User Manual
Page 37
6.0 ANALYZER INITIAL START-UP
•
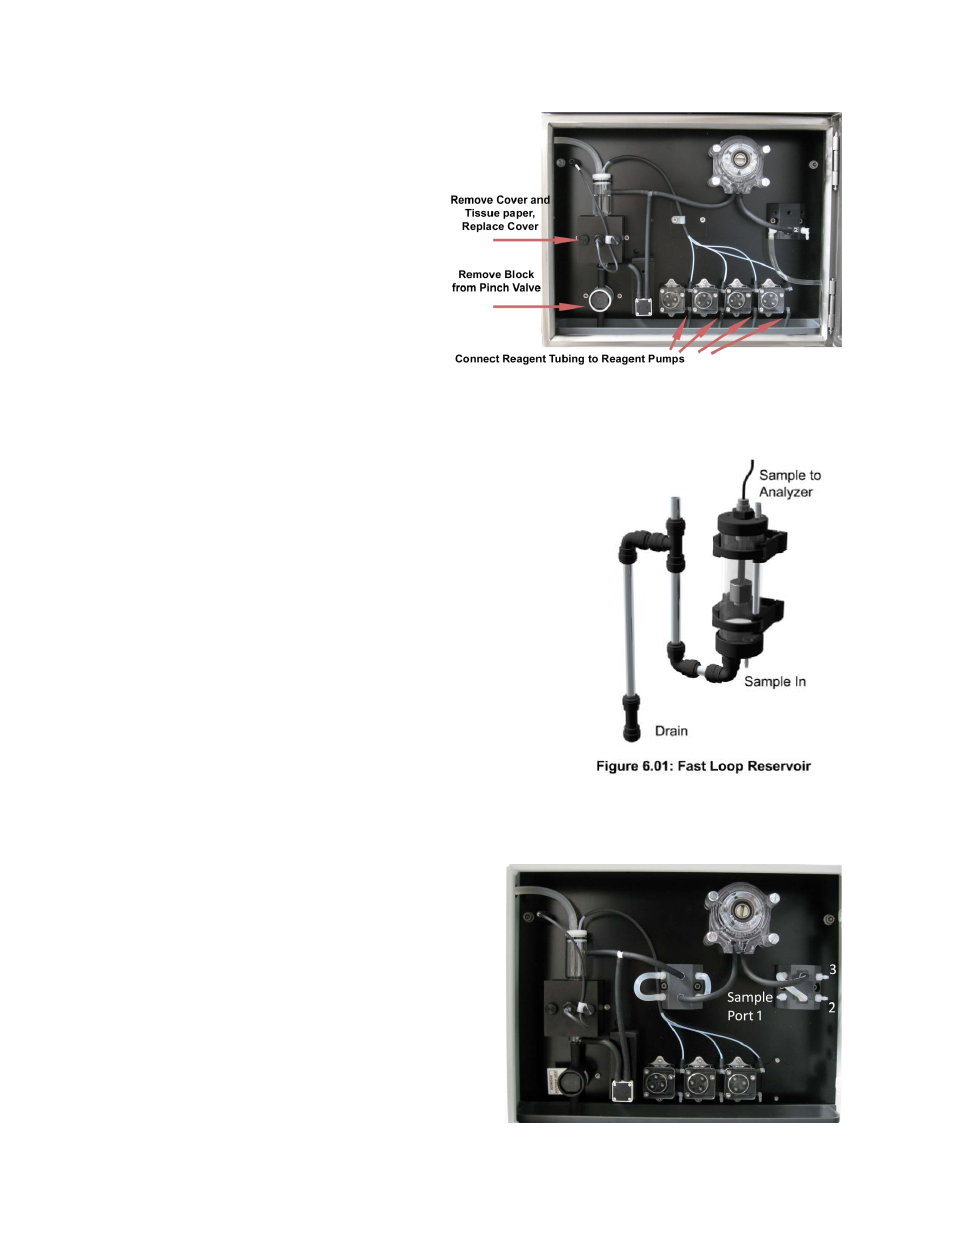
Open The Liquids Compartment
•
Disconnect LED Cable from upper left
corner of the back panel, twist ¼ turn
counter clockwise then pull back.
•
Remove the protective paper
surrounding the colorimetric cell by
unscrewing the two (2) thumbscrews
and carefully removing the
heater/LED block, remove the paper,
replace the block and gently retighten the thumbscrews. Reconnect LED.
•
Remove the block from the Drain Pinch Valve by pressing the black button. Save for future use.
It removes compression from the drain tube when the CA6 is not in use.
•
Install the Fast Loop Reservoir(s) close to the right side of
the CA-6 Analyzer. Samples and Dilution water must be
drawn from atmospheric pressure.
6.1 Sample and Drain Tubing Connections
After double checking Sections 4.0 & 5.0, proceed as follows:
•
Connect the overflow drain of the Fast-Loop Reservoir to
the drain with 12 mm OD tubing.
•
Connect the sample feed line (or the outlet of the optional
filtering unit) to the bottom of the Fast-Loop Reservoir
previously installed on the right side of the analyzer.
•
SEE SECTION 11, ANALYSIS CYCLE, FOR ACTUAL TUBING
CONNECTIONS
•
Connect the sample inlet tubing from the analyzer, Sample
#1, to the “Sample to Analyzer” port fitting on top of the Fast-loop Reservoir. The John Guest
fitting accepts 1/8” I.D. flexible tubing (Tygon, Pharmed or Norprene are recommended). The
sample will now be taken from atmospheric pressure by the sample peristaltic pump.
•
Connect the reagents tubing (coming from the
reagent bottle) to the corresponding
REAGENT port fitting (Reagent 1 to Port 1)
using 1/16” I.D. flexible tubing (Tygon,
Pharmed or Norprene are recommended).
The reagents will be delivered to the optical
cell by the internal reagent peristaltic pumps.
Note the maximum height of 15.75” (40 cm)
between the bottom of the bottle(s) and the
bottom edge of the analyzer panel.
26