Working with vpn tracker, Managing your connections, Ed in detail in – equinux VPN Tracker 6.4.6 User Manual
Page 33: Working with vpn, Tracker t
Working with VPN Tracker
Find out about other VPN Tracker features that will help you
work more productively with your VPN connections.
Managing Your Connections
At this point, you probably already have your first VPN Tracker connection. You
can see your connection in the connection list on the left-hand side of the
VPN Tracker window. In the connection list you can manage, group, rename –
and most importantly, connect and disconnect your connections.
Adding More Connections
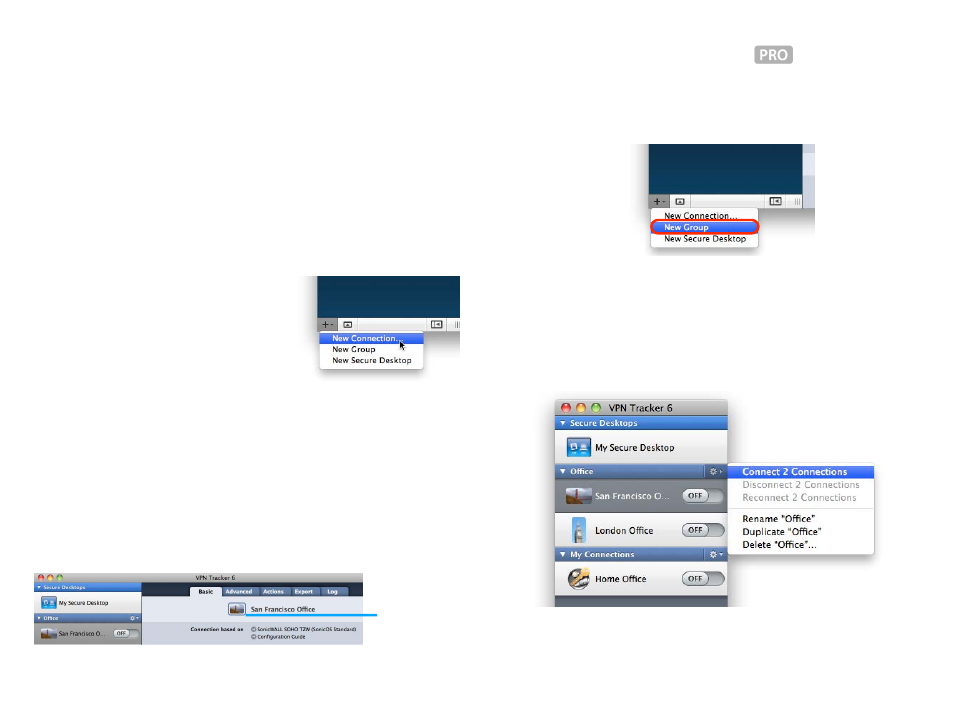
To create a new connection, click the ‘+’ icon
in the lower left hand corner of the window.
VPN Tracker will ask you to pick your device’s
manufacturer and model. You can also enter
a name for the connection.
For more information on creating a new
connection, please refer to the
Connected chapter.
Renaming and Editing Connections
To rename or edit a connection, simply select right-click or ctrl-click it in your
connection list and select ‘Rename’ or ‘Edit’.
Connection Icons
If you select your connection’s basic tab, you can drag an image to the rec-
tangular image placeholder. This image will be used in the connection list.
Drag an image
here to set a new
icon.
Organizing Connections in Groups
If you have a lot of connections, it will be useful to divide your connections up
into groups, e.g. by client, by branch office, by geographical location etc.
To create a new group: Click and hold the ‘+’ icon and select ‘New group’.
You can drag & drop connections between groups to rearrange them.
If you would like to connect, disconnect or reconnect an entire group of con-
nections simultaneously, click the gear icon next to your group and select one
of the options from the menu.
33