8 gland gasket installation – Flowserve PSS III Durametallic User Manual
Page 10
10
8 Gland Gasket Installation
8.1 Assemble the gland halves.
Tighten the cap screws until the
gland joints are metal to metal.
8.2 Wipe the gland gasket groove
clean with alcohol.
Caution: Consult material safety data
sheets for proper handling of
alcohol.
8.3 Using a paper clip apply a dot
of adhesive in the gland gasket
groove about 6.3 mm (.25 inch)
from each side of the split joints,
4 dots total. Then apply dots of
adhesive in the gland gasket
groove, space about 12.7 to
25.4 mm (0.50 to 1 inch) apart.
Do not apply adhesive closer than
6.3 mm (0.25 inch) to the split
joint. See Figure 18.
8.4 Center the gland gasket in the
gasket groove and hold it in place
with hand pressure for 10 seconds
until the adhesive sets. On larger
sizes use a flat plate to ensure
firm equal pressure around the
entire circumference.
See Figure 19.
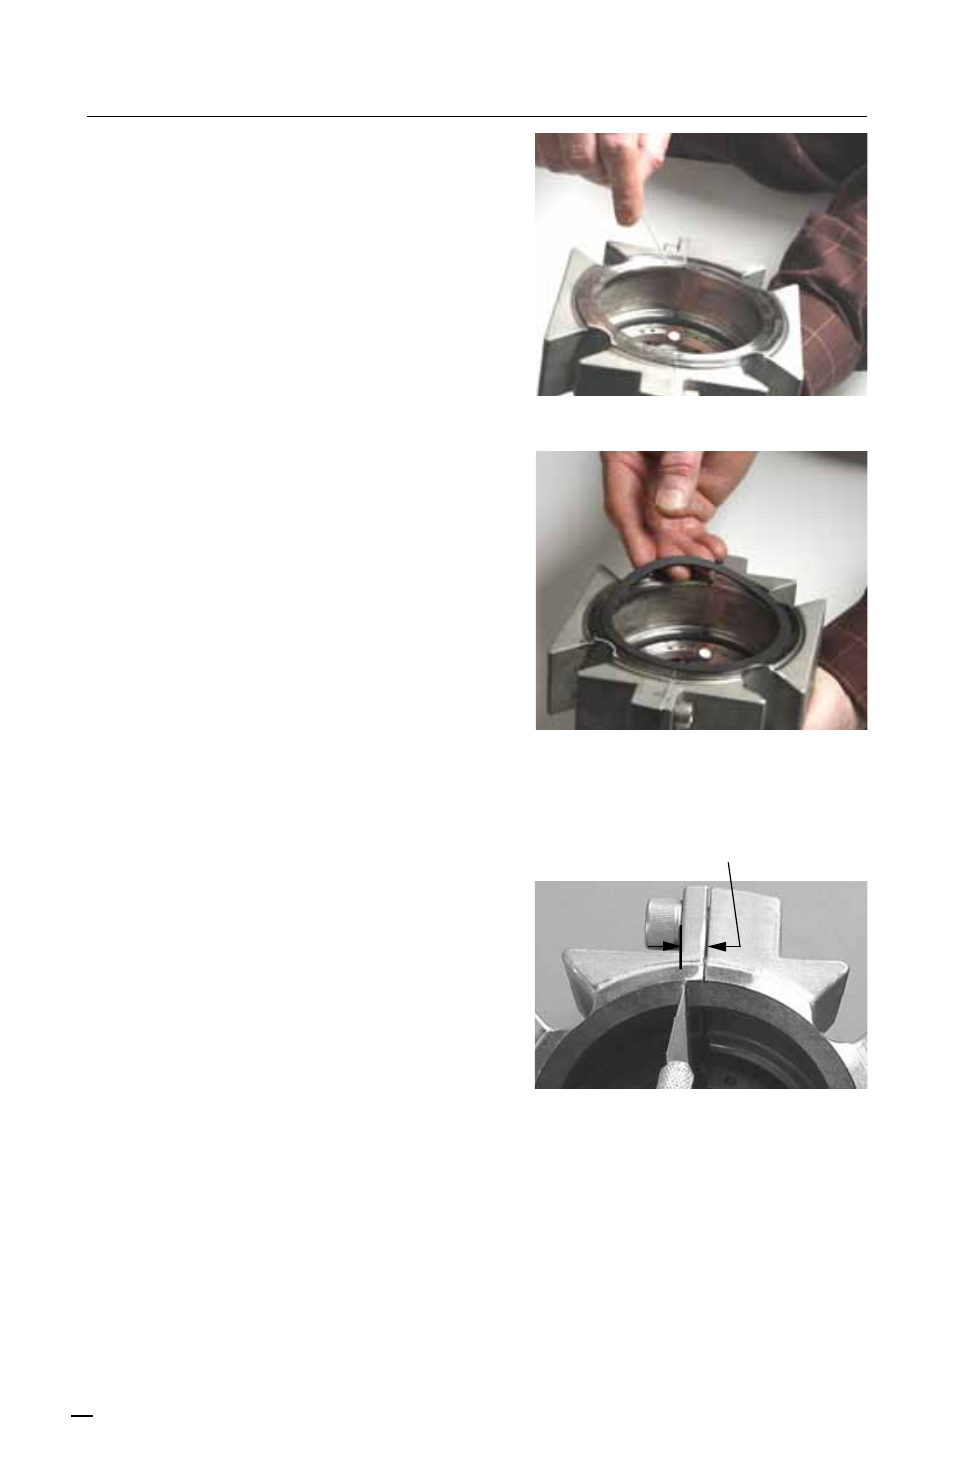
8.5 With the blade at a 20° to 30°
angle from the vertical cut the
gasket 3.0 to 3.8 mm (0.12 to
0.15 inch) from the one split joint.
Repeat on the opposite side, 180°
from the first cut.
See Figure 20 and 21.
Figure 18
Figure 19
Figure 20
3.18 - 3.81 mm
(0.125 - 0.150 inch)