Fitting options – Fronius Selectiva Plus (one-phase) User Manual
Page 34
4
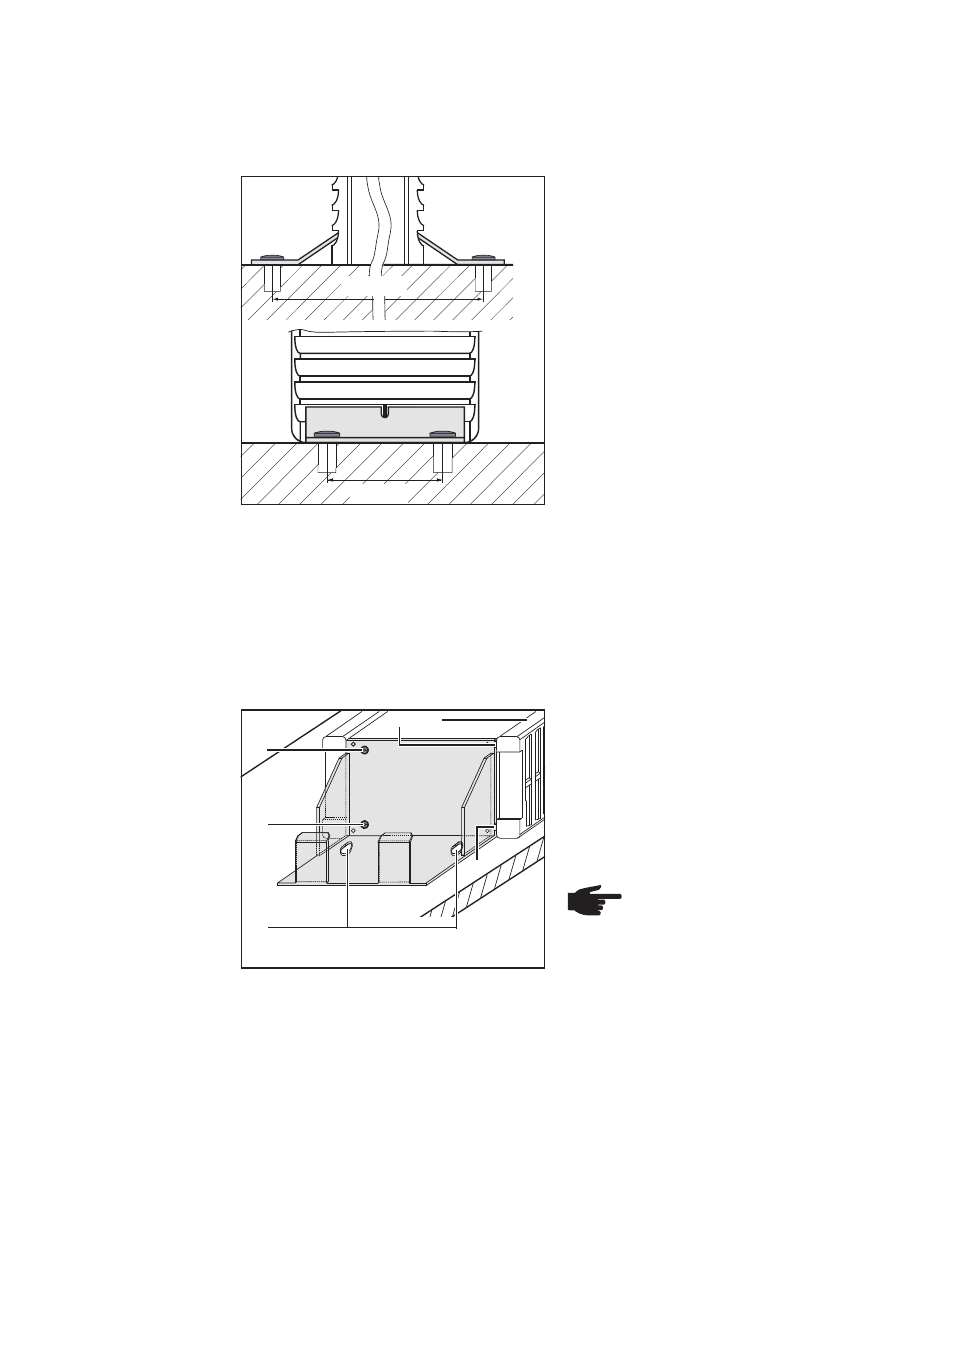
Fig. 2 Fitting to the floor
370 mm
42 mm
Fit the charger to the wall using the
optional wall bracket:
1.
Place the charger onto the bracket
(insert wall bracket lug (1) into slot on
the plastic front panel (2))
2.
Fasten the charger to the bracket
using the two screws supplied (3)
(diameter 3.5 x 9.5 mm)
NOTE! If fixing to the wall, please
note the weight of the charger.
Only fix to a wall that is suitable
to this purpose.
3.
The bracket is fitted using suitable
dowels and screws at the cut-outs (4)
(3)
(3)
(4)
(2)
(1)
(1)
Fitting options
Fitting to the
floor
Fit the charger to the floor using the
optional fitting brackets:
1.
Insert the fitting bracket into the left
and right-hand sides of the ventilation
grille on the charger’s front panel,
and do the same on the rear panel
2.
Mark the location of the holes on the
mounting surface (see diagram for
measurements)
3.
Drill holes
4.
Select the most suitable screws for
fastening the charger according to
the nature of the mounting surface
(diameter 5 mm)
5.
Fasten charger to the mounting
surface using fitting brackets, each
with two screws
Fig. 3 Mounting on the wall
Mounting on the
wall
Important! Observe minimum clearances for ventilation purposes. Ensure an adequate
supply of fresh air. To ensure an adequate supply of fresh air, leave a minimum gap of
50 mm to the left and right of the cooling vents.
Minimum clea-
rances