GAI-Tronics 12504-004 Repl. Door Handle Kit User Manual
Page 2
Pub. 42003-011B
M
ODEL
12504-004
R
EPLACEMENT
D
OOR
H
ANDLE
R
EPLACEMENT
K
IT
Page:
2 of 3
\\s_eng\gtcproddocs\standard ioms - current release\42003 kit manuals\42003-011b.doc
7/05
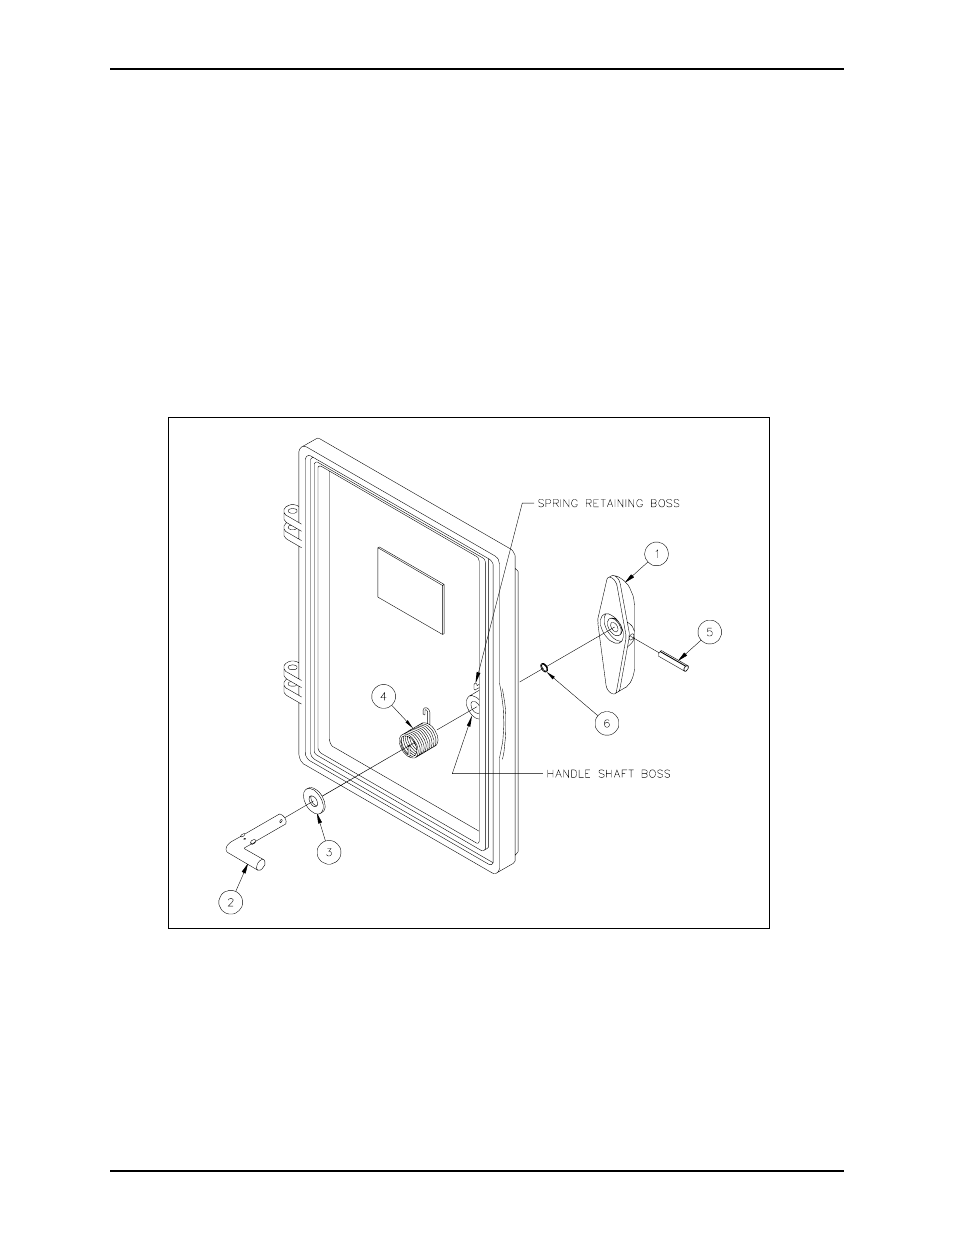
Installing the New Handle
1. Engage the looped arm of the torsion spring on the retaining boss on the inside of the door while
installing the spring over the handle shaft boss on the inside of the door.
New enclosures have an elbow-shaped retaining boss in which the looped arm is slid over and down on
the boss.
Older enclosures have a straight boss. After the looped arm is installed on the straight boss, apply heat
with a soldering iron to melt the top of the boss to secure the spring arm as shown in Figure 3.
2. Install the handle shaft through the flat washer and into the handle shaft boss as shown in Figure 1.
Make sure the flat washer is between the top of the handle shaft boss and the straight arm of the spring
as shown in Figure 2.
3. Install the O-ring onto the handle shaft on the front side of the door.
4. Position the handle of the shaft on the front of the door with the longer rib of the handle towards the
bottom of the door. Orient the shaft so that the latching leg of the shaft on the inside of the door is
positioned horizontally and pointing toward latch side of the door as shown in Figure 1. Align the
holes in the handle and the shaft. Install the roll pin through the handle and into the shaft hole so that
the amount of roll pin on each side of the shaft is approximately the same and does not protrude outside
the handle.
Figure 1.