Installing the 70v/100v option – GAI-Tronics 12832-002 Zone 2/22 ICS 70V/100V Upgrade Kit User Manual
Page 2
Pub. 42003-271A
M
ODEL
12832-002
Z
ONE
2/22
ICS
70
V/100V
U
PGRADE
K
IT
Page
2 of 5
f:\standard ioms - current release\42003 kit manuals\42003-271a.doc
03/14
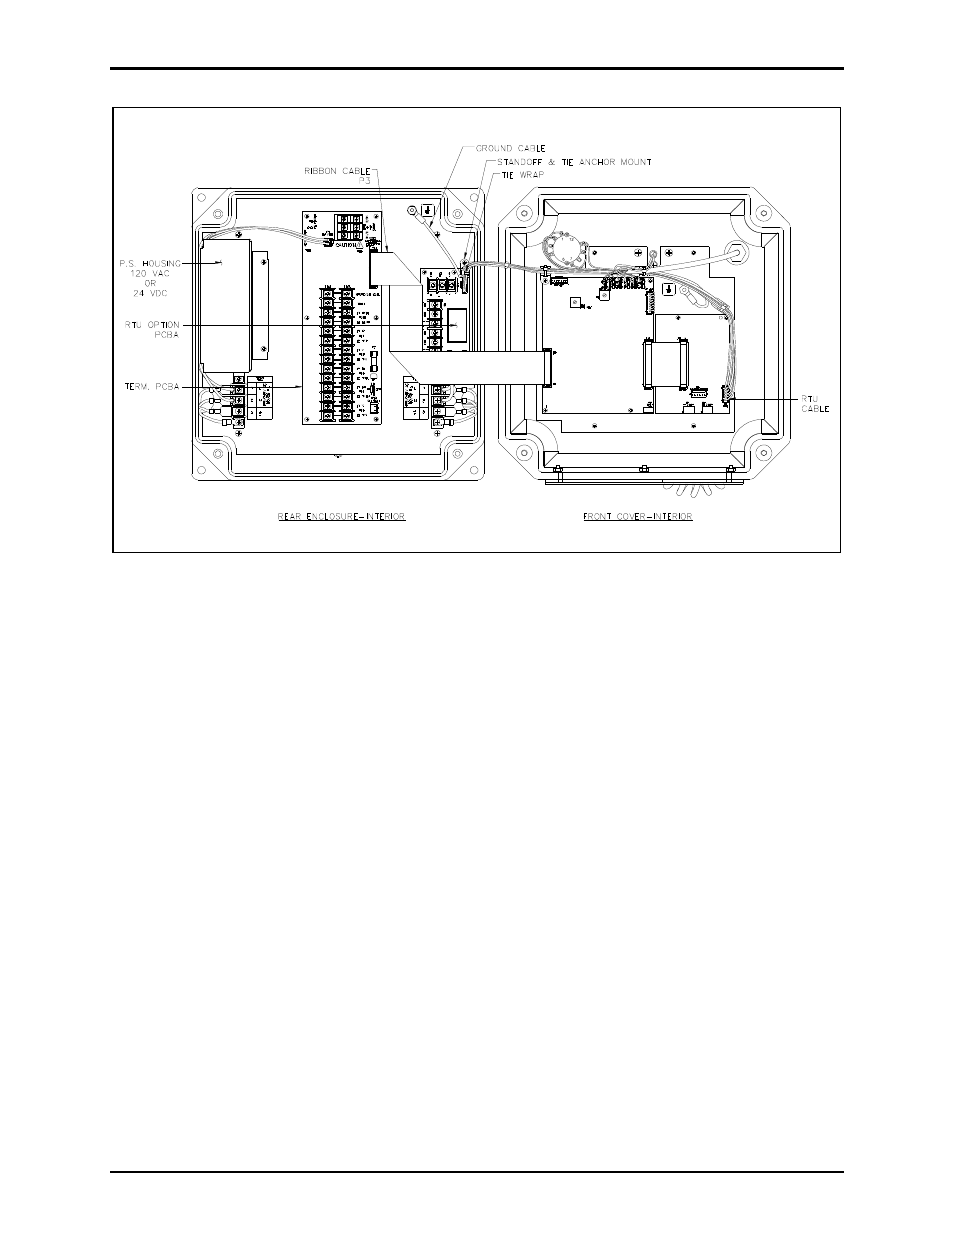
Figure 1. ICS Zone 2/22 Station – Interior View
Installing the 70V/100V Option
1. Cut the tie wrap that is securing the ground wire and RTU cable assembly (when applicable).
2. Remove standoff and tie anchor mount by removing the screw.
3. On the Termination PCBA, unplug the ribbon cable at P3 for easier access to the rear mounting plate.
4. When applicable, remove the four 4-40 screws that secure the RTU PCBA, the RTU PCBA and the
four 4-40
7/16-inch female/female standoffs from the rear mounting panel. Set these aside.
5. Attach two of the 4-40
1-3/16-inch male/female standoffs to the rear mounting panel. Attach the
bracket and toroid assembly to the rear mounting panel using the four 4-40 keps nuts if there is no
RTU option. See Figure 2.
6. If there is an RTU option, attach the bracket with two more 4-40
1-3/16-inch male/female standoffs.
Use the four 4-40
7/16-inch female/female standoffs to secure the bracket. Re-attach the RTU
PCBA to the standoffs and bracket using the 4-40 screws. See Figure 2.