Figure 1c-5, Top rear view of thc-2 c-6, Installation - pac-500 – Hypertherm THC2 Torch Height Control User Manual
Page 27: Thc-2 torch height control
Page 1c-6
THC-2 Torch Height Control
INSTALLATION - PAC-500
7.
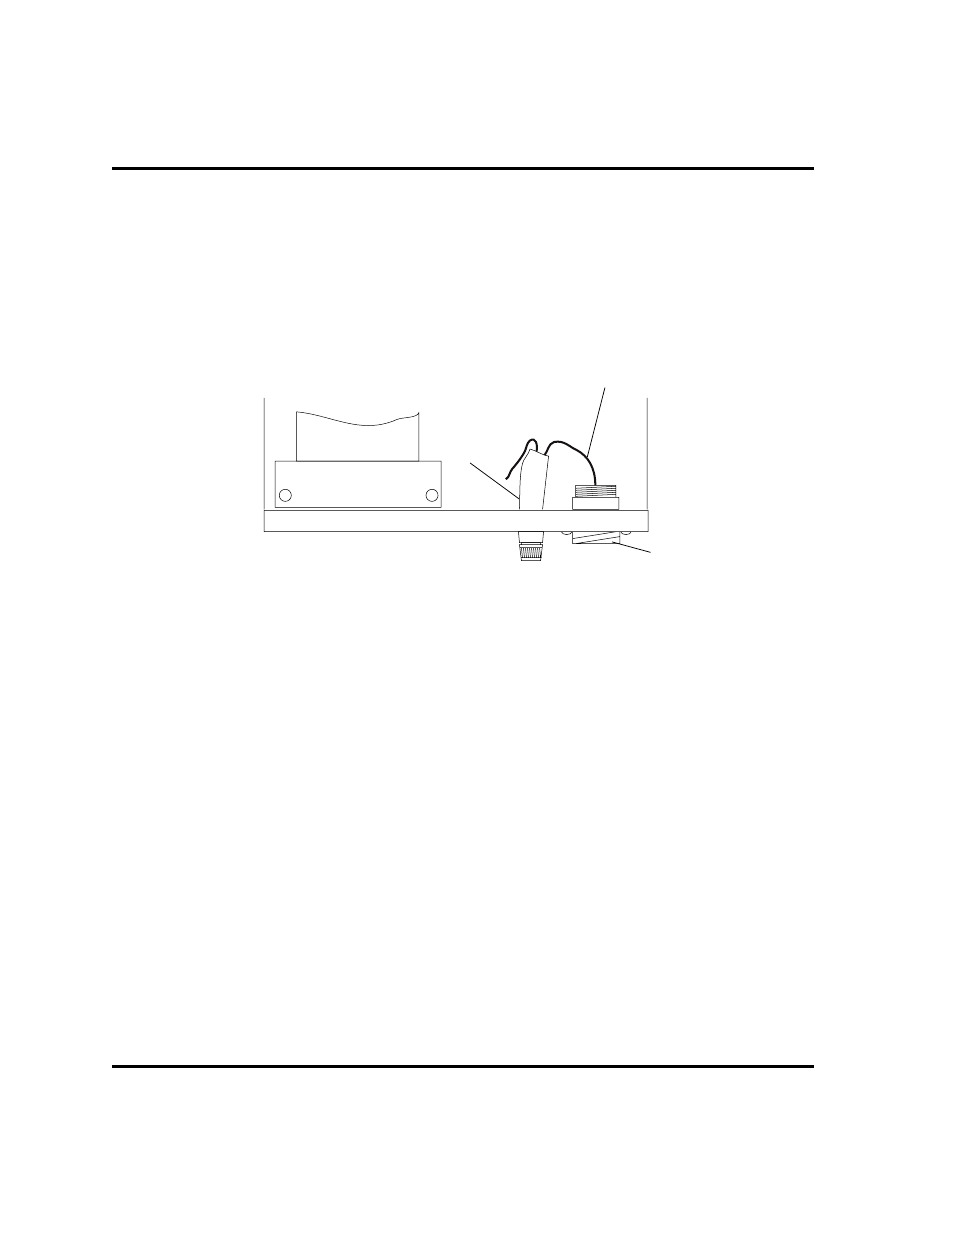
Pass the remaining end of the interconnect cable through the strain relief on the rear of
the THC-2 module.
8.
Facing the rear of the THC-2 module with the cover removed, look down inside the
module and observe where one of the wires from the THC-2 receptacle RECP2
connects to the rear-panel fuse (1FU) - Fig. 1c-5. Cut this wire and solder interconnect
cable wire labeled "1" to the end of the wire that goes to the fuse.
9.
Find the line filter (1F) on the inside of the THC-2 module - Fig. 1c-6. Solder interconnect
cable wire labeled "2" to terminal that has THC-2 wire labeled 102 connected to it.
10. Find the timer relay device (1TD) in the THC-2 - Fig. 1c-6. Attach interconnect cable wire
labeled "3" to timer relay terminal that has THC-2 wire labeled 108 connected to it.
11. Find the power supply (1PS) in the THC-2 - Fig. 1c-6. Attach interconnect cable wire
labeled "4" to power supply terminal that has THC-2 wire labeled 107 connected to it.
12. Find the 390
Ω
1/8 W resistor (R1) that THC-2 wire labeled 118 connects to - Fig. 1c-6.
Solder interconnect cable wire labeled "5" to the wire end of that resistor.
13. Find the big terminal strip (1TB) in the THC-2 module - Fig. 1c-6. Attach interconnect
cable wire labeled "6" to terminal 119 (ground).
This completes installation of the THC-2 to the PAC-500. See Section 2 for operation
instructions.
Figure 1c-5 Top Rear View of THC-2
RECP2
1FU
Cut and solder wire "1" here