Working steps after the milling process, Finishing – Ivoclar Vivadent Zenostar User Manual
Page 16
16
Working steps after the milling process
Finishing
Selecting the correct grinding instruments for adjusting and finishing Zenostar restorations is of essential importance. This is true
for both sintered and non-sintered objects. If unsuitable grinding instruments are used, for instance chipping of the edges and/or
localized overheating may occur.
When separating the milling discs,
generally observe the following points:
Non-sintered zirconia restorations are susceptible to damage and fractures. Keep this
fact in mind during all further processing steps.
Any adjustments involving the use of milling equipment should be performed while
the material is still in its non-sintered state.
IAny contact with liquids (e.g. water and/or oil coolant and/or contact media (such as
occlusion sprays) must be avoided. Only use suitable grinding instruments, low speed
and light pressure to prevent chipping and broken-off pieces, particularly at the
margins.
Do not use fine rubber polishers for finishing restorations that will be customized with
an infiltration solution. Fine rubber polishers densify the surface structure and may
result in an uneven shading of the restoration.
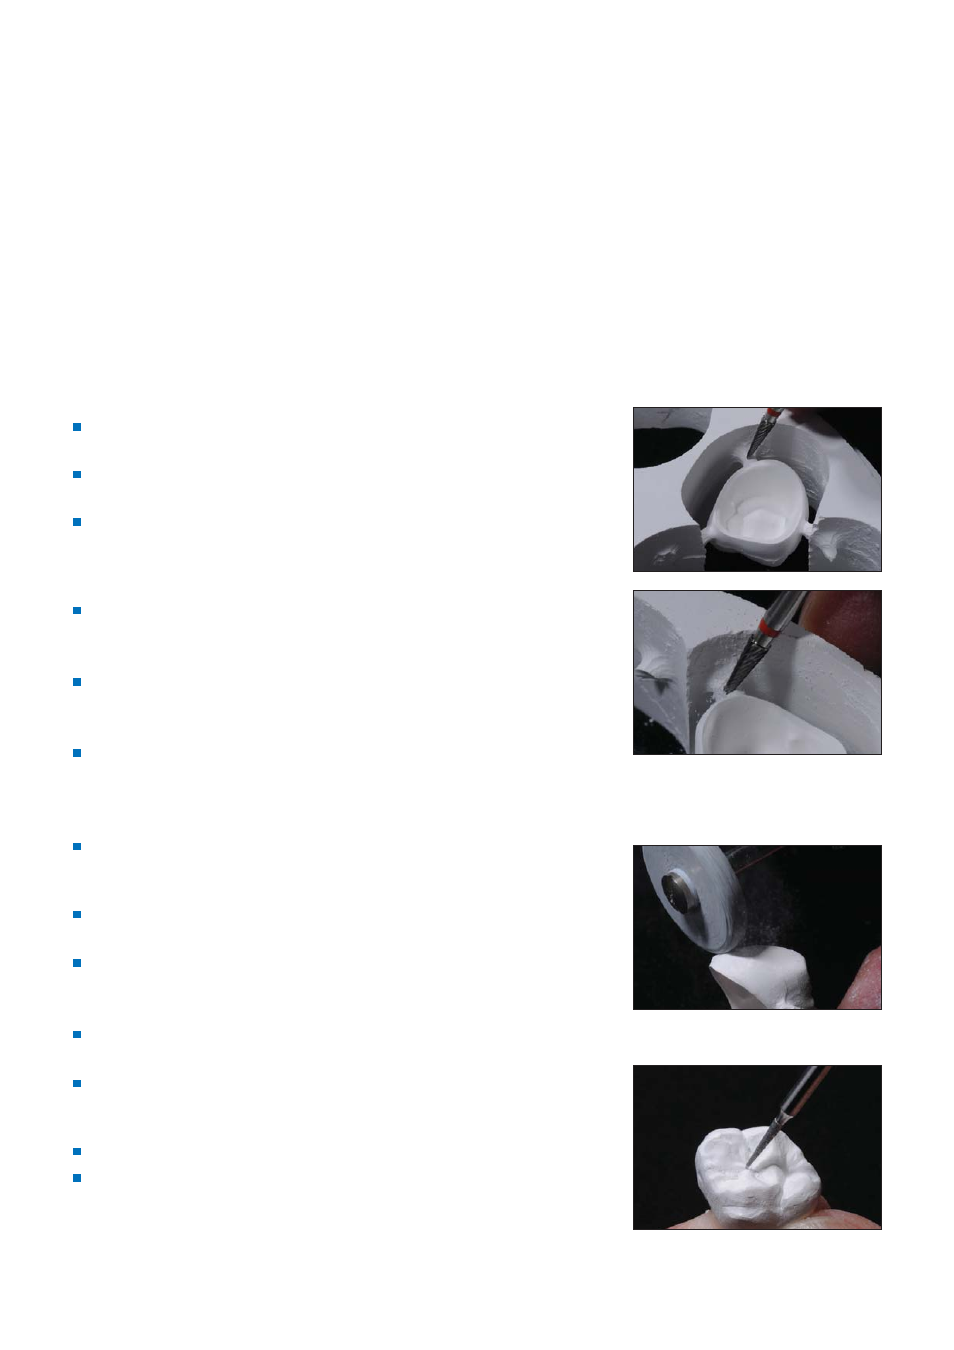
Carefully separate the milled objects from the disc using a separating disc or a suitable
grinding instrument. Smooth out the attachment point of the holding pins using
suitable grinding instruments.
Rough tungsten carbide burs and/or rough grinding instruments are suitable to only a
limited extent because they may cause vibrations during finishing and this may result in
chipping. Therefore, it is advisable to use only fine tungsten carbide burs and/or fine
grinding instruments.
Do not "post-separate" bridge constructions with separating discs. This may result in
predetermined breaking points on the connectors and undermine the stability of the
all-ceramic restoration.
Make sure that the minimum wall thicknesses are maintained after adjusting and
finishing the restoration.
In the non-sintered state, the marginal areas must be given special attention. Too thinly
ground margins are unsuitable for sintering, since the marginal area is rounded out
during the sintering process and will become too short.
Thoroughly clean the restoration after finishing. To remove any milling dust, carefully
clean the restoration with oil-free compressed air and/or a soft brush.
Make sure to completely remove all traces of milling residue (e.g. milling dust) from
the restoration prior to sintering. Milling dust sticking to the restoration may become
fused to the restoration and compromise the accuracy of fit.
Do not use steam or an ultrasonic bath to clean non-sintered restorations.
Do not blast the restoration with corundum or glass polishing beads.
Separating the restoration with
cross-cut tungsten carbide burs or
other suitable grinding instrument
Re-contouring the fissures (optional)
Smoothing out the attachment point of
the holding pin