Legrand WKD Pro Series System User Manual
Page 7
7
INSTALLING 275SR/275SL ADAPTER:
1.
Position long narrow legs at 45° angle to box opening, insert end of
narrow leg into box opening, and rotate part into opening.
2.
Install adapter by striking part with hammer until fully inserted into
opening.
3.
Slide duct into opening until duct hits duct stop.
4.
Install grounding clips as required.
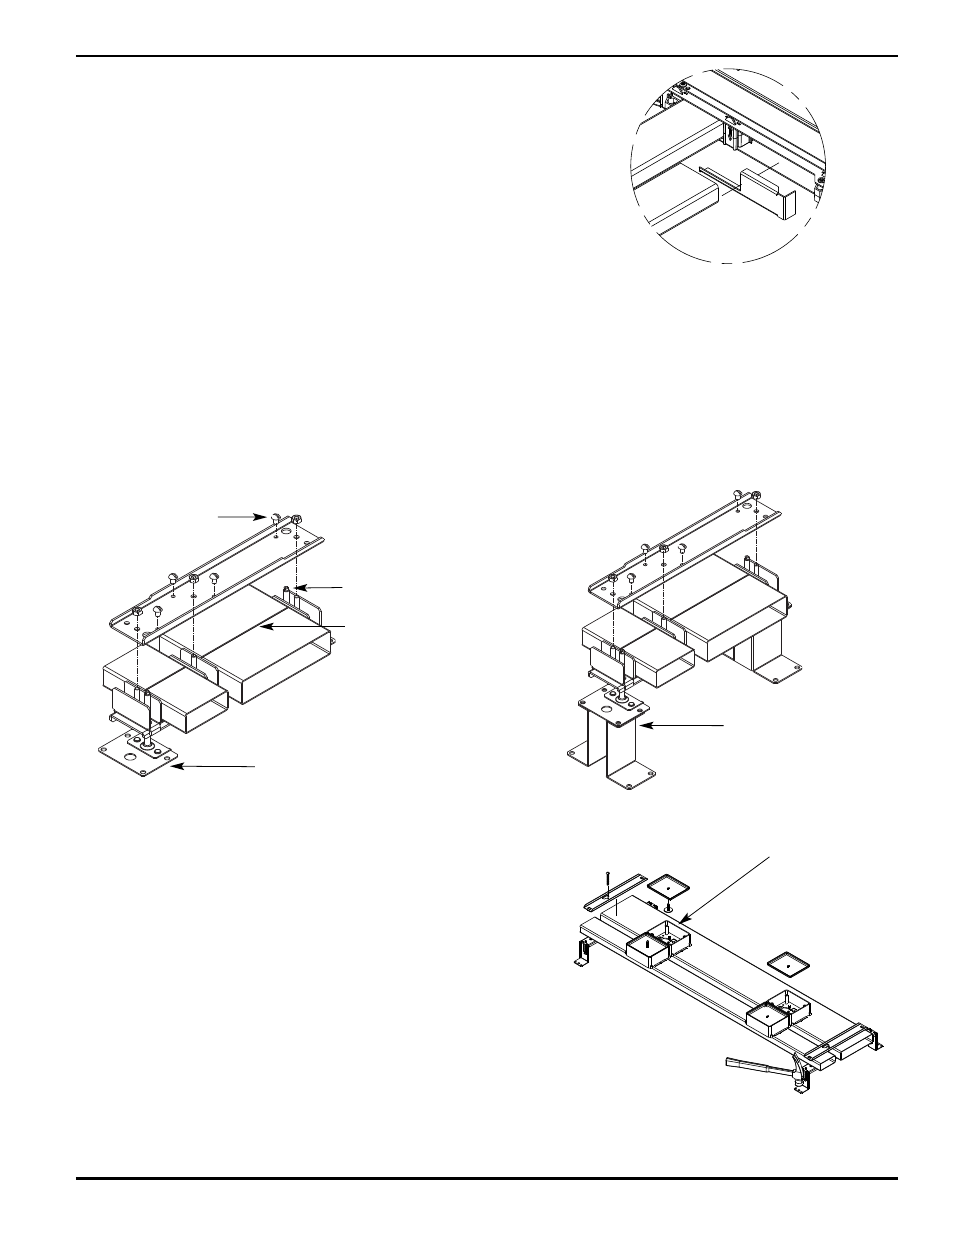
INSTALLING ADJUSTABLE DUCT SUPPORT/COUPLINGS:
1.
Either duct support/couplings or hold down straps are used to hold the
duct securely in place as well as coupling ducts together before and
while the concrete is poured.
2.
Duct supports are designed to accommodate single or multiple ducts.
Leveling screws, operated from above, provide vertical adjustment and
legs of different heights are furnished to meet varying slab thickness.
Duct support top member feature bonding screws to provide ground
continuity across duct junctions.
3.
It is recommended that supports be used 5' [1.5m] from junction boxes
and at 5' [1.5m] intervals from couplings.
4.
After all duct supports are in place, line up the duct runs between the
boxes and secure the duct to the slab or form by driving studs or nails
through holes in duct support feet. Nails or studs should be securely
fastened to form or slab.
INSTALLING SC SERIES ADJUSTABLE DUCT SUPPORTS:
1.
SC Series Adjustable Duct Supports are used to hold the duct securely in place before and while the concrete is poured. They
also can serve as a coupling to join two lengths of ducts.
2.
Duct supports are designed to accommodate single or multiple ducts. Leveling screws, operated from above, provide vertical
adjustment. Leveling screws of different heights are furnished to meet varying slab thickness. Bonding screws installed in top
bridge member provide ground continuity across duct joints.
3.
It is recommended that supports be used 5' [1.5m] from junction boxes and at 5' [1.5m] intervals.
4.
After all duct supports are in place, line up the duct runs between the boxes and secure the duct supports to the slab or form
by driving studs or nails through the holes in the duct support leveling feet. Nails or studs should be securely fastened to form
or slab.
Align Walkerduct Pro Series presets within
1/8" [3.2mm] before securing supports.
Pro Series Preset
Bonding Screw
(12 per Duct Joint)
Leveling Screw
(12 per Duct Support)
Duct Joint
Leveling Foot
(12 per Duct Support)
Deep Pour Adapter &
Leveling Foot Assembly
(12 per Duct Support)
-18", -33", & -48" INSTALLATION
-58", -73", & -88" INSTALLATION