Nuvo ESSENTIA NV-E6GXS User Manual
Page 22
18
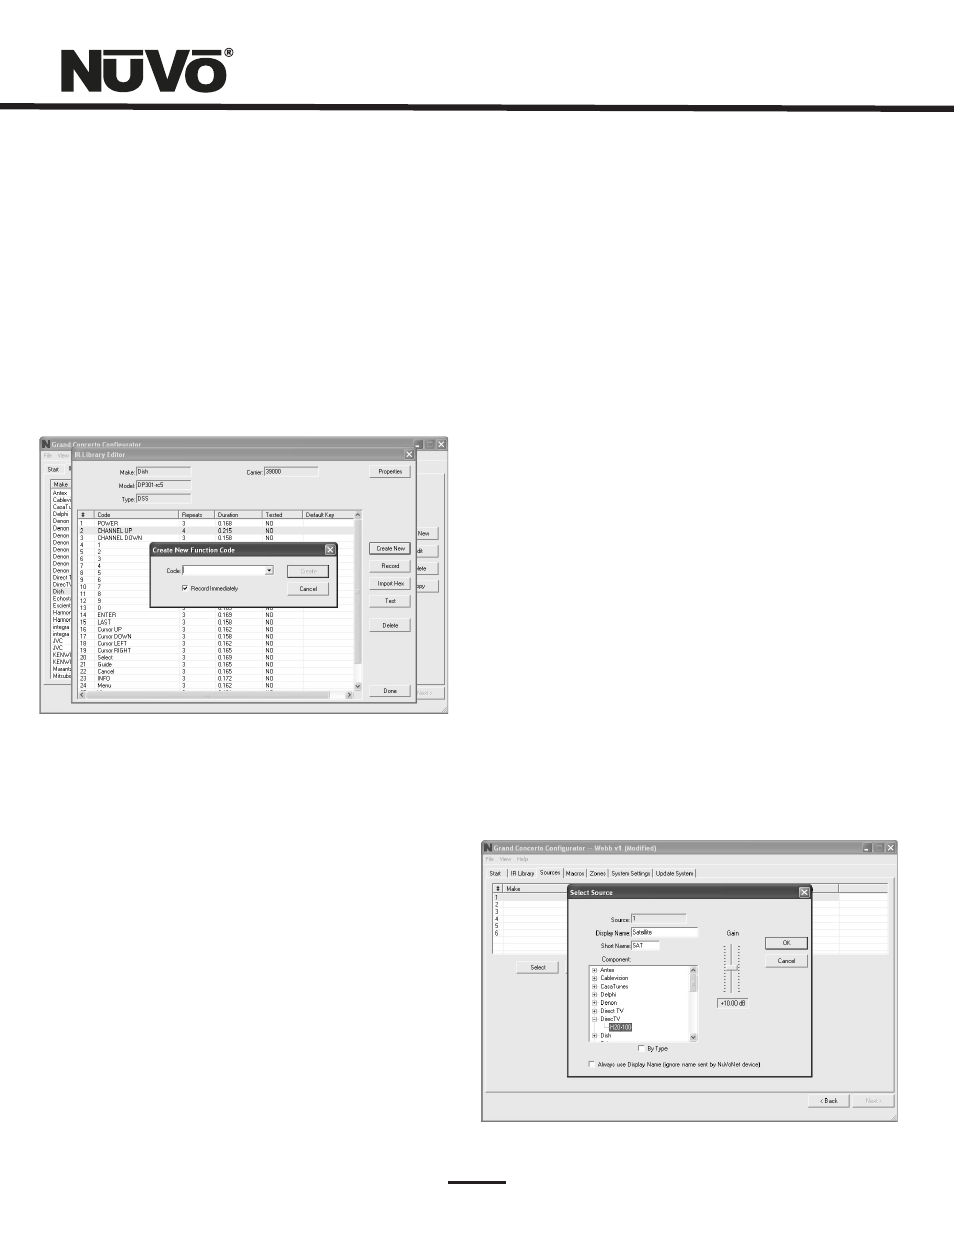
2.5 Adding a Function Code (Fig. 17)
If a required IR function is not in the list of those provided in
the library template, it is possible to add a code to the list
by clicking the “Create New” button. The pull-down menu
contains a list of all standard IR codes. A name not found in
the list can be typed in, but it is recommended that you use
the names provided in the list. This conserves memory in the
Grand Concerto. Clicking on the “OK” button proceeds
directly to the IR recording process.
Fig. 17
2.6 Cleaning Up an IR Library
Unused IR codes can be deleted from the list by highlighting
the code and either clicking the ”Delete” button or right-
clicking and selecting “Delete.”
When you are finished editing the library, select “Done.”
3. Defining Sources
The “Sources” tab allows you to define the source
component attached to each of the six source inputs. All six
sources are not needed, but at least one source must be
defined.
3.1 Select or Edit Source (Fig. 18)
Double-clicking on a blank source will open the “Select
Source” window. This window assigns the appropriate source
number input. The “Display Name” is the text that will be
read on the Control Pad when that source is selected in any
zone. The display name can contain only capital letters,
numbers, and some punctuation. If an invalid key is typed, it
will be ignored.
The “Make” field defines the manufacturer of the
equipment. A drop-down menu allows you to choose a
source from the IR Library. The “Model” field provides a
drop-down menu that allows you to choose the specific
piece of source equipment from the selected manufacturer.
An important feature of the “Select Source” window is the
“Gain” level control. Different pieces of source equipment
tend to have different levels of audio output signal. This
slider control allows you to compensate for equipment that
has an inherently lower volume level. By using this
adjustment, when switching between sources, relative
volume levels remain constant.
When the appropriate information has been completed, click
“OK.” This will add the updated source information to the
“Source” window. When all the desired sources have been
defined, go to “Next” and proceed to the “Macros” setup.
Fig. 18