2 dmx/mem switch connect loss action, 7 dmx alarm, 5 memories menu – LSC Lighting TEKO User Manual
Page 19: 1 recording memories, Ction, Dmx/mem switch connect loss, Action, Dmx alarm
TEKO Dimmer
Operator Manual V3.0
To instantly set the fader to 100% press the
[100%] button above the fader.
To quickly set the selected channel(s) to a
specific level press [@ Level]. Enter the level on
the keypad that appears then press [Set].
When the channel levels of the “Backup
Memory” are correct, press [Save Memory], or
to cancel the changes that you have made and
return to the previous Backup memory, press
[Cancel Memory].
When finished press; [Done] [Done]
[Done].
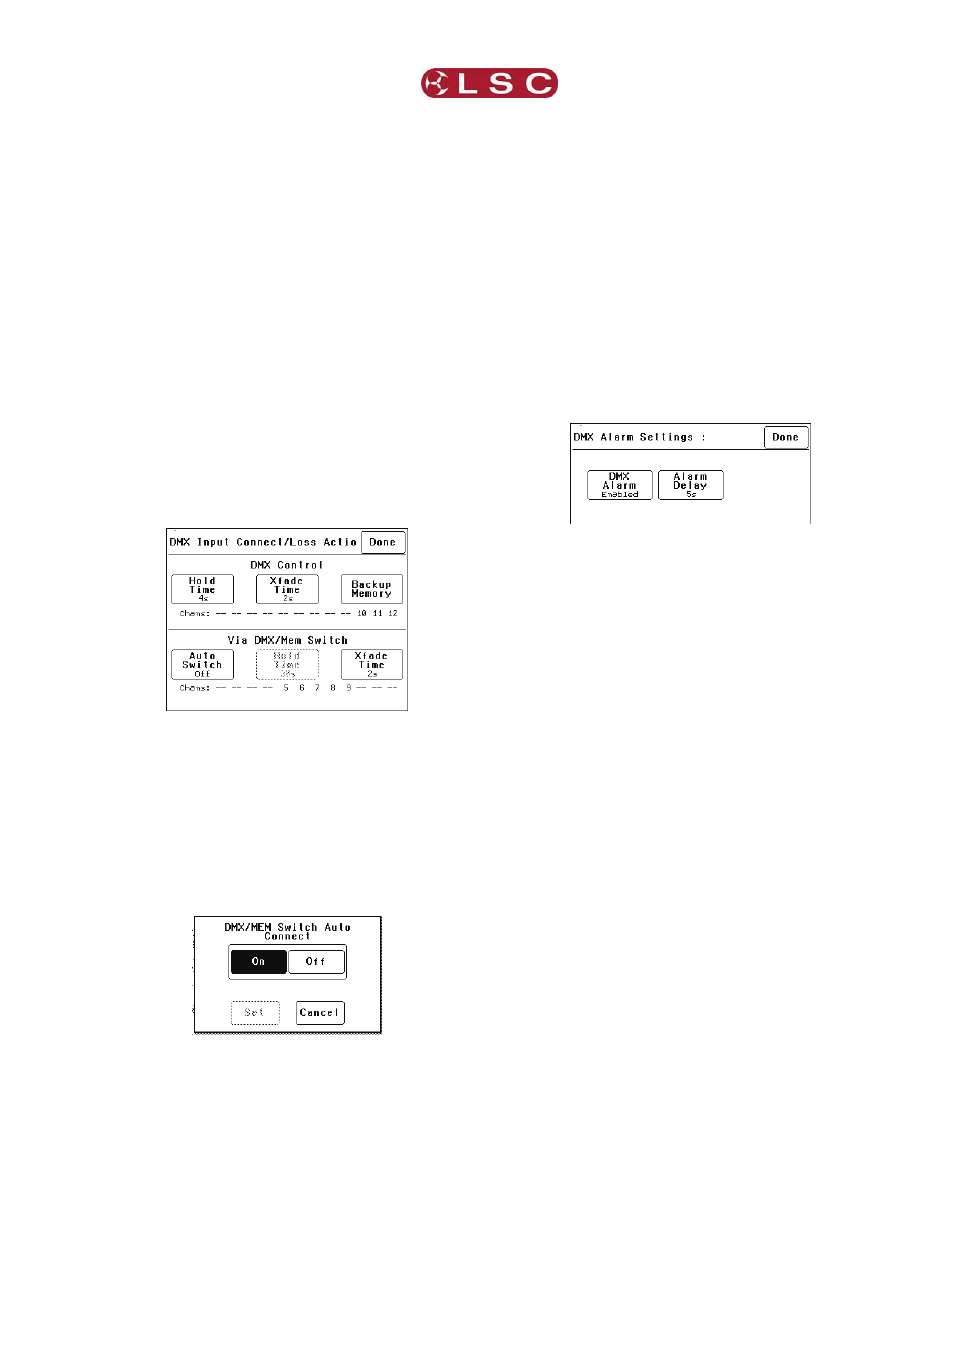
5.4.6.2 DMX/MEM SWITCH CONNECT
LOSS ACTION
In the event that the DMX input signal is lost, the
“DMX/MEM Switch” can be configured to
respond in different ways.
Press;
[Menu] [DMX Input] [Connect Loss Action].
Note: If [Auto Switch] is greyed out (not
available), then playback via LSCnet has
been disabled from the options menu. This
option can be selected when the TEKO is
ONLY to be controlled by DMX. See “Options
Menu” for details.
Pressing [Auto Switch] allows you to turn “Auto
Switch” On or Off.
Make your choice then press [Set].
If Auto switch is On, then if a valid DMX signal is
connected to the TEKO, the DMX/MEM Switch
will operate and all dimmer channels whose
control source is set to “switch” will cross fade to
DMX control in the time set by the [Xfade Time]
button. This crossfade can be from 0 to 300
seconds (5 minutes).
Note: The DMX/MEM Switch can also be
manually operated from either a suitably
programmed ePlate button or from the LCD
touch screen by pressing [Menu] [Net Setup]
[DMX/MEM Switch].
Pressing [Hold Time] allows you to set the time
that the DMX/MEM Switch will remain in the
DMX position if the DMX signal is lost (if it has
been automatically operated by the presence of
a DMX signal). The Hold Time can be set from 0
to 999 seconds (over 15 minutes) or to Infinite. If
a “Hold Time” other than “Infinite” has been set,
the channels will crossfade to their current
“Memory” settings after the Hold Time expires.
5.4.7 DMX Alarm
Selecting [Menu] [DMX Input] [DMX Alarm]
reveals the following screen.
Pressing [DMX Alarm] allows you to “Disable” or
“Enable” the DMX alarm that occurs whenever
there is no valid DMX signal present.
The “DMX Alarm” is usually disabled when the
TEKO is only to be controlled by ePlates.
Pressing [Alarm Delay] brings up a keypad
screen where you can enter the delay time
between when the TEKO is turned ON and
when the “No DMX alarm” occurs. The time can
be set from 0 to 300 seconds or “infinite”.
Setting the “Alarm Delay” time to be slightly
longer than the “boot up” time of your DMX
lighting controller will prevent unwanted alarms
when both the TEKO and Lighting Controller are
switched on at the same time.
5.5 MEMORIES MENU
Selecting [Menu] [Memories] provides menus
for;
Recording
Memories
Editing
Memories
Copying
Memories
Deleting
memories
A TEKO dimmer can hold up to 80 memories.
Each memory only contains the intensity levels
for the dimmer channels that you select when
you record (or edit) that memory. If a channel is
not selected in a memory then recalling that
memory will never affect that channel. Selected
channels in a memory can have any level from
0% to 100%.
Memories are recalled from ePlate wall stations.
5.5.1 Recording Memories
Press: [Menu], [Memories].
LSC Lighting Systems (Aust) Pty. Ltd
Page
17