Connection to the hardware, Start to use ladibug – Lumens Technology Ladibug 3.0 User Manual
Page 9
8
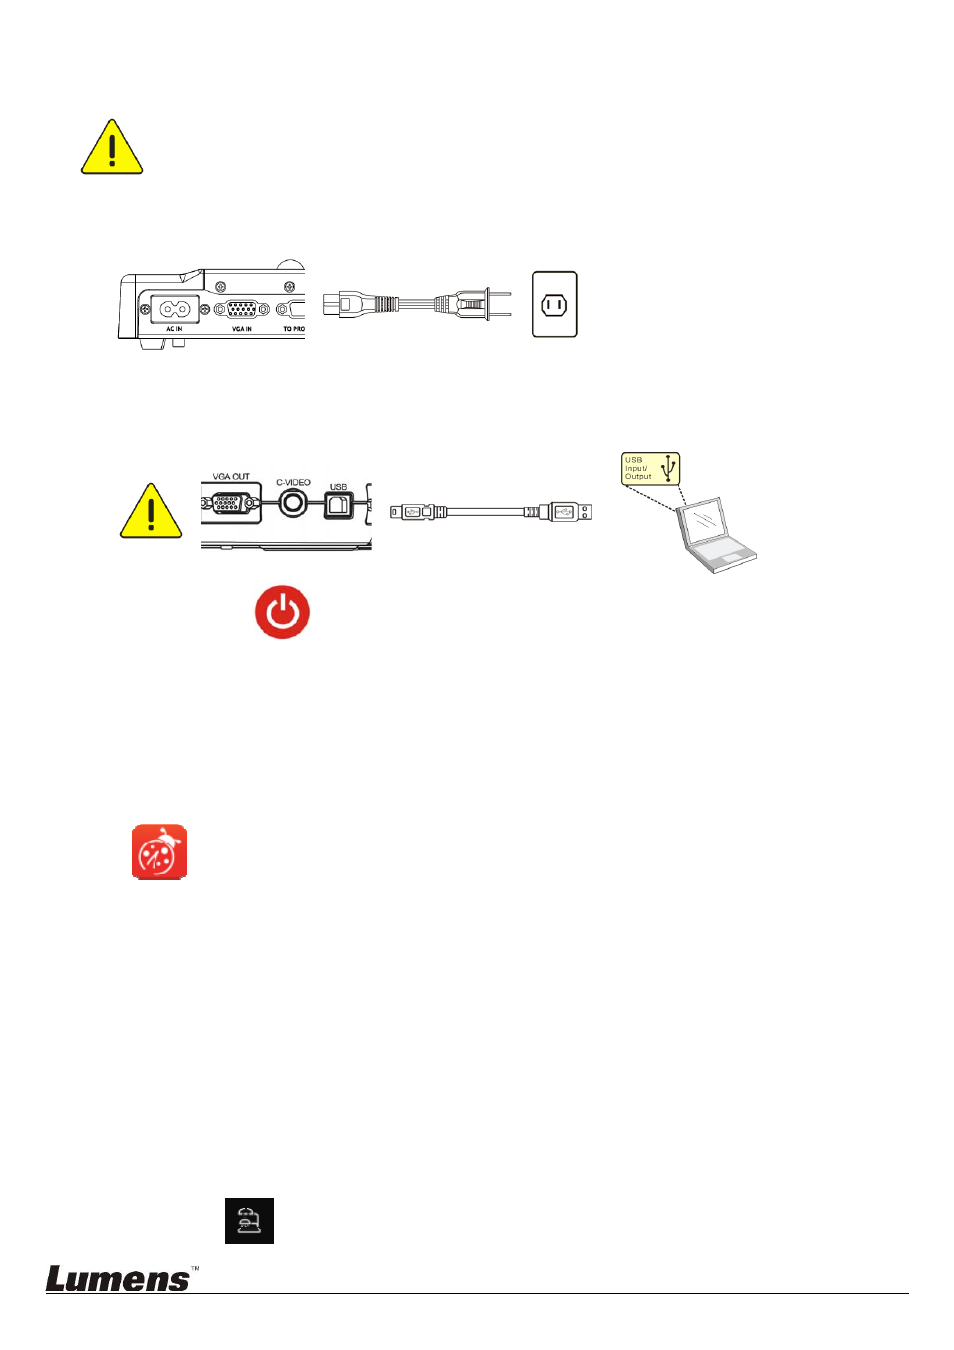
4. Connection to the Hardware
<Very Important> To ensure successful installation, please follow each of the
following steps.
4.1. Connect the power cord of the Document Camera.
AC outlet
<Note> Appearance may vary depending on country/region.
4.2. Connect USB cable to the Document Camera and your computer.
4.3. Turn on Power
.
5. Start to Use Ladibug™
Instructions for connecting Ladibug to the camera are provided below:
5.1. Use the USB cable to connect the camera to the computer
5.1.1.
Double-click the [Ladibug] icon to launch Ladibug™.
5.1.2.
If firewall warning occurs in the first use, please check the [LAN] and then press [Allow
to Access]
.
Safety Alert: Click [Unblock].
POWER Frequency setting page, please complete the settings following the instructions
on the screen.
A live image is displayed when the setting is finished.
Note: You are advised to confirm the local voltage/frequency before setting the POWER
Frequency. For example, 60 Hz is applicable for America, Taiwan, Japan, etc; 50 Hz is
applicable for Europe or other regions.
5.1.3.
Start Using.
Note: If no image is displayed, follow the instructions to establish a connection:
Click
,
open [Search Window], and select [USB Document Camera].