NIStune Type 3 User Manual
Page 7
Type 3 Hardware Installation Manual
Page 6 of 12
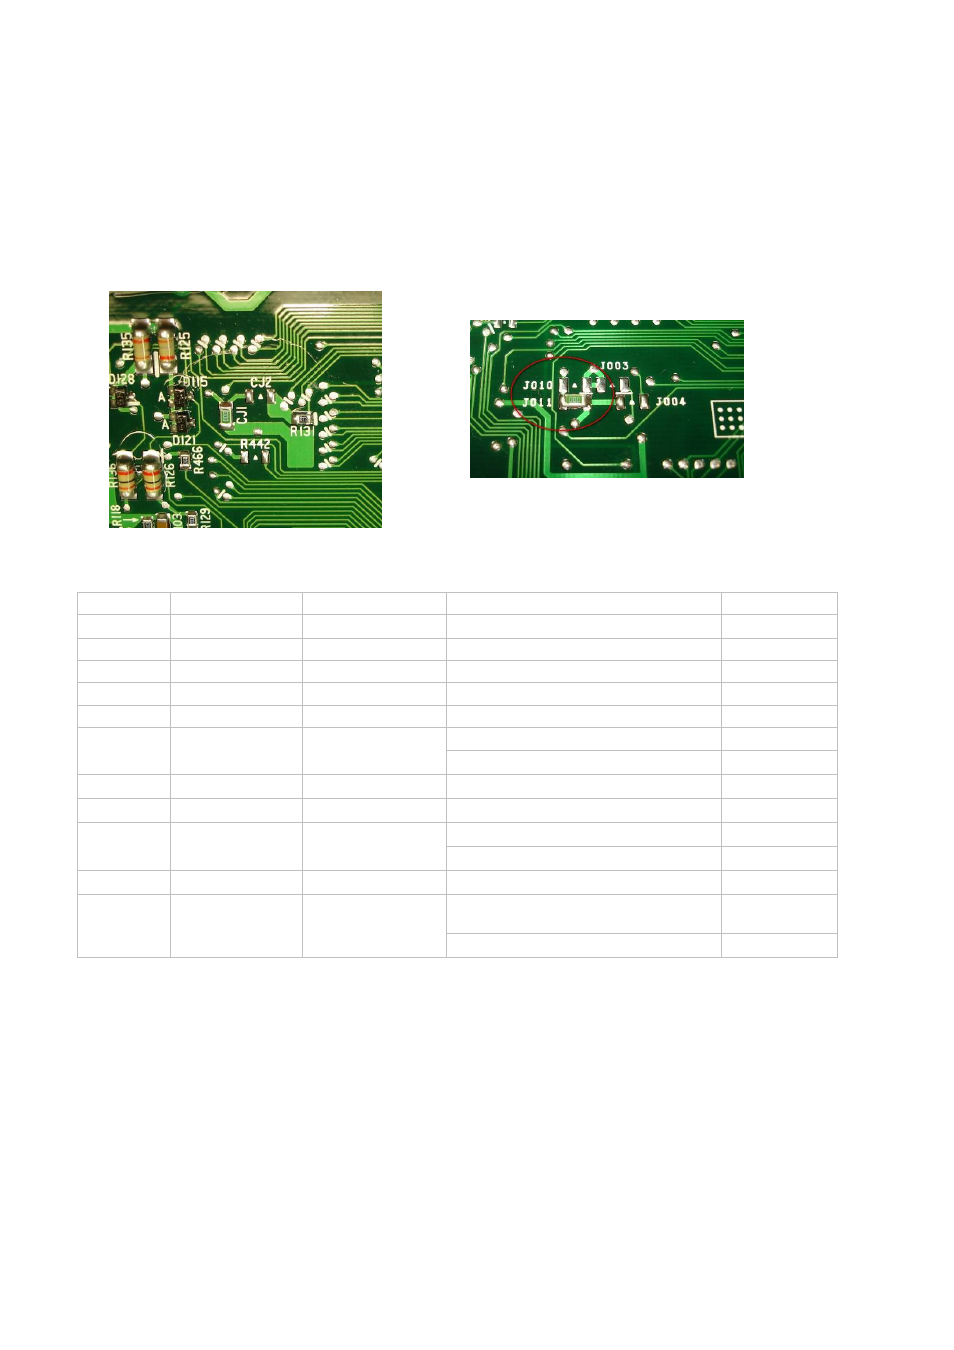
2. CHANGE ECU JUMPER SETTINGS
Jumpers are used on the ECU to tell the microcontroller to read from either factory code (located in a
memory chip on the ECU main board) or from the Nistune daughterboard. You will need to move the
jumper on the ECU so that it will read from the Nistune board
The easiest way to move the jumper is to melt the solder on both ends at once by using the de-soldering
iron one end and soldering iron the other. The jumper may be replaced with a small piece of wire if you
want. Jumpers are on the rear of the ECU mainboard in most cases.
Model
Name
Engine
ECU Series
Jumper
S13
180SX
SR20DE, DET
52Fxx, 50Fxx
CJ1 > CJ2
S13
240SX
KA24DE
53Fxx, 54Fxx, 59Fxx
CJ1 > CJ2
W10
Avenir
SR20DET
95Nxx
CJ1 > CJ2
U12/13
Bluebird
SR20DET/KA24DE
79Exx, 1E0xx, 4E6xx, 3E6xx, 1E4xx
CJ1 > CJ2
S14
Silvia (early)
SR20DET
69Fxx, 74Fxx, 75Fxx
J011 > J010
64Yxx, 67Yxx, 70Yxx, 71Yxx, 78Cxx
CJ1 > CJ2
B13
Sentra/NX2000
SR20DE
94Yxx
CJ1 > CJ2
N14/15
Pulsar
SR18DE, SR20DE
58Yxx, 68Cxx, 1N960
CJ1 > CJ2
RNN14
Pulsar GTiR
SR20DET
54Cxx, 69Cxx
CJ1 > CJ2
45Pxx, 51Pxx, 52Pxx
CJ1 > CJ2
Z32
300ZX late
VG30DE(TT)
53Pxx
J001 > J002
J30
Maxima
VE30DE
97Exx
CJ1 > CJ2
62Jxx, 70Jxx, 71Cxx, 77Jxx, OJ26x,
OJ27x
CJ1 > CJ2
P10
Primera
SR20DE
83Jxx
CJ1 > CJ2