Niveo Professional NNAS-R8 User Manual
Page 2
- 2 -
4. Smart Function Front Panel – for NAS System Configuration and Information
The smart LCD front panel is an option to configure or show information of NAS system.
If you are configuring the system using the LCD front panel, press the Select button to login
(LCD login password is 00000000).
Parts
Function
Exit button EXIT
Press this button to return to the previous menu.
Select button
This is used to enter the option you have selected.
Up and Down
Arrow buttons
Use the Up or Down arrow keys to go through the
information on the LCD screen. This is also used to move
between each menu when you configure the subsystem.
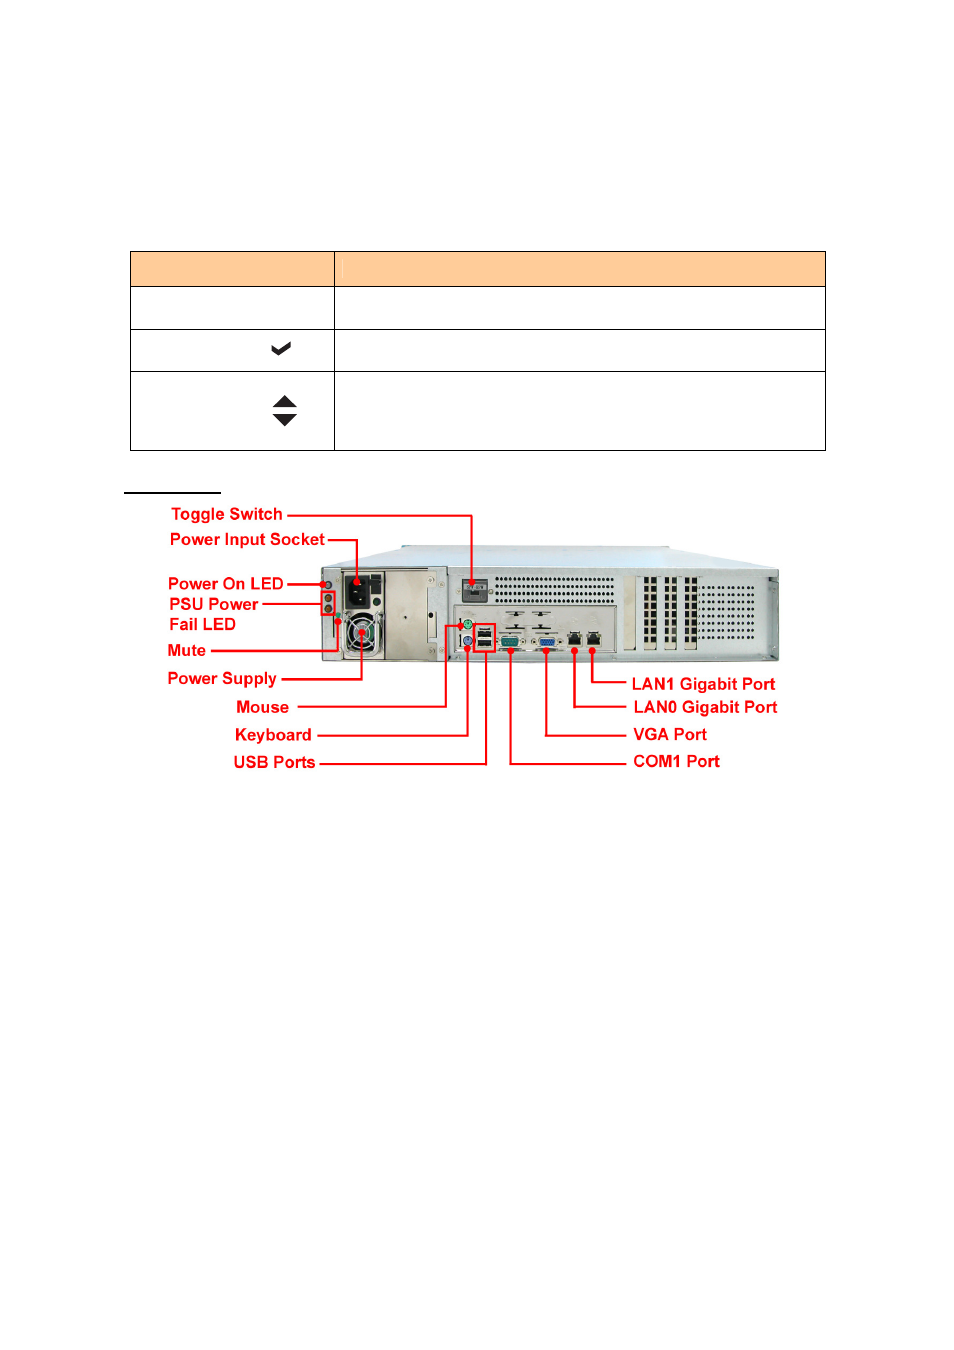
Rear View
1.
Power Input Socket - Use this to connect the power cord connected from power source.
2.
Power Supply – The NAS system has one supply.
3.
USB Ports – The NAS system has two USB 2.0 ports.
4.
LAN0 and LAN1 Gigabit ports – The NAS system has two Gigabit data ports. LAN0 is also
used for connecting to the NAS management GUI.
5.
VGA Port – The NAS system has VGA port for connecting a VGA monitor.
6.
Keyboard - The NAS system has PS/2 keyboard port for connecting PS/2 keyboard.
7.
COM1 – The NAS system has one serial port.
8.
Mute – Use this button to mute the alarm when a PSU fails in Redundant Mode.
9.
PSU Power Fail Led – The LED will turn red when a PSU fails in Redundant Mode.
10.
Toggle Switch - This is used to change the power supply mode, from Single Mode to
Redundant Mode, and vice versa.
B. Preparing and Using the NAS System
1.
Connect power cord to Power Input Socket, and connect LAN cable (LAN cable for LAN0 is
required, while LAN1 is optional).
2.
Prepare all disk drives and install in the disk trays. Insert the disk trays in the NAS system.
3.
Power on the NAS by pressing the Power On/Off Switch on the front side.