Niveo Professional NNAS-R8 User Manual
Page 5
- 5 -
3.
In the LV Configuration screen, enter the LV name (e.g. vol1) and the LV capacity in the
“Used/Total Size” box (check the Free Volume Group Size for the available capacity), and click
“Save”.
4.
Select Share Manager. Click “Add New Share”.
5.
Enter the Share Name (e.g. data1), select “proNASVG” in Volume Group, select LV name (“vol1”)
in Volume. Click “Save”. The share “data1” is created.
NOTE: The share name, such as “data1”, is the share folder accessible in the network.
By default, share folders are accessible from Windows clients (CIFS protocol is enabled and
Samba service is running) using local NAS accounts. And local NAS accounts have access
permission to share folders.
VII. How to Join the NAS to Windows AD Domain or NIS Domain
A.
Authentication via Windows
Active Directory
Sample Steps to Join the NAS to
Windows AD Domain:
1.
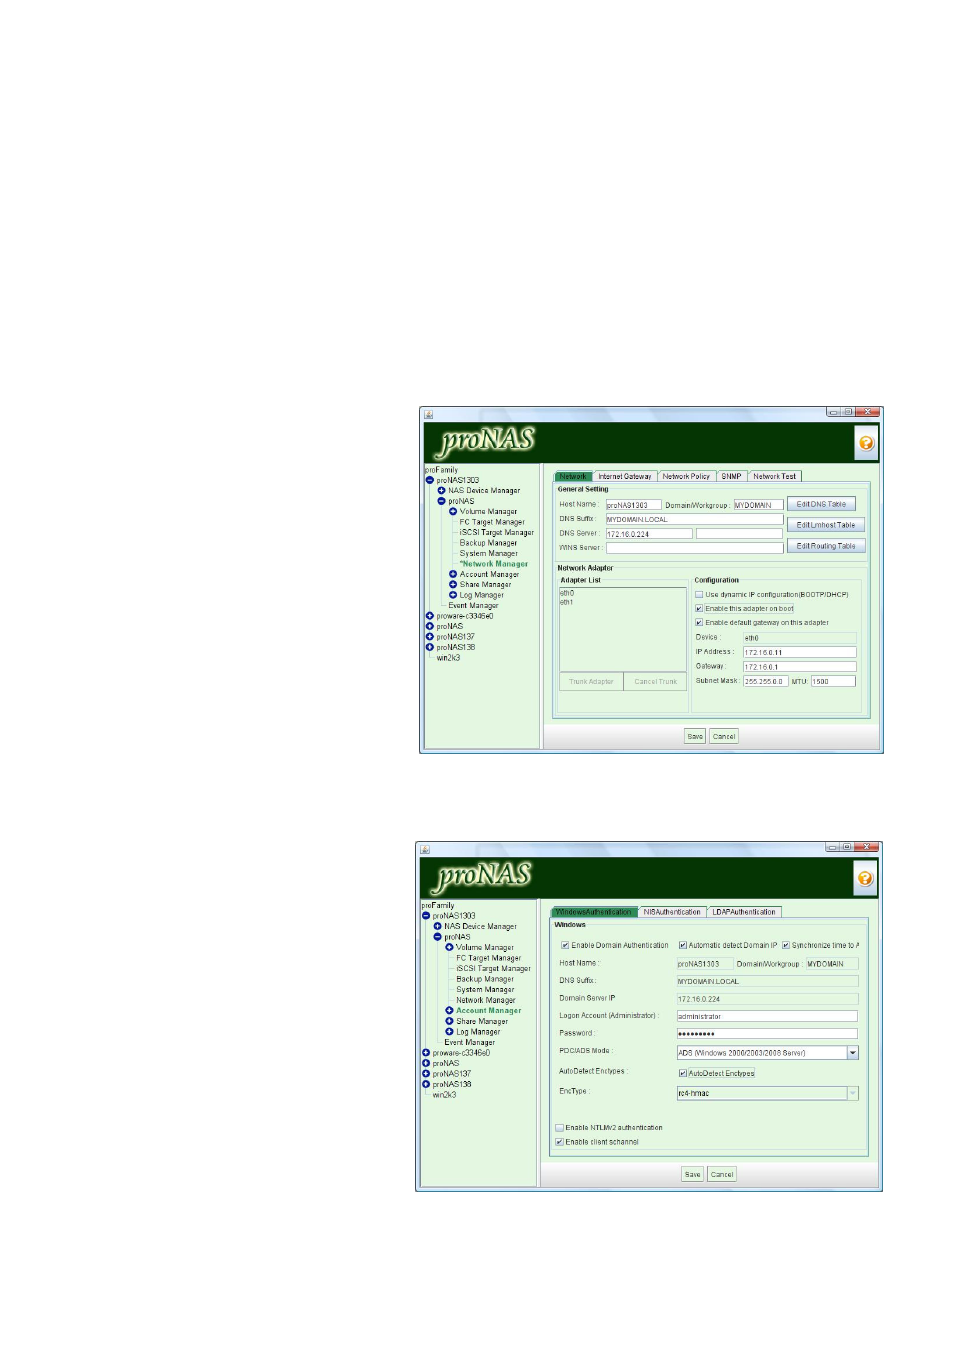
Select Network Manager. In
Network Manager –> Network tab,
click “Edit” to configure network
settings.
2.
Change the default proNAS Host
Name if there are other proNAS
systems in the network. Enter the
Windows Domain name in
“Domain/Workgroup”. For example:
MYDOMAIN
3.
Enter the DNS Suffix. The DNS
suffix is the name appended to the
server name to complete the
server’s FQDN. This includes the
domain name. For example:
MYDOMAIN.LOCAL
4.
Enter the DNS Server and WINS Server (IP address) as necessary.
5.
Click “Save” to update changes.
6.
Select Account Manager. In
Account Manager –> Windows
Authentication, click “Edit”.
7.
Tick “Enable Domain
Authentication” option.
8.
If the Domain Server IP is not
detected (not shown), you can
manually specify the Domain
Server IP by removing the check
mark in “Automatic Detect Domain
IP” and entering the Domain
Server IP address.
9.
Enter the Domain Administrator
Account and Password.
NOTE: No
need to include “domain-name\” in
Domain Administrator Account.
10.
Select the Domain Server mode
(PDC or ADS).