Niveo Professional NNAS-R8 User Manual
Page 7
- 7 -
Sample Steps to Assign Group Account Permission to Share:
1.
Select Share Manager. Select the share name where account will be giver permission, and click
Privilege tab.
2.
Click “Edit”. Select Group tab.
3.
Select the group account that will be given permission and click “ADD”.
NOTE: When group
account name is selected, it will be highlighted. If you want to select more than one group
account at the same time, press “Shift” key, click the groups you want to add to Permission list.
4.
In the Permission list, modify the permission, either Read-Only (no check mark in “Write” box)
or Read/Write (both “Read” and “Write” boxes have check marks).
5.
Click Save.
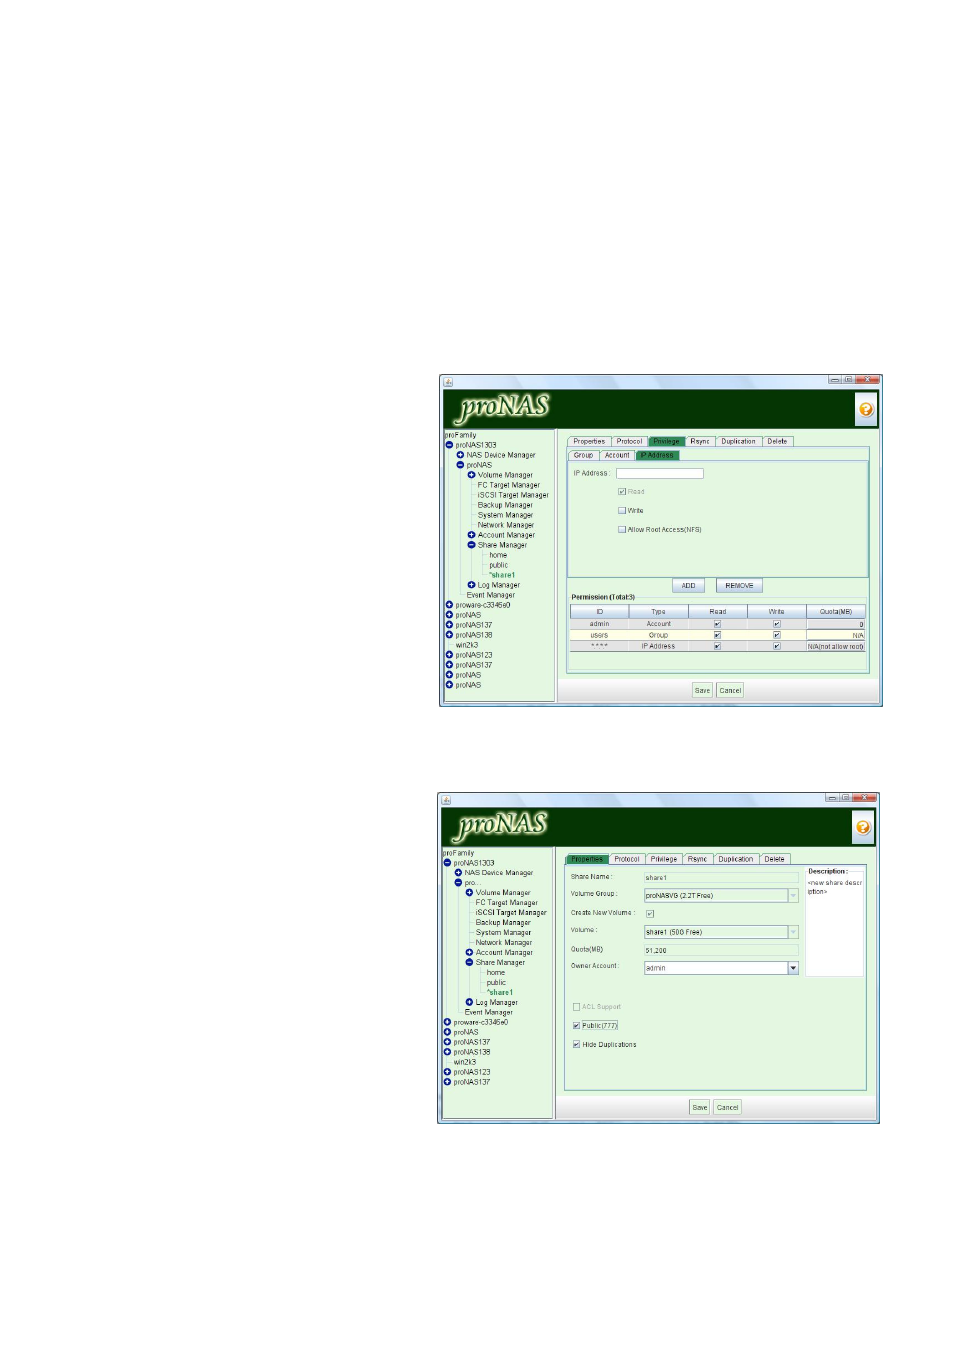
Sample Steps to Limit Share Access
to Selected IP Range:
1.
Select Share Manager. Select the
share name where account will be
giver permission, and click Privilege
tab.
2.
Click “Edit”. Select IP Address tab.
NOTE: BY default, all IP addresses
(*.*.*.*) have Read/Write access to
the NAS. If you restrict NAS access
from specific IP range, only the
selected IP range can access the NAS.
Group Permission or User Account
Permission is still needed to be
assigned in order for users to gain
access to the share folder.
3.
To remove *.*.*.*, select “*.*.*.*”
from Permission list and click
“REMOVE”.
4.
To add an IP range, enter the IP range (e.g.: 192.168.1.*) in the “IP Address” box, check the
“Write” box to assign Read-Write access if necessary, and click “ADD”.
5.
Click “Save” when done.
Steps to Make a Share Folder a
Public Folder Accessible to All Users:
NOTE: It is not recommended to set
a Share as a Public Share folder. Any
local NAS account or Windows/NIS
domain account (if NAS is joined to
the domain) can login to the share
with Read/Write privilege.
1.
Select Share Manager. Select the
share name that will be made
accessible to all users.
2.
In the Properties tab, click “Edit”.
Select (tick) the “Public (777)” option.
3.
Click “Save”.
NOTE: If you need to reassign ACL,
click “Edit” button, enable (check) the “ACL Support” option, and “Save”. The “Public (777)”
option will be automatically deselected or disabled.