Niveo Professional NNAS-R8 User Manual
Page 3
- 3 -
I.
How to Connect to NAS Management GUI
NOTE: Java Runtime Environment must have been installed in the client computer. The
default IP address of LAN0 (eth0) is 172.16.0.1, subnet mask 255.255.0.0. The LAN0
IP address is shown in the LCD display panel.
Java can be downloaded from http://www.java.com/en/download/
1.
Enable network connection from your client computer to NAS system IP address 172.16.0.1, if
not yet done, such as add an IP address 172.16.0.5 subnet 255.255.0.0 in your client computer.
2.
To open NAS management GUI in client computer, open web browser and enter
http://172.16.0.1
in the address bar.
3.
Click “Admin Login”. When Java prompts for a Security Warning, select Start.
4.
In the Logon dialog box, enter “admin” in the Account box and “00000000” in the Password
box. Press Logon.
5.
The proNAS main screen will be displayed.
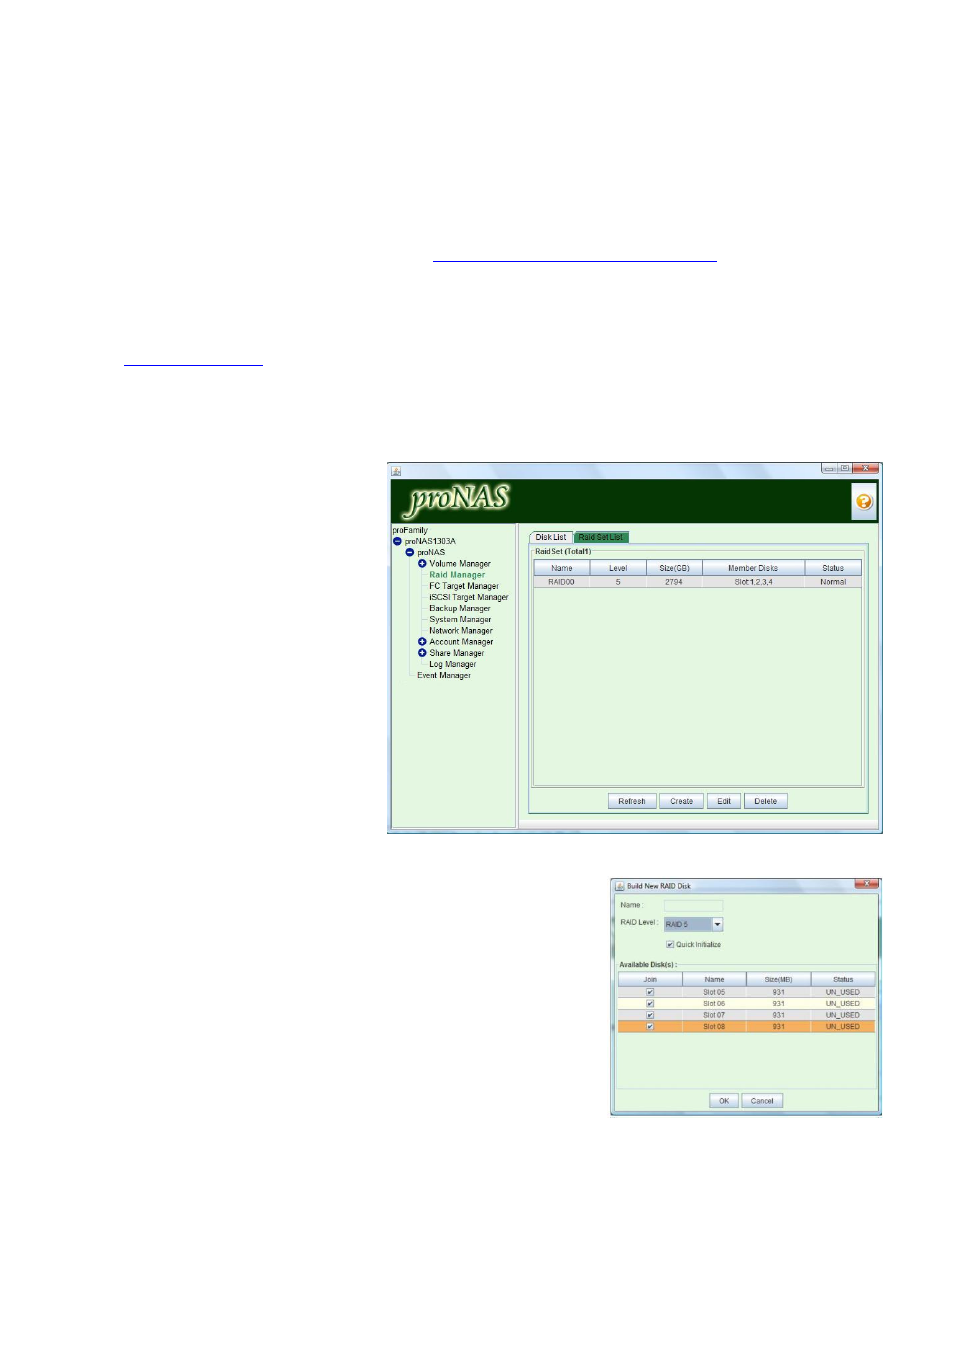
II.
How to Create Raid Set
Using Raid Manager
1.
Select Raid Manager in NAS
GUI.
2.
Select “Raid Set List” tab.
Then click “Create”.
3.
Select the disk drives to be included in the Raid Set.
Select/change the RAID Level, if necessary. Click “OK”
button when done.
NOTE: The default Raid Set Name for first Raid Set is
“RAID00”.
The Quick Initialize option is selected by default,
which means the Raid Set (RAID disk) will be
quickly initialized and the Status will show
“Normal”. If this option is disabled, the Raid Set
will go through the initialization process and
Status will show the percentage of initialization
until finished.