Niveo Professional NNAS-R8 User Manual
Page 6
- 6 -
11.
If needed, change the encryption
type to the same type used by your
domain server.
12.
Click “Save”. The NAS will be joined
to Windows Domain in a while.
13.
To verify, select Account under
Account Manager; the domain
accounts should be shown. You can
also verify group accounts in Group
List.
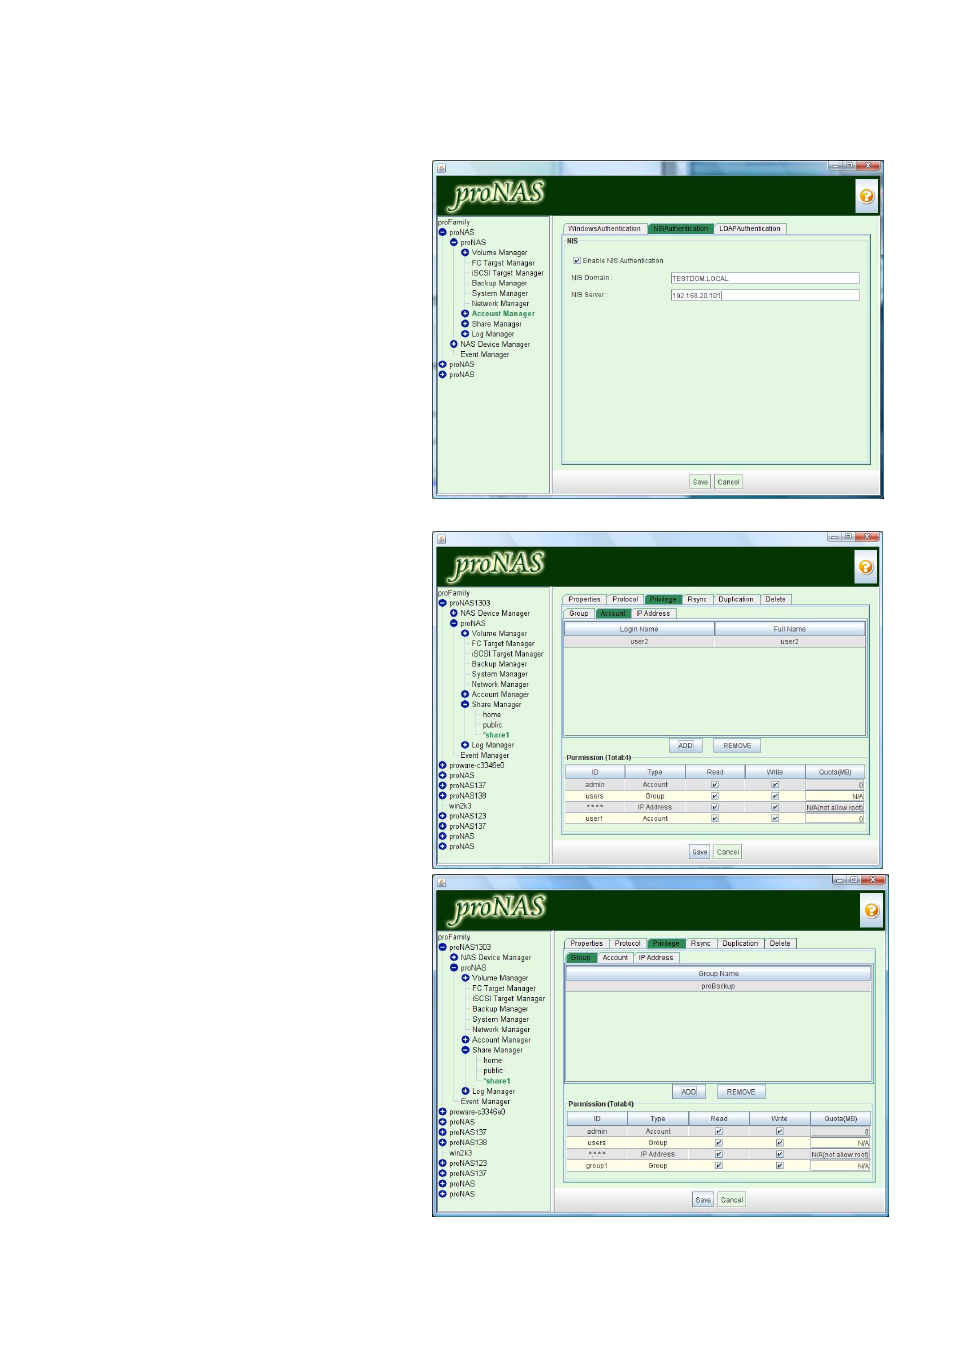
B. Authentication via NIS
Sample Steps to Join the NAS to NIS
Domain:
1.
Under Account Manager, select NIS
Authentication tab. Click Edit.
2.
Check the Enable NIS Authentication
option. Enter the NIS Domain name
(e.g.: TESTDOM.LOCAL) and NIS
Server IP address or FQDN. Click
Save when done.
3.
Click Account under Account
Manager to verify that the NIS
Accounts are listed in the Account
List, or select Group to display the
NIS Groups in the Group List.
VIII. How to Assign Share
Permission to Domain Users,
or Groups, or Limit Access to
Selected IP Range
Sample Steps to Assign User
Account Permission to Share:
1.
Select Share Manager. Select the
share name where account will be
giver permission, and click Privilege
tab.
2.
Click “Edit”. Select Account tab.
3.
Select the account name that will be
given permission and click “ADD”.
NOTE: When account name is
selected, it will be highlighted. If you
want to select more than one
account at the same time, press
“Shift” key then click the accounts
you want to add to Permission list.
4.
In the Permission list, modify the
permission, either Read-Only (no
check mark in “Write” box) or
Read/Write (both “Read” and “Write”
boxes have check marks).
5.
Click “Save”.