Firmware update – Obvius R9120 Rev C User Manual
Page 16
Firmware Update
From time to time, Obvius may release firmware updates with additional features and system changes. To find out what
firmware your ModHopper has installed, read the firmware version register with a Modbus utility, or use the “Advanced
configuration” page in the AcquiSuite setup menu. Firmware update files may be obtained from Obvius technical support.
The firmware update process requires an RS232 serial port and a windows computer to run the firmware update utility.
Before starting this process, verify your computer has a serial port available. You may need to deactivate other software
such as the palm pilot utility or ups monitor software. USB connected serial ports may be used however you may need to
reduce the baud rate if you receive errors updating the firmware.
To update the firmware, use the following procedure.
Step 1: Install the Philips LPC2000 software as provided by Obvius.
Step 2: Remove power, RS485 and pulse inputs from the ModHopper. Power can be disconnected by removing the screw
terminal or plug from the ModHopper power connection socket.
Step 3: Set the following dip switches:
Prog Enable = on
485/232 = on
Step 4: Attach the ModHopper to your computer with an RS232 serial cable. The ModHopper programming connector is
the 9 pin RS232 connector on the top of the device.
Step 5: Power up the ModHopper. The Green Alive LED should light up and solid.
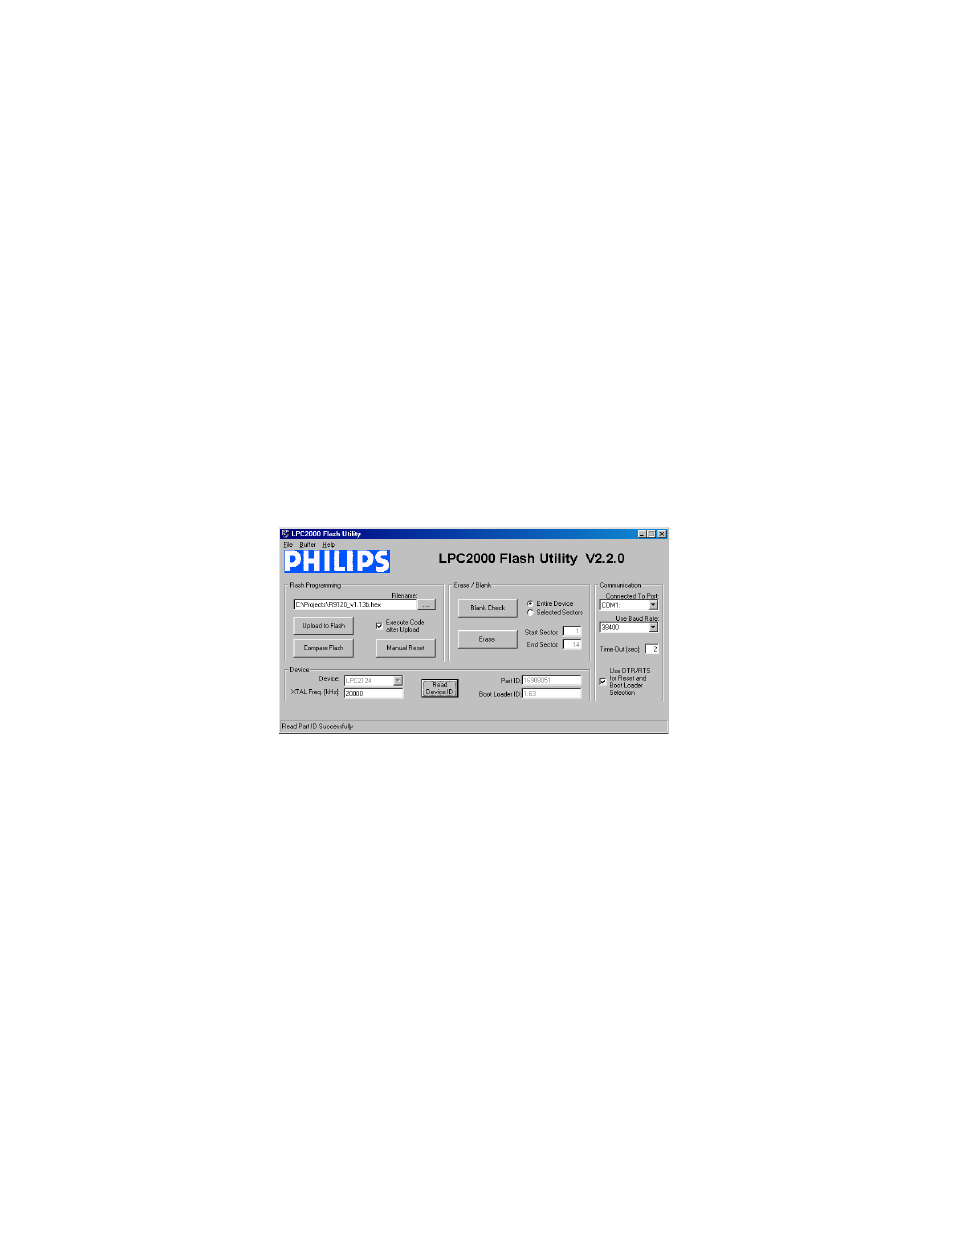
Step 6: Run the LPC2000 Flash Utility. The following screen will be displayed.
Step 7: Set the following communications options:
COM1 or COM2 depending on your computer serial port.
Use baud rate: 38400 or slower.
Check “Use DTR/RTS for Reset”
XTAL Freq[kHz] = 14745
Step 8: Click the “Read Device ID” button. The PartID and BootLoaderID fields will be shown if successful. Also, the
“Device” dropdown menu should switch to LPC2131. The bottom of the window will display “Read Part ID Successfully.”
Step 9: Click the “Filename” “...” button. A dialog box will appear. Locate and select the ModHopper firmware image file.
In the example above, this is named “R9120_revC_v2.04.hex”.
Step 10: Click the “Erase” button. This will remove the existing firmware from the ModHopper device.
Step 11: Click the “Upload to Flash” button. The firmware update will start, and a blue progress bar will be shown across
the bottom of the screen. While the upload is in progress, the green Alive LED on the ModHopper will stay on solid.
Step 12: when the update is complete, disconnect power from the ModHopper. Remove the RS232 serial cable. Turn off
the ProgEnable, and 485/232 switches.
Step 13: Re-attach the RS485 data and pulse wire connections. Power up the ModHopper. The new firmware should now
operate. To confirm the new firmware is installed, use the AcquiSuite device details page, click the “configure” button,
and then the “Advanced” button. The firmware version number will be displayed on the lower right side of the advanced
details page.
Page 16
ModHopper R9120 rev C – Wireless Modbus/pulse transceiver