Water connection - continued, Csw45 – Scotsman CSW45 User Manual
Page 7
Water Connection - continued
11. Unscrew the water valve inlet cover, and attach
the copper tubing with the compression sleeve and
nut.
NOTE: To prevent rattling, be sure the copper tubing
does not touch the cabinet’s side wall or other parts
inside the cabinet.
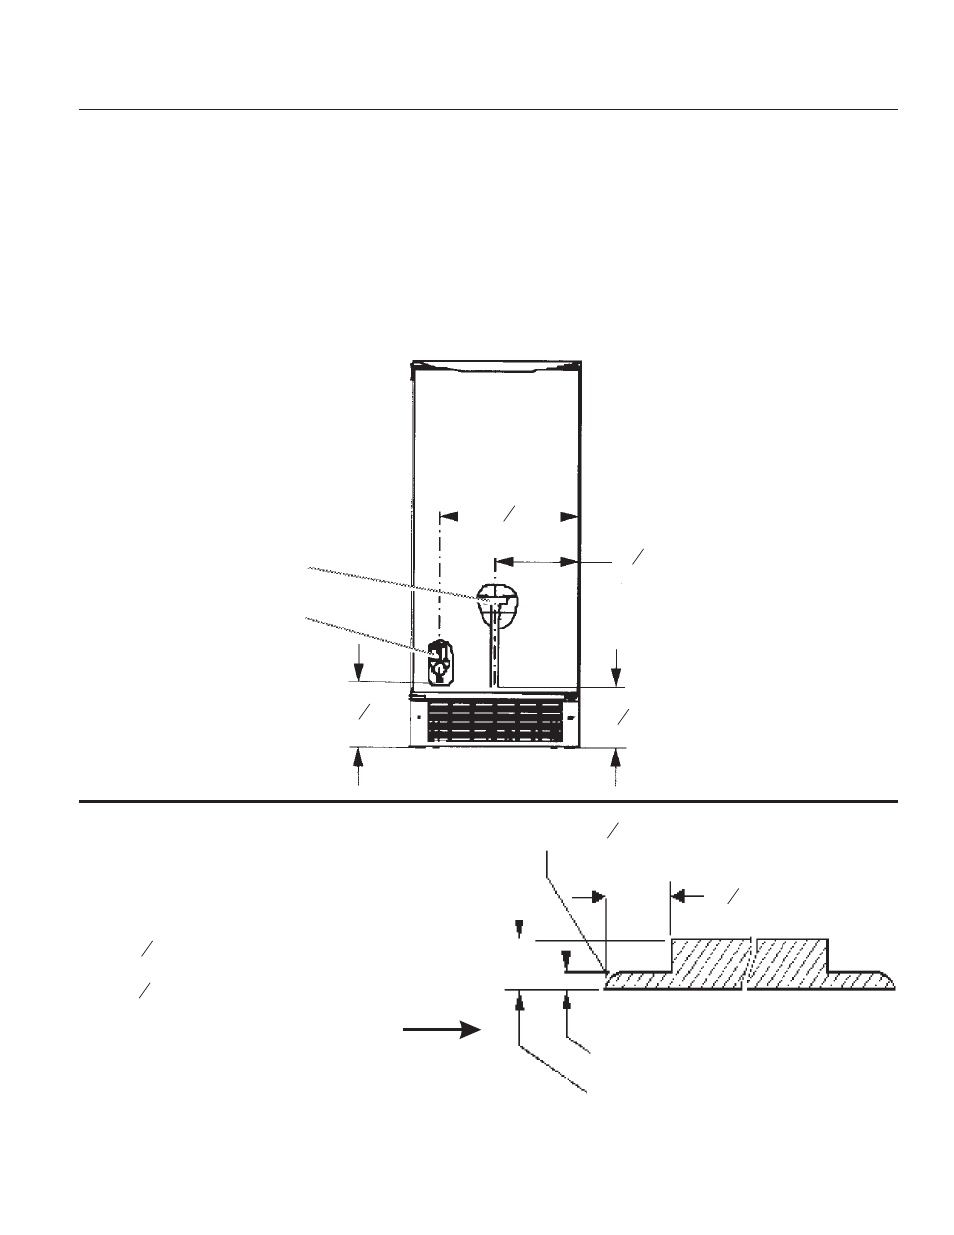
FRONT VIEW
Custom Panel (for kit KCSWTRIM):
Customer supplied wood panel must be
•
” thick x
•
29
31
64
“ high x
•
14
33
64
“ wide
and be trimmed as shown in the diagram.
12. Turn shut-off valve on. Check for leaks.
Tighten any connections (including connections at
the valve) or nuts that leak. The ice maker is
equipped with a built-in water strainer. If local water
conditions require periodic cleaning or a well is your
source of water supply, a second water strainer
should be installed. Obtain a water strainer from your
nearest appliance dealer and install it at either tube
connection.
13. Replace the lower access panel and screws.
July 1999
Page 7
CSW45
12
3
16
1
2
5
11
16
5
3
8
“
7
5
16
“
1. Water Pan Drain
2. Water Valve
1
15
32
“
Route Approx
3
8
“
”
” Thick Panel