SVS TL1 110V User Manual
Page 9
7. LIFT INSTALLATION
a. Preparation:
1. The Lift is shipped in a wooden crate.
2. Do not remove the Lift from the crate until you are ready to install it.
3. The Installation Instructions, Wall Plate Controller with control cable, and projector mounting hardware
are located in a cardboard box inside the crate.
4. Unbolt the Lift from the bottom of the crate to remove the Lift from the crate.
b. Installing the Lift in the Ceiling
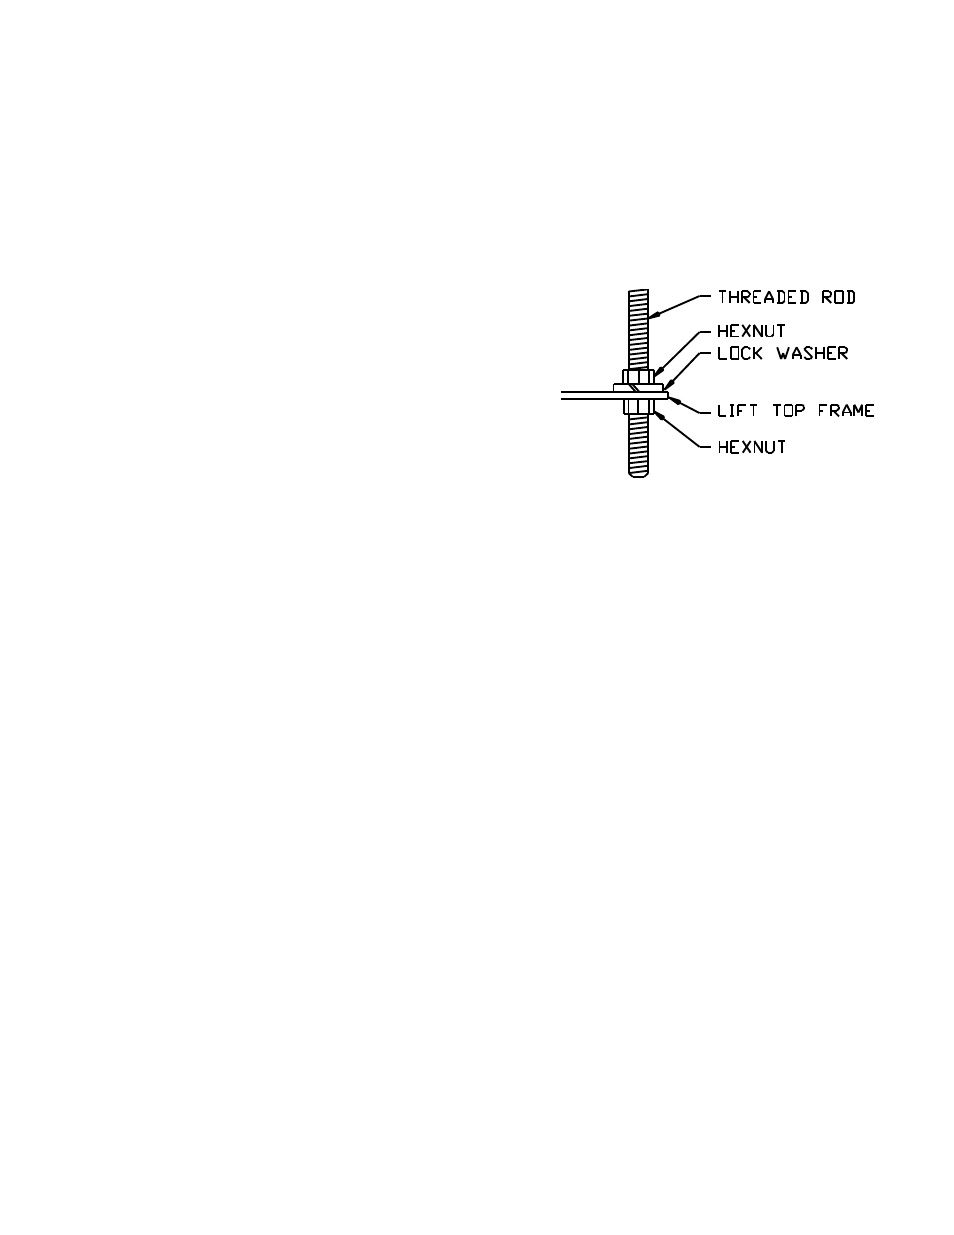
1. Raise the Lift into the ceiling and line up the four (4)
mounting holes in the Lift's top frame with the 3/8”
threaded rods of the supporting structure. Make sure that
there is a top nut and a flat washer on each threaded rod
before the Lift is mounted. See Figure 5. (Plenum
Shrouds require additional hardware installed on the
threaded rods before the Lift.)
2. Once the Lift's top frame has been inserted, add a hexnut
to each threaded rod below the Lift frame. Always leave
the top nut loose to allow adjustments until the Lift is
leveled.
3. Level the Lift's top frame side-to-side and front-to-back using the lower hexnuts on the threaded rods.
4. Once the Lift is leveled, secure the Lift to the threaded rods by tightening the upper hexnuts. Do not
over tighten the fasteners as it could distort the top frame of the Lift.
5. If the Power Sensor is used, please refer to the Power Sensor Instructions, otherwise, plug in the 12-pin
connector of the Wall Plate Controller into the 12-pin socket on the Lift's gray electrical box mounted on
the rear of the Lift. The Wall Plate Controller includes 75-feet of cable and is shipped with the Lift. It is
located in the cardboard box attached to the lid of the Lift's shipping crate.
6. Once the Lift is properly installed in the ceiling and leveled, you can remove the shipping blocks.
Remove the blocks by removing the screws and tie-raps holding them in place.
TO AVOID CABLE SPILLS
•
Do not push the Lift bottom frame upwards once the Lift has been installed.
•
Make sure that there are no obstructions in the Lift's path. If the bottom frame is lowered onto an
obstruction the cable will slack and spill over the cable drum. If the cable spills over the cable
drum and the Lift is not stopped the cable will back-wind onto the cable drum causing severe
damage to the Lift and accessories.
SVS TL1 Lift Installation Instructions
Page 9 of 16
Figure 6. Lift Mounting Hardware