Front panel overview, 10 front panel overview – Teac UD-301 User Manual
Page 10
10
Front Panel Overview
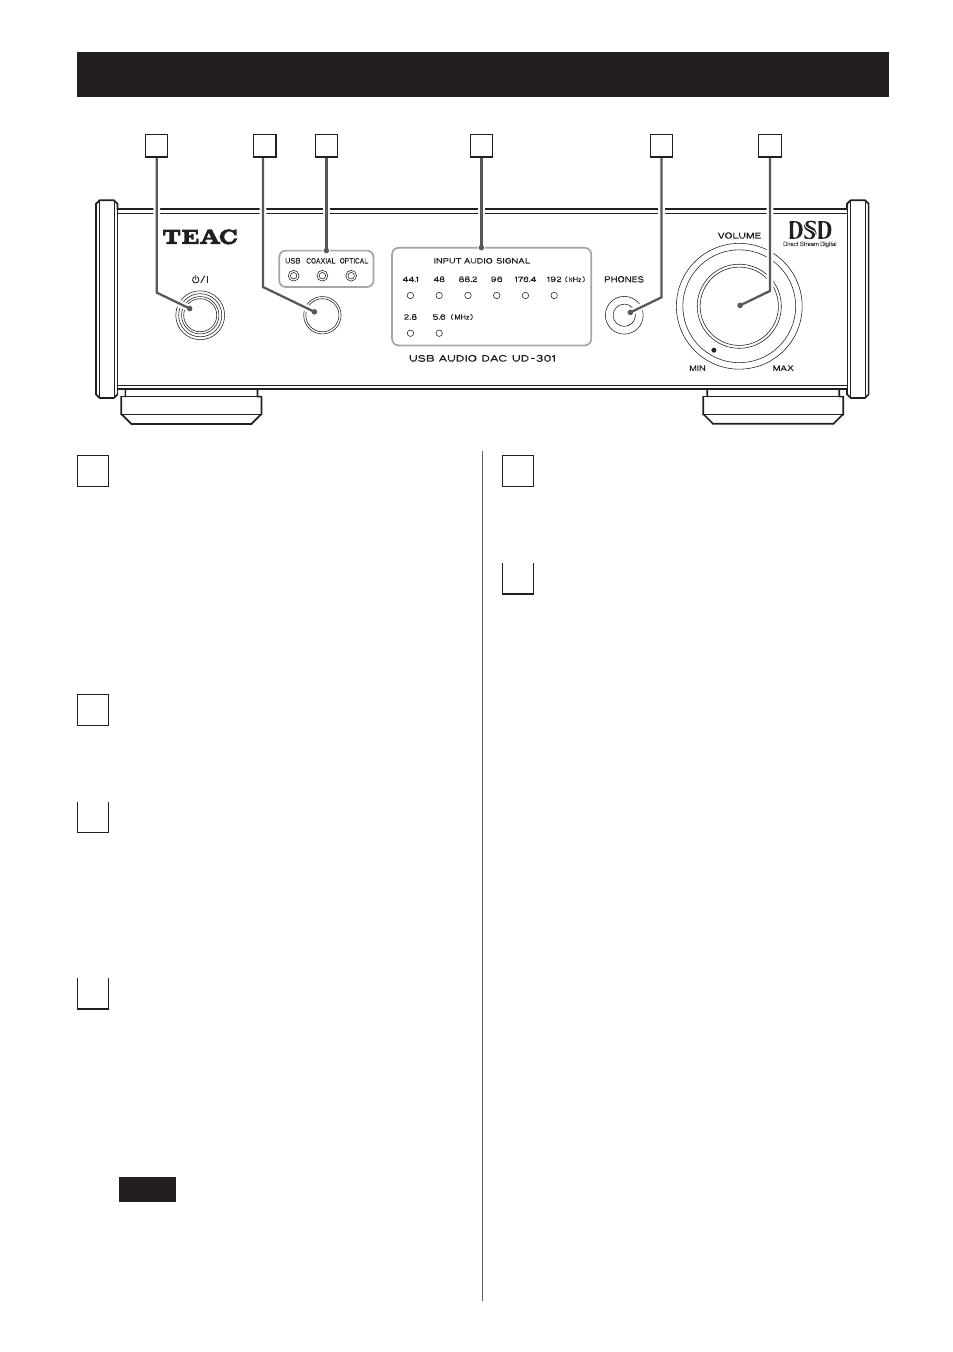
A
B
C
D
E
F
A
Standby/on (¤) button
Press this button to turn the unit on and put it in
standby. The blue indicator lights when the unit
is turned on.
o
When this unit is in standby mode, it still
consumes some power, which is why the
term “standby” or “standby mode” is used
instead of “off”.
B
Source button
Each time this button is pressed, the source
changes.
C
Input source indicators
The indicator for the selected source lights.
These indicators blink when the input signal is
not a digital audio signal or is a digital audio sig-
nal in a format other than PCM or DSD (such as
Dolby Digital, dts or AAC).
D
Sampling frequency indicators
These show the sampling frequency of the
input digital audio signal.
When an input signal is locked, the indicator for
its sampling frequency lights. These indicators
blink when there is no input signal or the input
signal is not locked.
NOTE
If the sampling frequency of the input signal is
32 kHz, no sampling frequency indicator will
light, but the input indicator will light.
E
PHONES jack
Connect headphones with a standard 6.3mm
(1/4") stereo plug here.
F
VOLUME knob
When the LEVEL switch is set to VARI, you can use
this knob to control the audio level output from
the analog audio output jacks (see page 9).
When headphones are connected, this knob
also adjusts the headphones volume.
V
Be sure to set the VOLUME knob to MIN
before putting on connected headphones.
Do not turn the unit on or put it in standby
or connect/disconnect headphones while
wearing them. Doing so could cause a sud-
den loud sound, resulting in harm to
hearing.