Align the sensor to the roadway, Attach the smartsensor cable, Attach the sensor and mount bracket to the pole – Wavetronix SmartSensor HD (101-0415) - Quick-reference Guide (Installer) User Manual
Page 2
Attach the mount bracket to the pole:
1 Insert the stainless steel straps through the slots in the mount
bracket.
2 Position the mount on the pole so that the head of the mount is
pointing towards the middle of the lanes of interest.
3 Tighten the strap screws partway. The sensor alignment will need
to be fine-tuned later, so keep the straps loose enough to be adjust-
able but tight enough to be secure.
Attach the sensor to the mount bracket:
1 Align the bolts on the sensor’s backplate with the holes in the mount bracket. The connector at the bot-
tom of the unit should be pointing towards the ground.
2 Place the lock washers onto the bolts after the bolts are in the mount bracket holes.
3 Thread on the nuts and tighten.
4
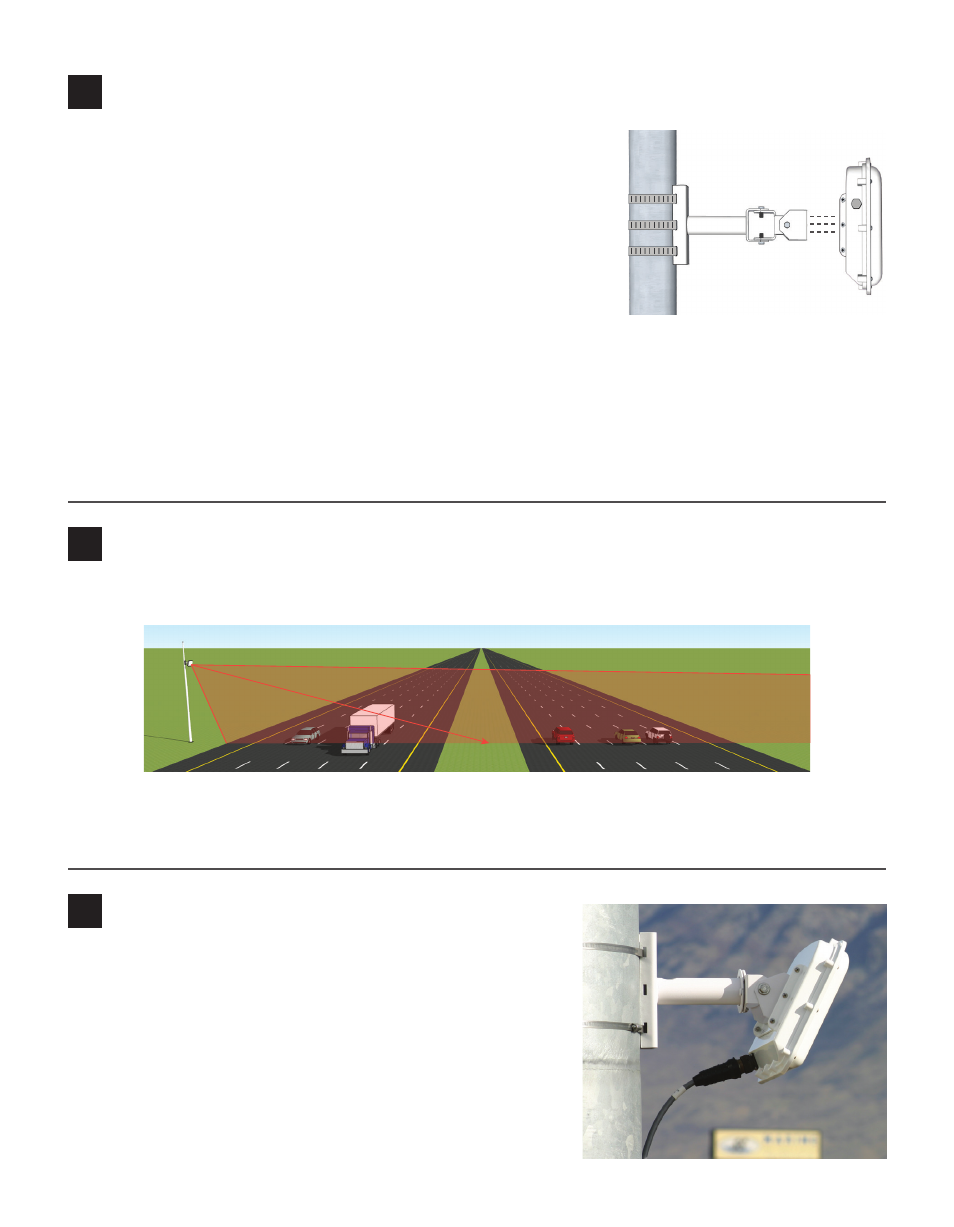
Align the sensor to the roadway
5
Attach the SmartSensor cable
1 Tilt the sensor down so that the front is aimed at the center of the detection area.
3
Attach the sensor and mount bracket to the pole
1 Tear the tab off the silicon dielectric compound and squeeze
about 25% of it into the connector at the base of the sensor.
Wipe off any excess compound.
2 Insert the cable into the connector and twist clockwise until
you hear it click into place.
3 To avoid undue movement from wind, strap the cable to the
pole or run it through a conduit, but leave a small amount of
slack at the top of the cable to reduce strain.
2 Adjust the side-to-side angle as close to perpendicular to the flow of traffic as possible. The side-to-side
alignment will be fine-tuned in step 10 using the SmartSensor Manager HD software.