Start/stop collection, Change sensor information – Wavetronix Command Collector (CMD-DCx) - Quick-reference Guide User Manual
Page 2
3
Start/Stop collection
4
Change sensor information
For data collection, click on Sensors in the menu bar then follow the
steps below:
1 Put a check next to the sensors for which you would like data to be
collected.
2 Select Collection from the Sensors toolbar then click the Start Col-
lection button.
3 Click the Stop Collection button to stop data collection for all selected sensors.
The Status icon will be empty if collection is stopped, green/yellow/red if collection has started.
Note. This step is not necessary if you checked the Start Collecting Data Immediately check box when
adding the sensor. In that case, collection has already started.
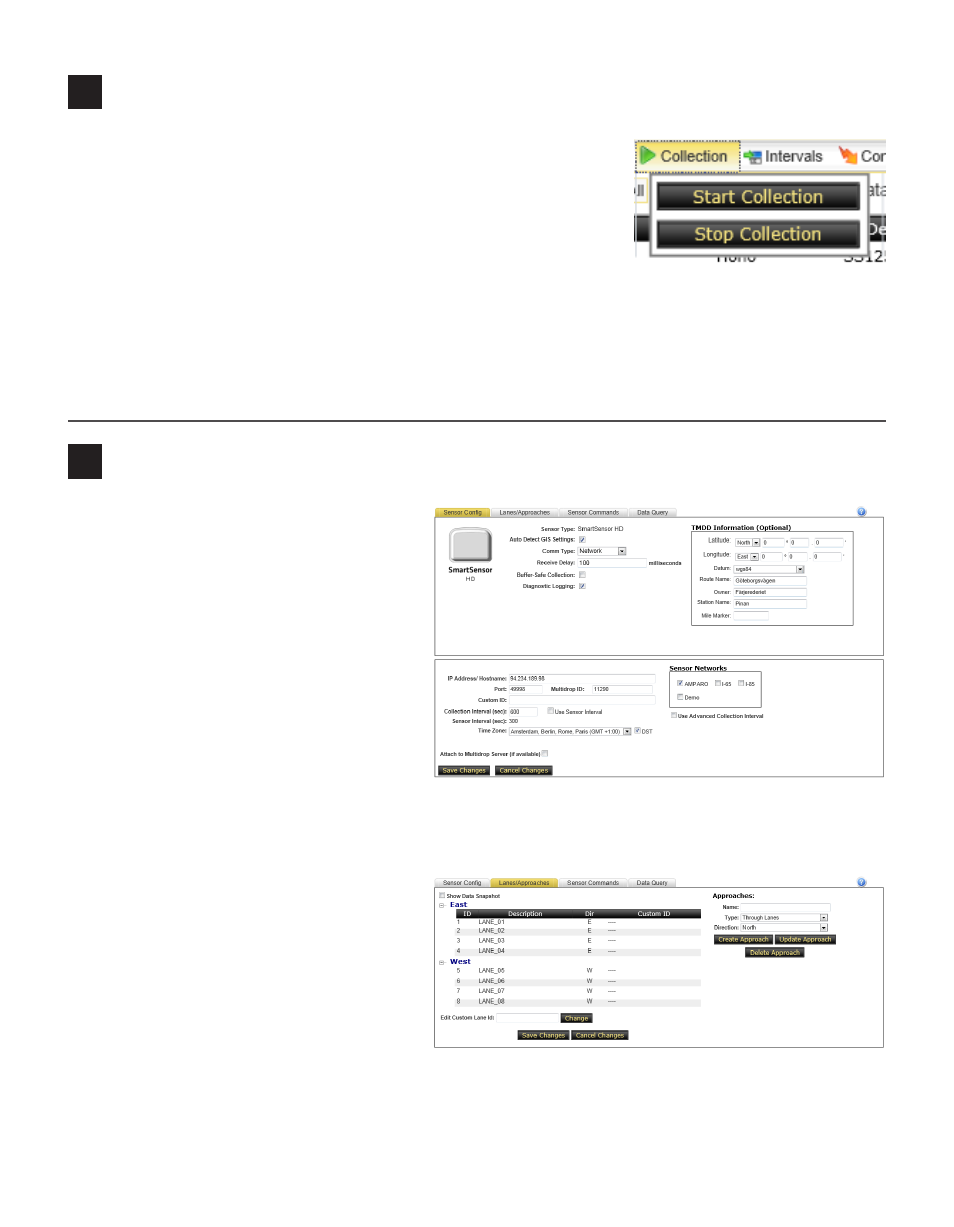
If necessary, sensor information can be
changed on the Sensor Config page. This
page can be accessed by clicking on the name
of the desired sensor. There are four tabs with
configurable information. Two of these tabs,
Sensor Config and Lanes/Approaches, are
used to change sensor information:
1 Sensor Config – This tab contains all
basic configuration information. The box
on the top half of the page contains the
custom configuration control. This in-
formation will help identify each sensor,
as Collector can support any number of
different data collection devices. The box on the bottom half of the page contains the standard Collec-
tor sensor information as discussed in step 2 on the previous page. Any changes can be save by clicking
Save Changes.
2 Lanes/Approaches – This tab allows
you to view lanes and configure ap-
proaches (abstract groupings of lanes)
for the sensor. In the Approaches box
you can create or update an approach by
providing the name, type, and direction.
Lanes can then be moved from approach
to approach by clicking on a lane and
dragging it to the desired approach. Any
changes can be made by clicking Save Changes.