3 date – ARM Electronics RT8-16CD User Manual
Page 37
MENU FUNCTION
-32-
6.3 Date
In this menu list, you can set up the system date and time for this device.
Note: When the recording function is activated, please DO NOT change the date or time on your DVR. For
details, please refer to the section “4.1 Recording” at page 23.
Press “MENU” button on the front panel to enter the main menu list. Move the cursor to “DATE”, and press ”ENTER”.
The screen will show the following options.
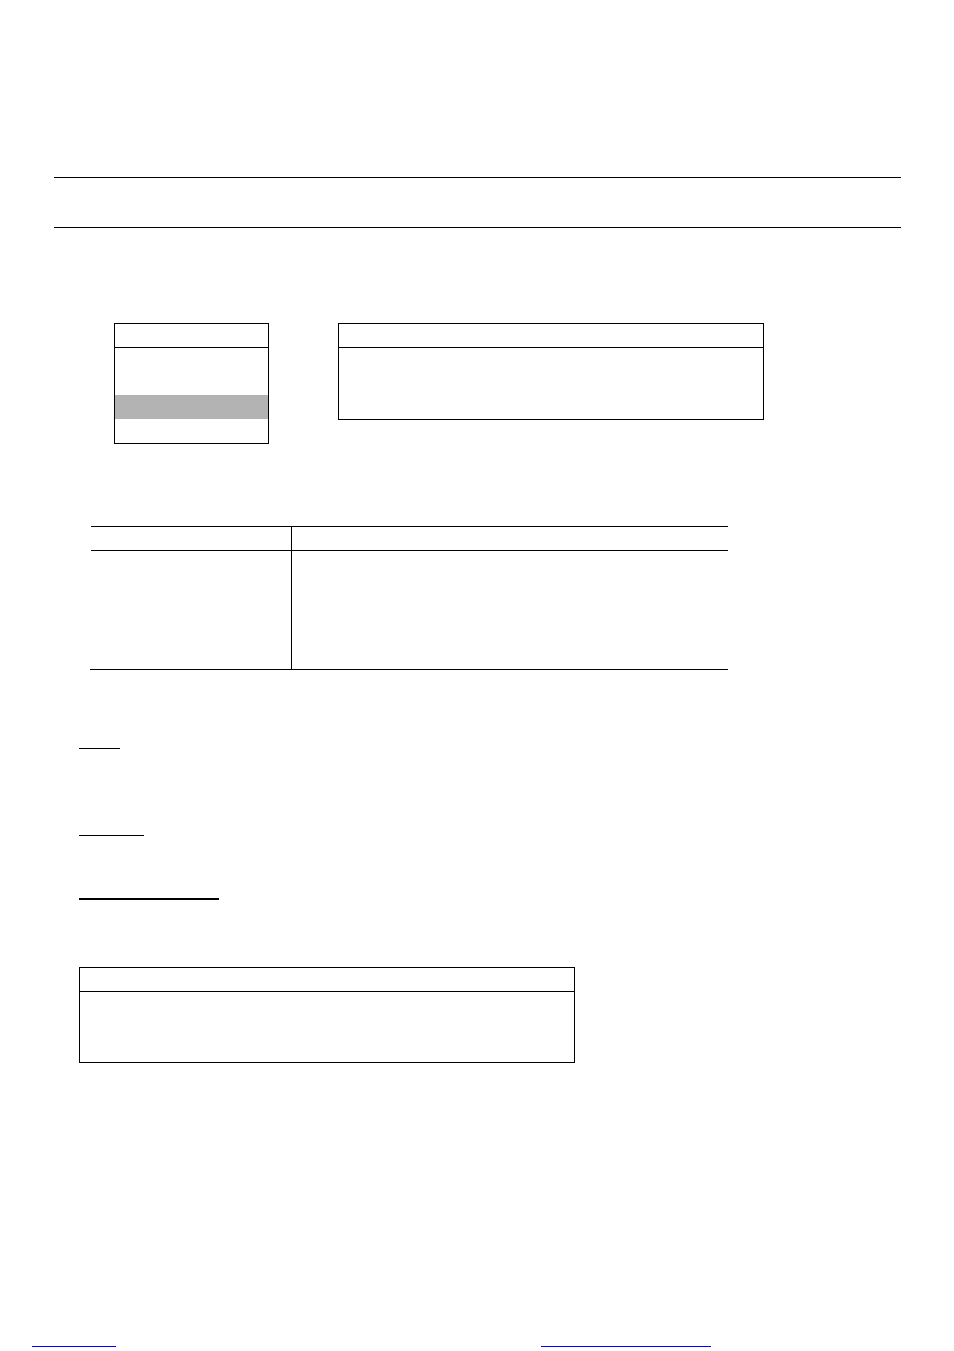
MENU
DATE
RECORD
DATE
2006 – AUG - 30 12 : 15 : 30
TIMER
FORMAT
Y - M - D
DATE
DAYLIGHT SAVING
ON
ADVANCE
You can use the following buttons for menu setting:
BUTTON
FUNCTION
UP, DOWN, LEFT, RIGHT
Move the cursor.
+ , -
Choose numbers / selections.
ENTER
Go to the submenu / confirm the selection.
MENU
Go to the menu list / confirm the change / exit the menu list.
The submenu items are described below:
1) DATE
Set the current date and time. The default order is “YEAR – MONTH – DATE HOUR : MIN : SEC”. You can change
the date format in “FORMAT”.
2) FORMAT
Select one date format from the following 3 options: Y-M-D, M-D-Y, D-M-Y.
3) DAYLIGHT SAVING
Specify whether to use daylight-saving time (ON / OFF). If it’s set to ON, press “ENTER” to go to its submenu for
further settings. You will see a similar screen as following.
DAYLIGHT SAVING
START
4TH
- SUN - MAR 24 : 00 : 00
END
4TH
- SUN - OCT 24 : 00 : 00
ADJUST
01 : 00
Set the start time and end time, and adjust the daylight saving time in hour. The above example means during the
daylight-saving time period (starting from the 4th Sunday of March and ending on the 4th Sunday of October), the
system time will plus one hour.
files without this message by purchasing novaPDF printer (