Appendix 1 install hdd – ARM Electronics RT8-16CD User Manual
Page 90
-85-
APPENDIX 1 INSTALL HDD
Carefully follow the steps below to ensure correct HDD installation.
Note: The PCB side of the HDD must face upward, shown as the picture below.
Step 1: Loosen the screws on the upper cover and open the upper cover of the DVR
Step 2: Screw out the HDD bracket.
Step 3: Get suitable brand HDD and set the HDD mode (Master / Slave) according to the indication.
Step 4: After HDD mode setup, screw all the HDDs onto the HDD brackets, and replace the HDD brackets back to the
indicated position of the DVR base (Be sure to follow the indicated position shown as the picture below).
Note: For HDD mode setting rule and position, please refer to the following instructions:
* If you plan to install three HDDs, please set two HDDs to Master mode, and one HDD to Slave mode,
and place them to the exact position according to the indication.
* If you plan to install two HDDs, please set one HDD to Master mode and place it to the Master 1 position,
and set the other HDD to Slave mode and place it to the Slave 1 position.
* If you plan to install only one HDD, please set the HDD to Master mode and place it to the Master 1 position.
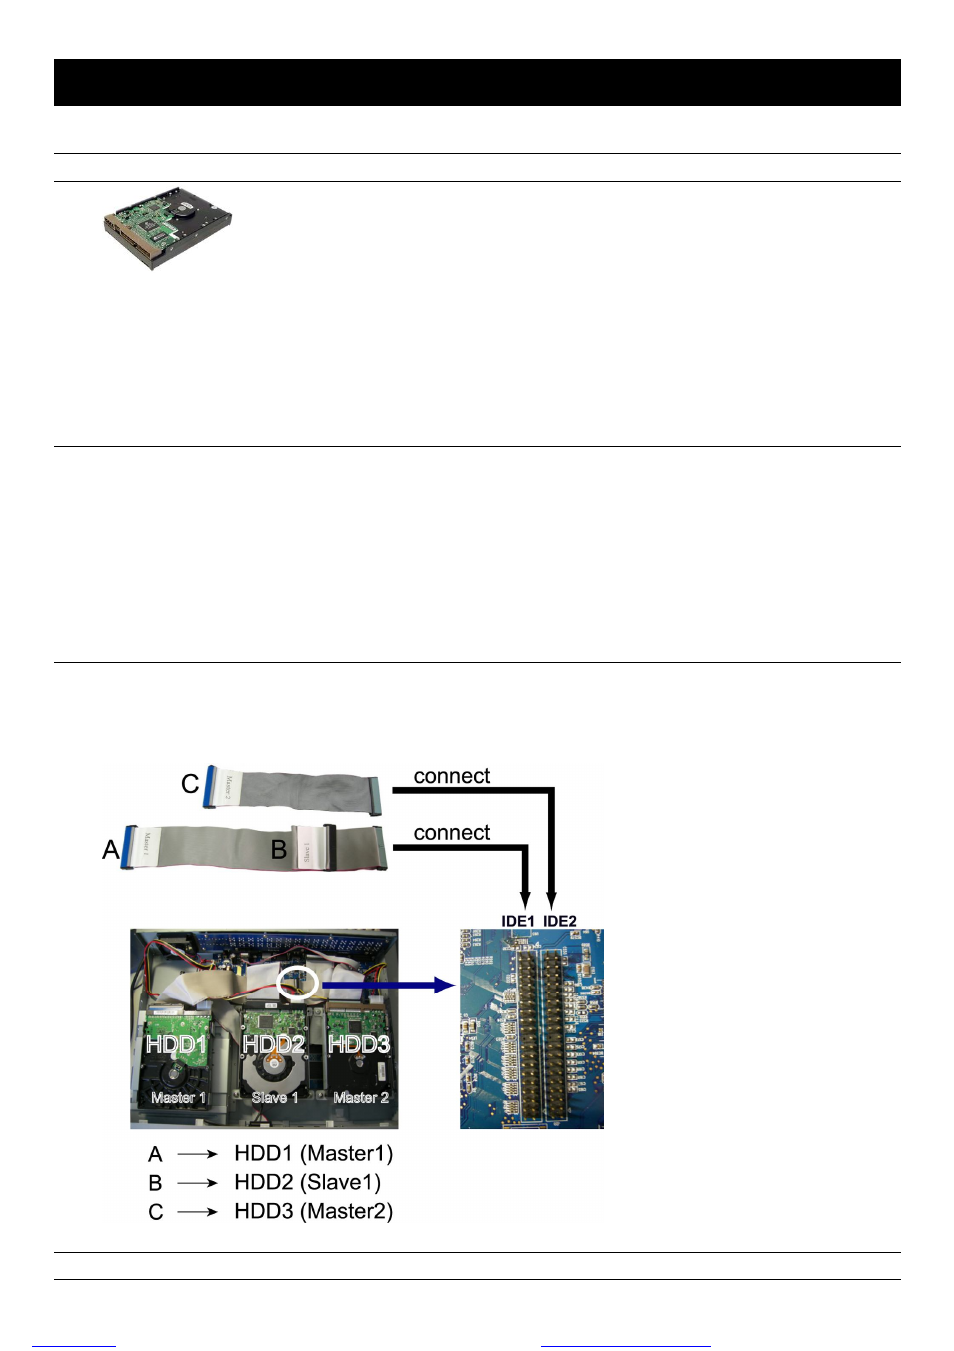
Step 5: Depending on which HDD you want to install, connect the HDD to the indicated power connector and IDE BUS
(make sure to align the HDD precisely for pin connection). For detailed connection, please follow and see the
illustration below:
NOTE: If you plan to connect to an external disk array, please don’t install the HDD in “HDD3” position.
files without this message by purchasing novaPDF printer (