Discharge pipe ‘perfect cut’ reference chart – Atlantic Water Gardens Pro Series PS4600 User Manual
Page 15
15
Use a small piece of sandpaper to smooth out the cut end of the discharge pipe.
Clean the 2” socket fitting on the bottom of the check valve and the cut end of the
discharge pipe with PVC cleaner/primer. Apply PVC glue and insert the discharge
pipe into the 2” socket fitting. Hold the discharge pipe firmly in place for a few
seconds, giving the glue time to set (Figure 21).
Figure 20.
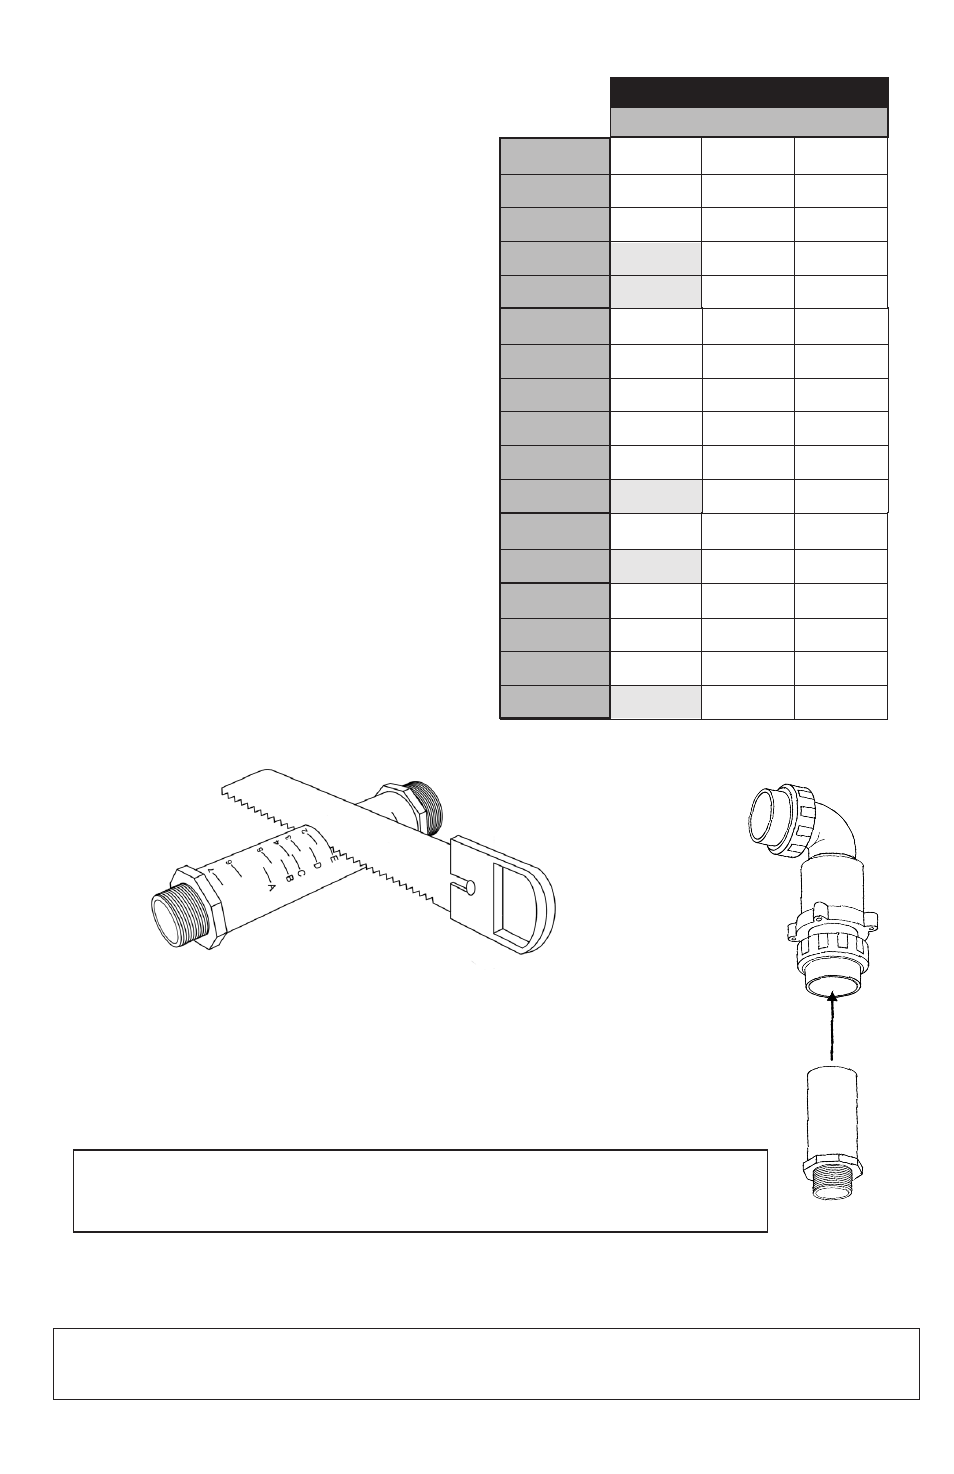
DISCHARGE PIPE ‘PERFECT CUT’
REFERENCE CHART
D
D
D
C
C
2
G
G
G
F
F
5
B
B
B
A
A
1
TW1200
TW1900
TW2400
TW3700
TW4800
TW6000
5
5
5
5
7
7
7
7
3
3
3
3
PAF-20
PAF-25
PAF-40
PAF-75
5
4
7
6
3
2
A-05
A-21
PRO SERIES PRODUCTS
PS4600
G
G
G
D
D
H
H
H
G
G
E
E
E
B
B
PS7000
PV1800
SH1450
SH2050
SH3600
SH5000
SH6500
Shaded areas denote pumps that exceed
maximum flow rates or dimension for use
with the corresponding Skimmer/Pump
Vault. Use of this equipment combination
is not recommended and could void the
warranty.
* The discharge pipe can be extended with
the 2" PVC pipe and a coupling for use with
the larger/deeper Big Bahama products
(PV2300/PS15000) or Pump Vaults
with extensions.
Figure 21.
Locate the correct reference mark for this
installation on the discharge pipe. Using a
hacksaw or PVC saw, cut the pipe at this mark
being careful to make a clean, square cut (Fig-
ure 20). Discard the end of the discharge pipe
that will not be used.
If you have removed the outlet fitting from the check valve prior to gluing
the connection, make sure to slide the union nut onto the supply pipe
before gluing the socket fitting in place.
MD, TW2 and SH Series pumps include fittings that convert the pump discharge to 1 ½” female
threads and are neccessary for proper attachment to the TR215CV.
Attach the Triton Check Valve to the TidalWave pump by threading the
discharge pipe into the pump discharge.